你是否曾經因為網站載入速度太慢而感到焦慮?
在現代網站開發中,等待通常是訪客戶最不喜歡的環節。
如何讓使用者在等待的過程中感到愉悅,是每位開發者都需要考慮的問題。
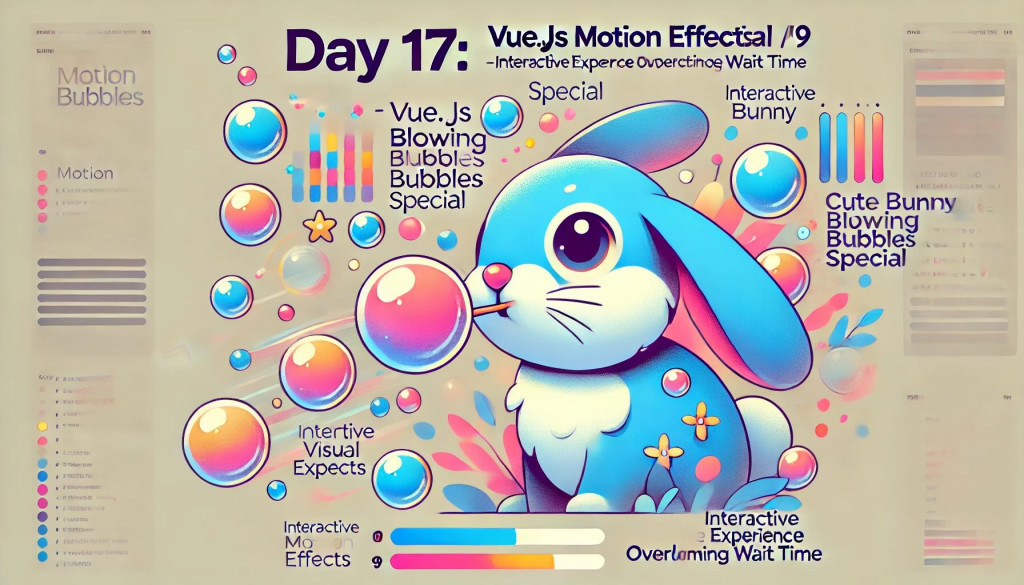
但今天,我將帶你進入一個全新的世界——超萌兔子吹泡泡動畫特效!
在這篇文章中,我們將深入探討如何使用 Vue.js 為網站增添一個讓人無法抗拒的趣味等待動畫效果。
當你的訪客看到兔子輕鬆地吹著繽紛的泡泡,誰還會捨得離開呢?
這不僅僅是一個普通的動效設計,這是改變使用者體驗的神奇法寶,讓你的網站充滿驚喜與活力!

首先,我們來解構今天的動效。
這次我們會透過可愛的兔子動畫來吸引使用者的注意,並透過兔子吹出的泡泡來表現時間的流逝。
這種互動方式不僅具有視覺上的趣味性,還能增加使用者的參與感。
整個設計過程,我們將運用到以下幾個關鍵技術:
在動效設計中,我們可以通過 CSS Variables (變數)來更靈活地管理樣式,例如顏色、大小、動畫時間等。
這樣做的好處是,我們可以統一控制某些關鍵屬性,便於未來進行修改或擴展。
以下是關鍵的 CSS Variables 設置:
:root {
    --bunny-size: 300px;
    --bunny-color: pink;
    --bunny-color-2: #f0a4cb;
    --bunny-eye-color: #473929;
    --bunny-cheek-color: red;
    --bunny-tongue-color: red;
    --bunny-mouth-color: #473929;
    --bunny-nose-color: #473929;

    --stick-color: #ff8819;
    --bubble-color-1: #4fd5e7;
    --bubble-color-2: #829fff;
    --bubble-color-3: #76e0cf;
    --bubble-color-4: #86befd;
    --bubble-color-5: #91f1d9;
}
通過這些變數,我們能快速改變兔子和泡泡的外觀設定,而不必到處修改具體樣式。
Array.from() 動態生成泡泡樣式接下來,我們使用 JavaScript 的 Array.from() 方法來動態生成一組泡泡的資料。這個方法允許我們以編程方式生成多個物件,並根據特定條件動態配置每個泡泡的樣式屬性,例如顏色、大小和動畫延遲時間。
// 泡泡颜色
const bubbleColors = [
    "var(--bubble-color-1)",
    "var(--bubble-color-2)",
    "var(--bubble-color-3)",
    "var(--bubble-color-4)",
    "var(--bubble-color-5)",
];

// 生成泡泡樣式
const bubbles = Array.from({ length: 18 }, (_, index) => {
    const color = bubbleColors[index % bubbleColors.length];  // 每個泡泡循環使用顏色
    const padding = `${(index % 5) * 3 + 8}px`;  // 根據 index 動態計算 padding
    const offsetPath = `path('m-160,10 l -400, ${(index % 5) * 10 - 35}')`;  // 設定泡泡的 offset-path 路徑
    const animationDelay = `calc(var(--bubble-base-delay) + var(--bubble-delay) * ${index})`;  // 根據 index 設置動畫延遲

    return {
        background: color,
        padding,
        transform: "rotate(10deg)",
        offsetPath,
        animationDelay,
    };
});
@keyframes bubbleAnim {
    40% {
        offset-distance: 0%;
    }

    60% {
        offset-distance: 100%;
    }

    42%, 58% {
        opacity: 1;
    }

    0%, 40%, 60%, 100% {
        opacity: 0;
    }
}

.bubble {
    animation: bubbleAnim var(--breathe-duration) linear infinite;
    --bubble-base-delay: 3s;
    --bubble

-delay: 0.2s;
}
這段動畫讓泡泡在畫面上從兔子的嘴巴中逐漸飄出,並逐漸消失,模擬出吹泡泡的動作。offset-distance 是控制泡泡沿著 offset-path 移動的屬性,讓它從 0% 到 100% 的距離進行位移。
這裡我們生成了 18 個泡泡,並為每個泡泡動態分配不同的顏色、大小、位移路徑和動畫延遲。
這些屬性讓每個泡泡看起來都是獨特的,且漂浮時會按照不同的路徑和速度進行運動。
offset-path 設定泡泡運動軌跡offset-path 是 CSS 中用來設定元素沿著指定路徑移動的屬性。透過這個屬性,我們可以讓泡泡在畫面上隨機飄動,模擬出吹泡泡的效果。以下是 offset-path 的設置範例:
const offsetPath = `path('m-160,10 l -400, ${(index % 5) * 10 - 35}')`;
在這裡,offsetPath 是一條基於 index 值動態生成的路徑,讓泡泡看起來沿著不規則的路線移動。這種效果可以讓畫面更有趣味性,避免過於單調。
我們的 Vue 模板包括一個等待訊息、可愛兔子的結構、以及一組隨機生成的泡泡。
通過 Vue 的 v-for 指令,我們將前面生成的泡泡資料渲染出來。
hover:animate-bounce就可以輕鬆辦到。
<template>
    <div class="font-mono flex flex-col pt-38 items-center bg-[linen] min-h-screen">
        <div class="text-5xl tracking-[0.1em] mb-20 text-animation">LOADING ...</div>
        <div class="w-[300px] h-[300px]">
            <div class="grass"></div>
            <div class="bunny cursor-pointer hover:animate-bounce">
                <div class="bunny-ears">
                    <div class="bunny-ear bunny-ear--left"></div>
                    <div class="bunny-ear bunny-ear--right"></div>
                </div>
                <div class="bunny-feet">
                    <div class="bunny-foot bunny-foot--left"></div>
                    <div class="bunny-foot bunny-foot--right"></div>
                </div>
                <div class="bunny-tail"></div>
                <div class="bunny-paw-tail"></div>
                <div class="bunny-body">
                    <div class="bunny-eyes"></div>
                    <div class="bunny-nose"></div>
                    <div class="bunny-cheeks"></div>
                    <div class="bunny-mouth"></div>
                </div>
            </div>
        </div>
        <div class="relative z-2 -top-38">
            <div v-for="(bubble, index) in bubbles" :key="index"
                class="bubble absolute rounded-full opacity-0 animate-bubbleAnim hover:animate-bounce" :style="bubble">
            </div>
        </div>
    </div>
</template>
展示了頁面上的幾個主要元素:
div,通過 hover 效果讓兔子在鼠標經過時會跳動。v-for 根據我們之前生成的 bubbles 資料來渲染。為了讓動效更豐富,我們為兔子的不同部位設定了多種動畫。
兔子的眼睛會有眨眼效果、耳朵會隨著時間擺動。
@keyframes eyesAnim {
    0%, 10%, 15%, 17%, 70%, 79%, 81%, 100% {
        transform: translate(40px, 40px) rotateZ(6deg);
    }

    16%, 80% {
        transform: translate(40px, 40px) rotateZ(6deg) scaleY(0.3);  /* 模擬眨眼效果 */
    }

    60% {
        transform: translate(40px, 30px) rotateZ(6deg);
    }
}

.bunny-eyes {
    padding: 6px;
    background: var(--bunny-eye-color);
    border-radius: 50%;
    animation: eyesAnim var(--breathe-duration) linear infinite;
}
這段動畫主要是模擬兔子眨眼的動作,其中 scaleY(0.3) 是用來控制眨眼時眼睛垂直方向的縮放。
接下來是耳朵部分,耳朵的擺動透過 @keyframes 動畫來實現。左右耳分別使用不同的動畫軌跡,讓耳朵隨著時間擺動,模擬兔子的自然反應。
<div class="bunny-ears">
    <div class="bunny-ear bunny-ear--left"></div>
    <div class="bunny-ear bunny-ear--right"></div>
</div>
.bunny-ear {
    width: 50px;
    height: 100px;
    border-radius: 50% 50% 0%;
    background: var(--bunny-color);  /* 使用與身體相同的顏色 */
    transform-origin: bottom left;  /* 設置耳朵的旋轉中心 */
    box-shadow: inset 0px 15px var(--bunny-color-2);  /* 在耳朵內側添加陰影 */
}

.bunny-ear--left {
    --transform-1: translateX(50px) rotate(10deg);  /* 設置耳朵在不同時刻的旋轉狀態 */
    --transform-2: translateX(50px) rotate(5deg);
    --transform-3: translateX(50px) rotate(30deg);
    --transform-4: translateX(50px) rotate(8deg);
    animation: earLeftAnim var(--breathe-duration) linear infinite;  /* 左耳的動畫 */
}

.bunny-ear--right {
    --transform-1: translateX(125px) rotate(25deg);  /* 右耳的動畫設定 */
    --transform-2: translateX(125px) rotate(20deg);
    --transform-3: translateX(125px) rotate(45deg);
    --transform-4: translateX(125px) rotate(23deg);
    animation: earRightAnim var(--breathe-duration) linear infinite;  /* 右耳的動畫 */
}

@keyframes earLeftAnim {
    0%, 10%, 75% {
        transform: var(--transform-3);
    }
    15%, 65% {
        transform: var(--transform-1);
    }
    16% {
        transform: var(--transform-2);
    }
    25%, 60% {
        transform: var(--transform-4);
    }
}

@keyframes earRightAnim {
    0%, 10%, 75% {
        transform: var(--transform-3);
    }
    13%, 65% {
        transform: var(--transform-1);
    }
    14% {
        transform: var(--transform-2);
    }
    28%, 55% {
        transform: var(--transform-4);
    }
}
臉頰部分隨著兔子的呼吸過程中透明度變化,這樣的效果讓兔子顯得更加栩栩如生。
.bunny-cheeks {
    padding: 18px;
    background: var(--bunny-cheek-color);
    border-radius: 50%;
    transform: translate(10px, 55px) rotateZ(5deg);  /* 臉頰位置 */
    box-shadow: 110px 0 var(--bunny-cheek-color);  /* 陰影效果模擬另一側的臉頰 */
    animation: cheeksAnim var(--breathe-duration) linear infinite;
}

@keyframes cheeksAnim {
    60% {
        transform: translate(10px, 50px) rotateZ(5deg);  /* 臉頰的位置在呼吸過程中稍有變動 */
        opacity: 0.5;  /* 呼吸時臉頰的透明度隨著時間變化 */
    }

    10%, 70%, 100% {
        transform: translate(10px, 55px) rotateZ(5deg);  /* 臉頰回到原始位置 */
        opacity: 0.2;  /* 呼吸時臉頰變得更加透明 */
    }
}
嘴巴部分則會隨著兔子的呼吸放大和縮小,讓動畫更加生動。
這段程式碼使用了 scale 來模擬呼吸時嘴巴張合的動作。
<div class="bunny-mouth"></div>
.bunny-mouth {
    padding: 8px 10px;
    background: var(--bunny-tongue-color);
    border-radius: 50%;
    transform: translate(66px, 70px);  /* 嘴巴的位置 */
    box-shadow: inset 5px 8px var(--bunny-mouth-color);  /* 嘴巴的內部陰影 */
    animation: breatheMouthAnim var(--breathe-duration) linear infinite;
}

@keyframes breatheMouthAnim {
    0%, 2%, 4%, 6%, 8%, 10%, 75%, 78%, 82%, 86%, 90%, 94%, 98%, 100% {
        transform: translate(68px, 70px);  /* 嘴巴在大部分時間保持固定 */
    }

    60% {
        transform: translate(70px, 70px) scale(3, 2.5);  /* 嘴巴張大,模擬呼吸時擴張的動作 */
    }

    76%, 80%, 84%, 88%, 92%, 96% {
        transform: translate(66px, 70px);  /* 嘴巴回到初始狀態 */
    }
}
兔子的腳掌是固定在兔子身體底部的兩個圓形元素,並且有輕微的旋轉和傾斜效果來模擬兔子坐著的狀態。
<div class="bunny-feet">
    <div class="bunny-foot bunny-foot--left"></div>
    <div class="bunny-foot bunny-foot--right"></div>
</div>
.bunny-feet {
    height: 35px;
    width: 200px;
    transform: translateY(265px);  /* 腳掌的位置 */
}

.bunny-foot {
    height: 35px;
    width: 65px;
    background: var(--bunny-color-2);  /* 使用不同顏色來區分腳掌 */
    border-radius: 0 0 25px 50%;  /* 設置腳掌的圓角 */
}

.bunny-foot--left {
    transform: rotate(10deg) skewY(-20deg);  /* 左腳輕微旋轉與傾斜 */
}

.bunny-foot--right {
    transform: translateX(110px) rotate(10deg) skewY(-20deg);  /* 右腳同樣輕微旋轉與傾斜 */
}
兔子的尾巴是使用一個圓形來模擬,並且會隨著呼吸輕微擺動。
這個效果增加了兔子的動態感,讓尾巴顯得更加靈活。
<div class="bunny-tail"></div>
.bunny-tail {
    height: 50px;
    width: 40px;
    background: var(--bunny-color-2);
    border-radius: 50% 50% 50%;
    transform: translate(190px, 200px) rotate(8deg);  /* 尾巴的位置與角度 */
    animation: tailAnim 3s linear infinite;  /* 尾巴的擺動動畫 */
}

@keyframes tailAnim {
    0%, 15%, 25%, 75%, 85%, 95% {
        transform: translate(190px, 200px) rotate(8deg);  /* 尾巴擺動到左邊 */
    }

    20%, 80%, 90% {
        transform: translate(190px, 198px) rotate(-8deg);  /* 尾巴擺動到右邊 */
    }
}
今天的萌兔吹泡泡特輯,用可愛的動畫讓等待變得有趣!
每個小細節,從耳朵擺動到泡泡漂浮,都讓畫面充滿活力。
其實,程式設計就像這隻兔子,一步步解決問題,最終能創造出驚喜!
只要保持熱情,面對每個挑戰時,就像這隻兔子一樣輕輕一吹,所有問題都會煙消雲散。
加油吧!程式設計的路上,樂趣無限,你會越來越強!🌟🐰
