昨天有提到當你自己建立 VM 提供給開發,要根據 GPU 的需求安裝特定 driver 以及根據使用者需求安裝 PyTorch or TensorFlow,以下是我們過往的 docker file
FROM pytorch/pytorch:2.2.1-cuda12.1-cudnn8-devel

RUN conda env update -f environment.yml
然後在 environment.yml 還要自己配置 Jupyter Lab
# environment.yml

jupyterlab=4.2.1
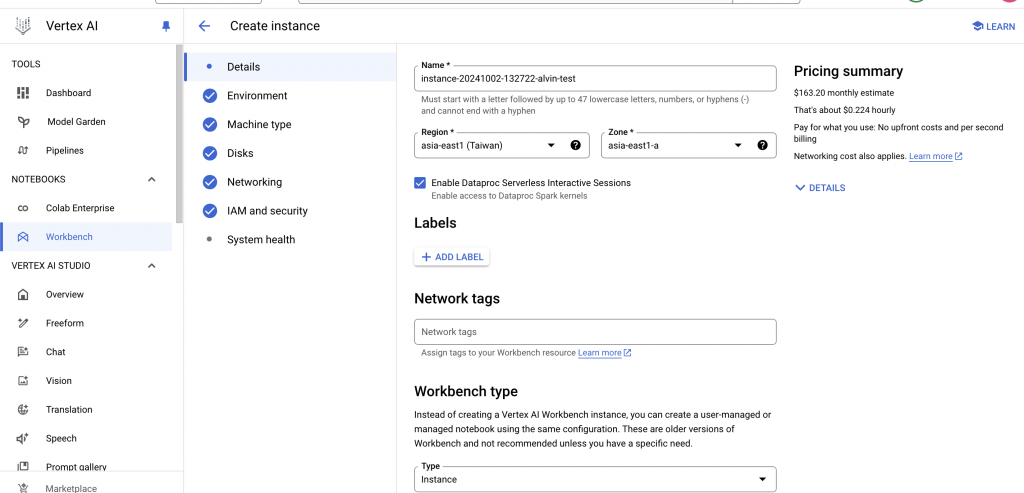
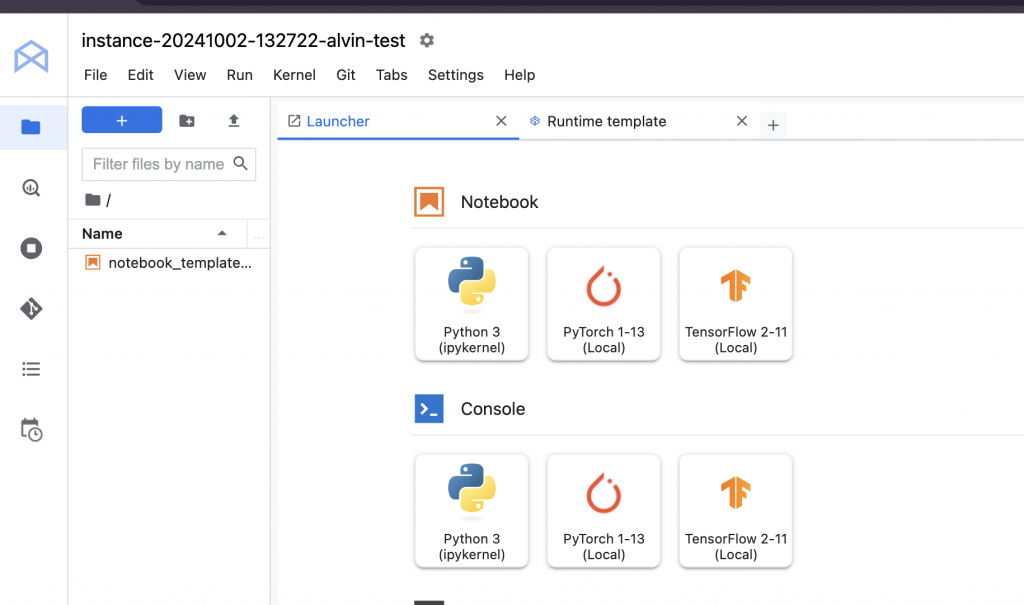
昨天的文件其實有提到 Vertex AI Workbench,我今天實際操作來看看,他其實相當於幫你把 GPU VM 這塊建立起來,然後已經配置好了以上動作。同時還可以追加設定權限相關問題,看起來是可以替代的


一進來後他會有個說明書,跟我們提到兩個部分
設定 project id, region
建立 Cloud Storage bucket for dataset
但因為我真的對 MlOps 的過程很不熟,所以決定找 workshop 試試看。我參考了官方的教學 並選擇 Vertex AI Prediction,可以看到大概會有幾個步驟
Package training application into a Python source distribution
Configure and run training job in a prebuilt container
Package model artifacts in a model archive file
Upload model for deployment
Deploy model using a prebuilt container for prediction
Make online predictions
Package training application into a Python source distribution
此步驟是為了將訓練代碼和所有必要的依賴項打包成一個 Python 源代碼分發包,這樣就可以部署到訓練環境中。想像我們之後改用 Vertex AI 可以快速 migrate 過去環境
Configure and run training job in a prebuilt container
這個步驟是為了運行訓練模型,包含了預構建容器映像(例如 PyTorch GPU 容器)+ Python 包的 GCS URI+要執行的 Python 模塊
Package model artifacts in a model archive file
這個步驟將PyTorch 模型文件、自定義處理程序和其他必要的文件打包成一個 .mar 文件,這是 TorchServe 使用的標準格式。
上傳模型以進行部署: 使用 Vertex AI SDK 將模型上傳到 Model Registry
使用預構建容器部署模型進行預測: 部署模型到端點
endpoint = uploaded_model.deploy(
    machine_type="n1-standard-4",
)
進行在線預測: 使用部署的端點進行預測
prediction = endpoint.predict(instances=[您的輸入數據])
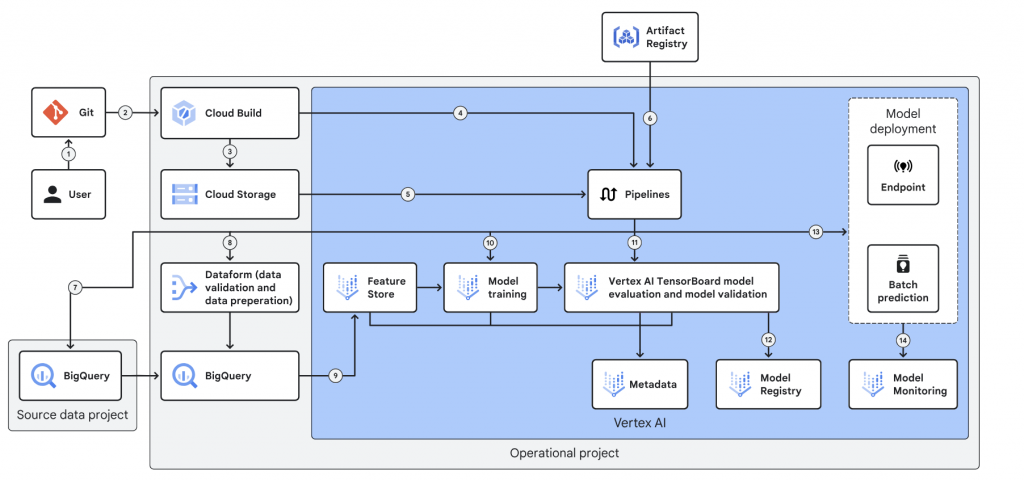
大概瞭解了有哪些步驟,但感覺跟實際狀況有點差別,我實際參考了官方的 production 環境,看到我們最後產出的 model 跟 image 應該會丟給 pipeline

而在不知道 pipeline 過往的狀況,我們是自己開發以下流程
訂閱 Google Pub/Sub 的消息。
調用預測 API(本地的 FastAPI )。
app/main.py
FastAPI,如果 Pub/Sub 有消息,則打這支 API,並用 router 觸發 predict.py
採用 Gunicorn 使用主進程-工作進程模型。
主進程負責管理多個工作進程,這些工作進程才是實際處理請求的單元 → 協助高併發
predict.py
