我們在【Day5: 如何利用DialoGPT建立一個小小的聊天機器人】已經介紹要如何使用Huggingface去載入並使用DialoGPT,那今天我們來升級聊天室,從普通的文字介面變成漂亮的互動聊天室: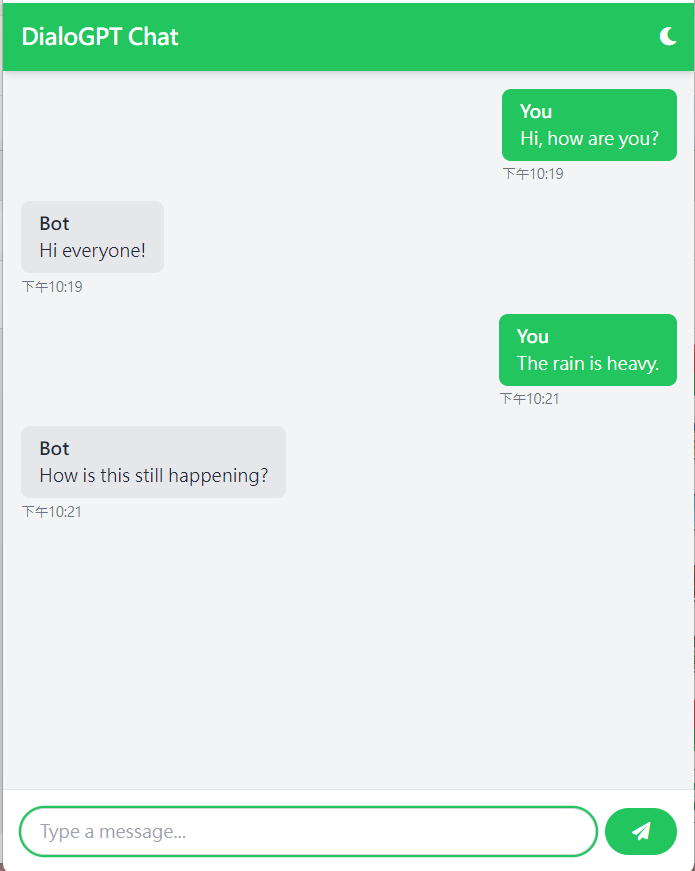
那我們就來講解如何架設聊天網站吧!
flask為Python編寫的輕量級網頁框架,可以快速的架設網站後端及API,而我們需要用到Flask的:
Flask: 網站應用本體,用來運行Flask後端render_template: 建立並渲染網站前端(HTML、CSS)request: 接收使用者輸入jsonify: 將GPT回覆轉成JSON格式並傳至前端其餘就跟Day5一樣,載入Pytorch torch及Huggingface transformers:
from flask import Flask, render_template, request, jsonify
import torch
from transformers import AutoModelForCausalLM, AutoTokenizer

app = Flask(__name__)
同Day5,載入微軟的microsoft/DialoGPT-medium
並且用torch.device判斷是否有使用GPU進行DialoGPT的推論(Inference)
device = torch.device("cuda" if torch.cuda.is_available() else "cpu")
# Load pre-trained model and tokenizer
model_name = "microsoft/DialoGPT-medium"
tokenizer = AutoTokenizer.from_pretrained(model_name)
model = AutoModelForCausalLM.from_pretrained(model_name).to(device)
最後我們在設定聊天介面路由(根目錄),只要輸入http://0.0.0.0:[port]/我們就可以進入聊天室與GPT聊天了。至於聊天室前端的部份,我們在明天會做解釋。
@app.route('/')
def index():
    return render_template('index.html')
跟Day5大同小異,差別在這裡需載入使用者輸入
最後轉成JSON格式並傳遞到前端網站。
user_input = request.json['message']

# Tokenize user input
new_user_input_ids = tokenizer.encode(user_input + tokenizer.eos_token, return_tensors='pt').to(device)

# 將你的輸入與上一輪GPT的回覆串接
bot_input_ids = torch.cat([chat_history_ids, new_user_input_ids], dim=-1) if chat_history_ids is not None else new_user_input_ids
# Generate response
chat_history_ids = model.generate(
    bot_input_ids.to(device),             # GPT上輪的回覆+你要講的話
    max_length=1000,                      # 最大輸入字串長度
    pad_token_id=tokenizer.eos_token_id,  # padding token
    no_repeat_ngram_size=3,               # 控制生成字串不要重複
    do_sample=True,                       # 讓GPT以機率的方式去採樣輸出
    top_k=100,                            # 取前100的機率去採樣
    top_p=0.7,                            # 生成隨機性設定
    temperature=0.8                       # 生成一致性設定
)

# 因為GPT的輸出為一串token(數字),須使用tokenizer解碼
response = tokenizer.decode(chat_history_ids[:, bot_input_ids.shape[-1]:][0], skip_special_tokens=True)
@app.route('/chat', methods=['POST'])
def chat():
    global chat_history_ids
    user_input = request.json['message']

    # 將你的話進行tokenization
    new_user_input_ids = tokenizer.encode(user_input + tokenizer.eos_token, return_tensors='pt').to(device)

    # 將你的輸入與上一輪GPT的回覆串接
    bot_input_ids = torch.cat([chat_history_ids, new_user_input_ids], dim=-1) if chat_history_ids is not None else new_user_input_ids

    # Generate response
    chat_history_ids = model.generate(
            bot_input_ids.to(device),             # GPT上輪的回覆+你要講的話
            max_length=1000,                      # 最大輸入字串長度
            pad_token_id=tokenizer.eos_token_id,  # padding token
            no_repeat_ngram_size=3,               # 控制生成字串不要重複
            do_sample=True,                       # 讓GPT以機率的方式去採樣輸出
            top_k=100,                            # 取前100的機率去採樣
            top_p=0.7,                            # 生成隨機性設定
            temperature=0.8                       # 生成一致性設定
        )

    # 因為GPT的輸出為一串token(數字),須使用tokenizer解碼
    response = tokenizer.decode(chat_history_ids[:, bot_input_ids.shape[-1]:][0], skip_special_tokens=True)
    return jsonify({'response': response})
最後再運行程式即可完成聊天室網站架設:
if __name__ == '__main__':
    app.run(host='0.0.0.0', port=5050, debug=True)
chatroom.pyfrom flask import Flask, render_template, request, jsonify
import torch
from transformers import AutoModelForCausalLM, AutoTokenizer
app = Flask(__name__)
# 若有顯卡,可安裝cuda並將模型加入顯卡已提升推理速度
device = torch.device("cuda" if torch.cuda.is_available() else "cpu")
# 載入DialoGPT及tokenizer
model_name = "microsoft/DialoGPT-medium" # 微軟的官方DialoGPT,另外有small及large可選擇
tokenizer = AutoTokenizer.from_pretrained(model_name) # 載入tokenizer
model = AutoModelForCausalLM.from_pretrained(model_name).to(device) # 載入模型
# 初始化對話紀錄
chat_history_ids = None
@app.route('/')
def index():
return render_template('index.html')
# 訊息路由
@app.route('/chat', methods=['POST'])
def chat():
global chat_history_ids
user_input = request.json['message']
# 將你的話進行tokenization
new_user_input_ids = tokenizer.encode(user_input + tokenizer.eos_token, return_tensors='pt').to(device)
# 將你的輸入與上一輪GPT的回覆串接
bot_input_ids = torch.cat([chat_history_ids, new_user_input_ids], dim=-1) if chat_history_ids is not None else new_user_input_ids
# Generate response
chat_history_ids = model.generate(
bot_input_ids.to(device), # GPT上輪的回覆+你要講的話
max_length=1000, # 最大輸入字串長度
pad_token_id=tokenizer.eos_token_id, # padding token
no_repeat_ngram_size=3, # 控制生成字串不要重複
do_sample=True, # 讓GPT以機率的方式去採樣輸出
top_k=100, # 取前100的機率去採樣
top_p=0.7, # 生成隨機性設定
temperature=0.8 # 生成一致性設定
)
# 因為GPT的輸出為一串token(數字),須使用tokenizer解碼
response = tokenizer.decode(chat_history_ids[:, bot_input_ids.shape[-1]:][0], skip_special_tokens=True)
return jsonify({'response': response})
if __name__ == '__main__':
app.run(debug=True)