昨天我們認識了 Metaflow 的基本用法,今天讓我們深入探討一些進階設定和功能。
Metaflow 提供了兩種主要的方式來處理外部數據和參數:Parameters 和 IncludeFile。
Parameters:用於傳遞簡單的數值、字串,或是 json 格式,若想要呼叫檔案,使用者需要在程式內自行載入檔案。IncludeFile:直接將檔案內容嵌入 flow 中,Metaflow 會紀錄檔案版本內容,方便管理和檔案追溯。
run.data.movie_data 查看檔案內容。以下是一個結合了 Parameters 和 IncludeFile 的程式碼範例:
from metaflow import FlowSpec, step, Parameter, IncludeFile
import pandas as pd

class NetflixMatchCuttingFlow(FlowSpec):
    ### Parameter 可以傳字串 ###
    video_path = Parameter('video_path', help='Path to the input video')

    ### Parameter 也可以傳 json 格式 ###
    video_config = Parameter('video_config',
                    help='The configuration of the video',
                    type=JSONType,
                    default='{"duration": 3, "audio_sample_rate": 16000}')

    ### IncludeFile 會直接儲存檔案內容 ###
    movie_metadata = IncludeFile(
        "movie_metadata",
        help="The path to a movie metadata file.",
        default="movies.csv",
    )

    @step
    def start(self):
        """ Load the videos """
        self.video = load_video(self.video_path)
        movie_metadata_df = pd.read_csv(self.movie_metadata)
        self.next(self.scene_detection, self.audio_analysis)

    @step
    def parse_video(self):
        continue

    @step
    def end(self):
        print("Process completed successfully!")
呼叫方式:python parameter_flow.py run --video_path /path/to/videos/ --video_config '{"duration": 5, "audio_sample_rate": 24000}' --movie_metadata movies.csv
在 Metaflow 中,artifacts 是在 flow 的執行過程中產生的資料。Metaflow 會自動保存每個步驟的 artifacts ,並在不同的步驟之間傳遞。每次執行 flow 時都會產生一個新的版本,方便我們追蹤數據,並在 flow 完成後,可以使用 Python API 以查詢數據內容。
在執行完 flow 之後,可以利用下面的程式碼來查看 artifacts:
from metaflow import Flow

run = Flow('PlayListFlow').latest_successful_run
print("Using run: %s" % str(run))  # 印出 run 的 id

print(run.data)  # 印出所有儲存的 artifacts

## 指定要查詢的 Flow 名稱,會印出所有這個 flow 的執行紀錄
for run in Flow('NetflixMatchCuttingFlow').runs():
    if run.successful:
        print(f"Videos processed on {run.finished_at}")

        ## 可以查看 IncludeFile 的內容
        print(f"Movie Metadata {run.movie_metadata}")

        ## 查看被處理過的 video
        print(f"Processed videos {run.video}")
        print('\n')
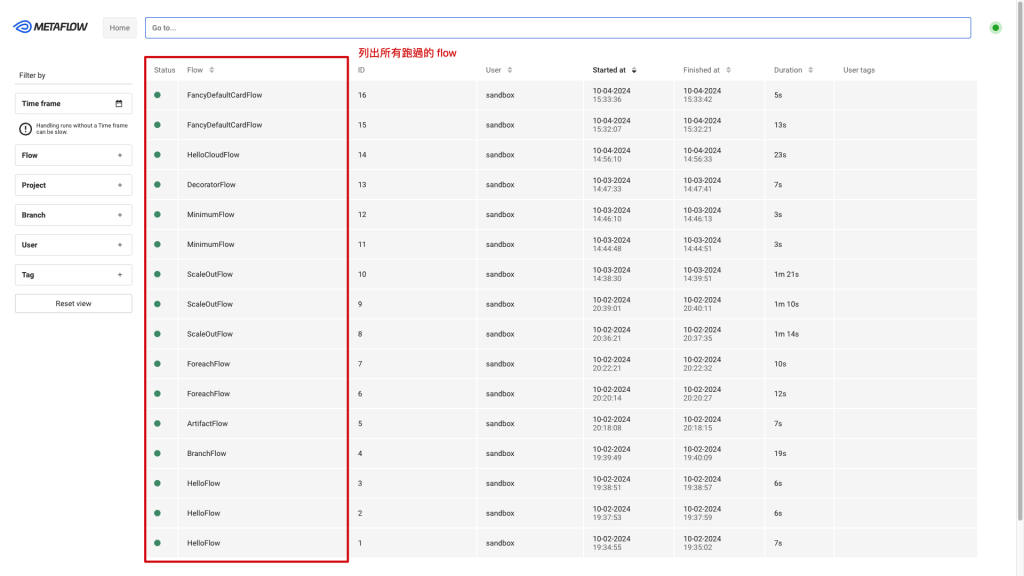
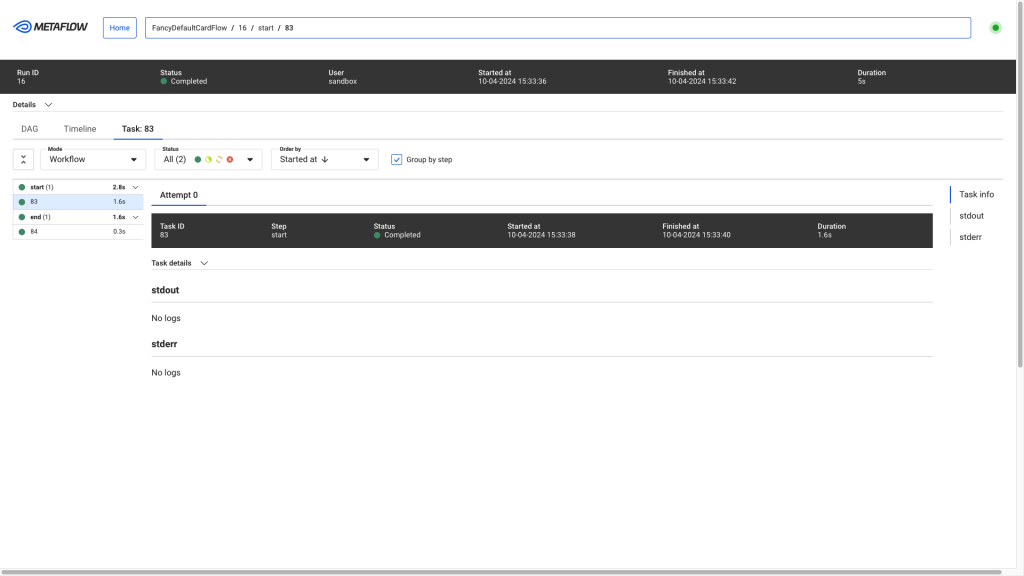
Metaflow 有提供 UI:https://github.com/Netflix/metaflow-ui?tab=readme-ov-file
但我們就不要自己架了,先用他們架好的 sandbox 來測試看看。


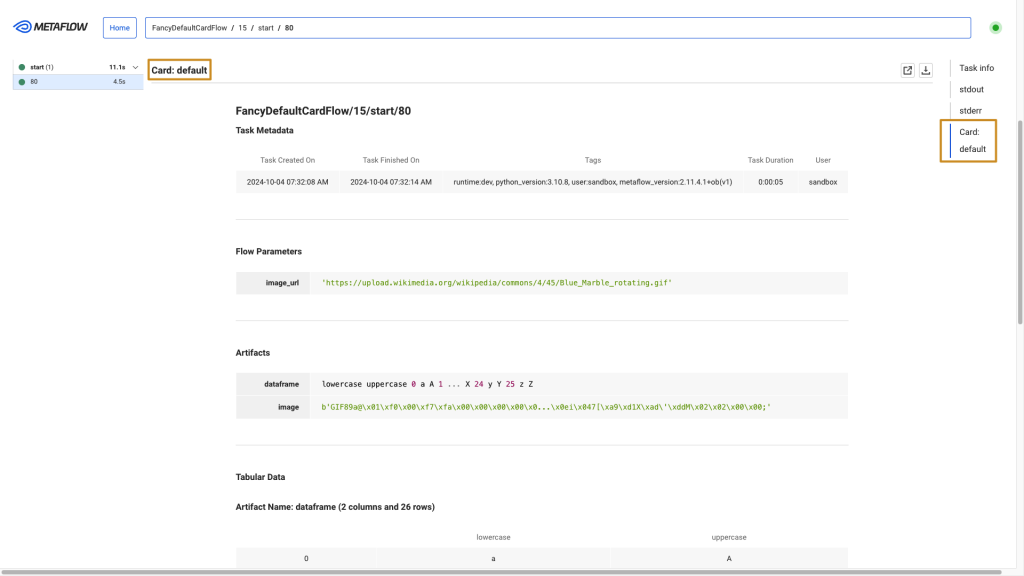
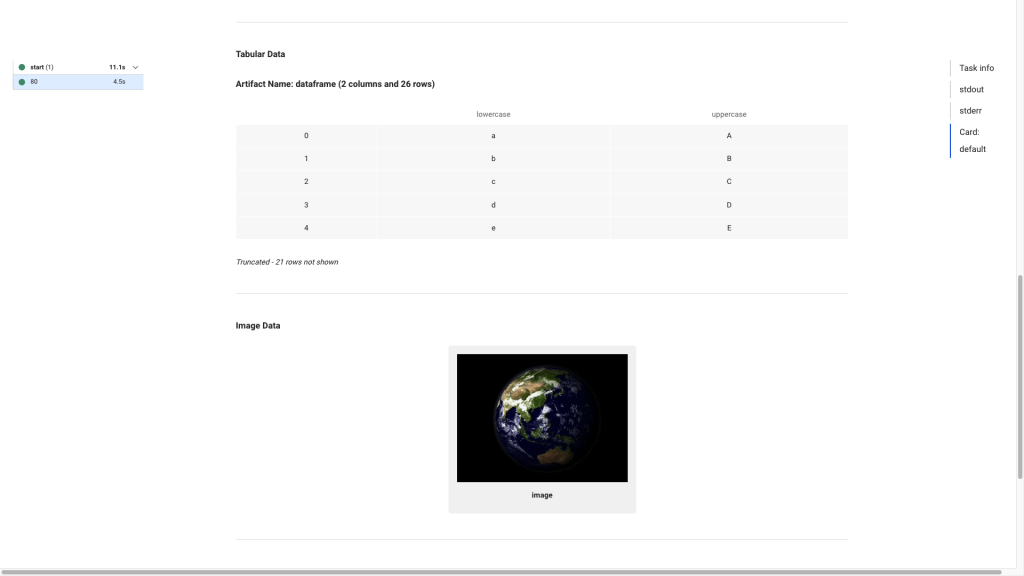
Metaflow 有提供 card 這個功能,協助我們輕鬆地分享結果。Metaflow Card 是一個 HTML 檔案,會顯示與特定任務相關的所有資訊,例如:
Metaflow card 如下所示:


而要如何產生 Metaflow Card 呢?有以下幾種方式:
@card,Metaflow 就會在每次執行時自動產生 card。@card,也不想重新修改程式碼,可以在執行 flow 時,使用 python flow.py run --with card,這樣也會在執行時附加預設的 card。若想要檢視 card,可以用以下幾個方法:
python flow.py card view <task_id> 命令,輸入想要檢視的 task_id,此 id 可以用上面示範過的 Flow('NetflixMatchCuttingFlow').runs() 來查詢。python flow.py card server,會啟動 local server,可以在瀏覽器中訪問 localhost:8324。最後,如果想要分享 card,可以使用 python flow.py card get <task_id> filename.html,將 card 儲存為 HTML 檔案,進而分享給其他人。
以下是產生上面的 card 示意圖的程式碼,我沒有在每個 step 加上 @card,而是直接在執行 flow 時,加上 --with card,Metaflow 就幫我將 flow 裡面的圖片和 dataframe 都顯示在 card 中。
from metaflow import FlowSpec, Parameter, step
import requests, pandas, string

URL = "https://upload.wikimedia.org/wikipedia/commons/4/45/Blue_Marble_rotating.gif"

class FancyDefaultCardFlow(FlowSpec):

    image_url = Parameter('image_url', default=URL)

    @step
    def start(self):
        self.image = requests.get(self.image_url,
                                  headers={'user-agent': 'metaflow-example'}).content
        self.dataframe = pandas.DataFrame({'lowercase': list(string.ascii_lowercase),
                                           'uppercase': list(string.ascii_uppercase)})
        self.next(self.end)

    @step
    def end(self):
        pass

if __name__ == "__main__":
    FancyDefaultCardFlow()
經過今天的介紹後,有沒有覺得 Metaflow 又更加方便好用啦!
我們目前都是在 local 上面執行,明天來看看他又可以怎麼樣方便地幫我們部署到 cloud 上吧!
謝謝讀到最後的你,如果喜歡這系列,別忘了按下喜歡和訂閱,才不會錯過最新更新。
如果有任何問題想跟我聊聊,或是想看我分享的其他內容,也歡迎到我的 Instagram(@data.scientist.min) 逛逛!
我們明天見!
Reference:
[1] https://docs.metaflow.org/metaflow/visualizing-results/effortless-task-inspection-with-default-cards
