現在就要讓我們來實作Spring boot Security。在實作之前,如果還沒有在最初設定的時候增加Security的夥伴,我們也有教學,讓大家從Maven中新增Security實作,而已經有設置的夥伴,就可以挑過這一段,往後面實作。
今天要教大家的有以下的內容:新增Spring boot Security 的依賴,然後設定Config來新增對於API的限制,最後教大家CSRF的設定方法
這邊要請大家先到pom.xml中,在dependencies底下新增一個dependency,這邊就是新增Spring-boot-starter-security
		<dependency>
			<groupId>org.springframework.boot</groupId>
			<artifactId>spring-boot-starter-security</artifactId>
		</dependency>
貼上之後是這樣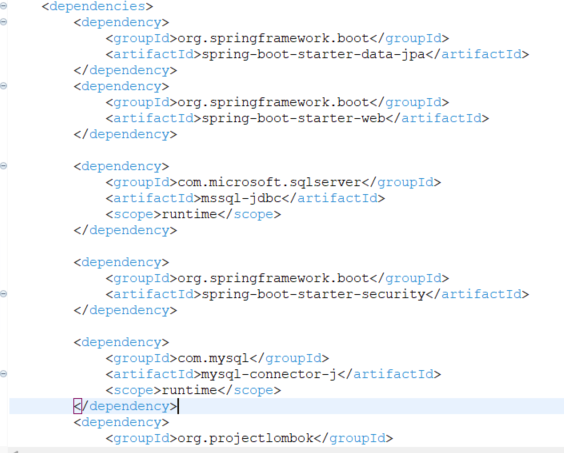
完成之後,我們要在accounting資料夾底下新增一個config的資料夾,在這個資料夾底下,創建一個SpringSecurityConfig.java這個class
這個class就是用來設定Security相關資料的地方,其實我們不一定需要在config資料夾下新增這個class,但是新增這個資料夾的好處就是能夠讓我們一目瞭然,知道這個程式碼是放在哪個資料夾底下。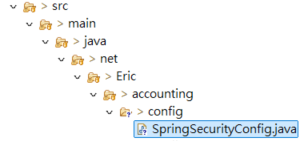
在創建之後,可以打開這個class,然後填入以下的程式碼,要記住,這裡的class名稱是不能錯的,統一都是這個名稱
package net.Eric.accounting.config;


import org.springframework.context.annotation.Bean;

import org.springframework.context.annotation.Configuration;

import org.springframework.http.HttpMethod;

import org.springframework.security.config.Customizer;

import org.springframework.security.config.annotation.web.builders.HttpSecurity;

import org.springframework.security.web.SecurityFilterChain;

import org.springframework.security.web.authentication.UsernamePasswordAuthenticationFilter;

import lombok.AllArgsConstructor;

@Configuration

@AllArgsConstructor

public class SpringSecurityConfig {

	@Bean

	SecurityFilterChain securityFilterChain(HttpSecurity http) throws Exception {


		http.csrf((csrf) -> csrf.disable())

			.authorizeHttpRequests((authorize)->{
				authorize.requestMatchers(HttpMethod.GET,"/api/**").hasRole("ADMIN");

				authorize.anyRequest().authenticated();

			}).httpBasic(Customizer.withDefaults());

		return http.build();

	}

}
可以看到,我們的程式碼中有這一行程式碼
authorize.requestMatchers(HttpMethod.GET,"/api/**").hasRole("ADMIN");
這個程式碼的意思就是,設置權限,當有資料是get,然後是使用到api這個網址的時候,只有ADMIN的權限才能使用。我們可以用API進行測試,打開Postman,然後輸入任何一個get的指令,POST之後就會發現右下角會有401 Unauthorized這個結果,代表因為權限的關係無法操作這個指令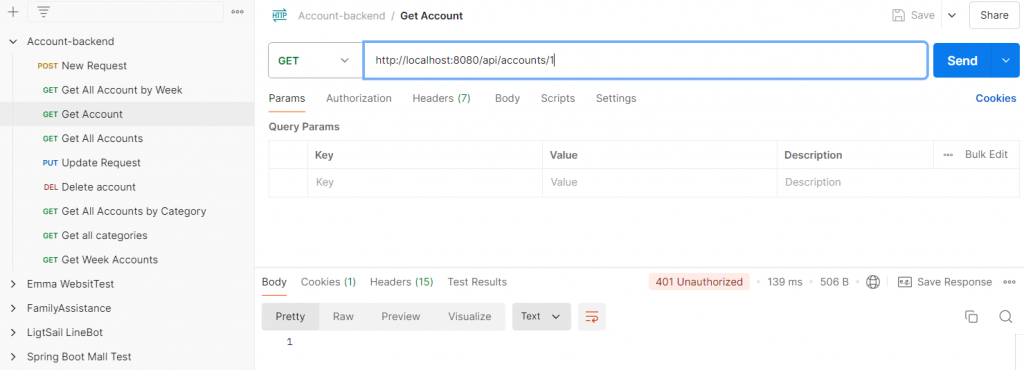
這個時候,我們回到繼續使用postman,然後點選左方的Params右邊的Authorization,就會發現這裡可以輸入帳號跟密碼。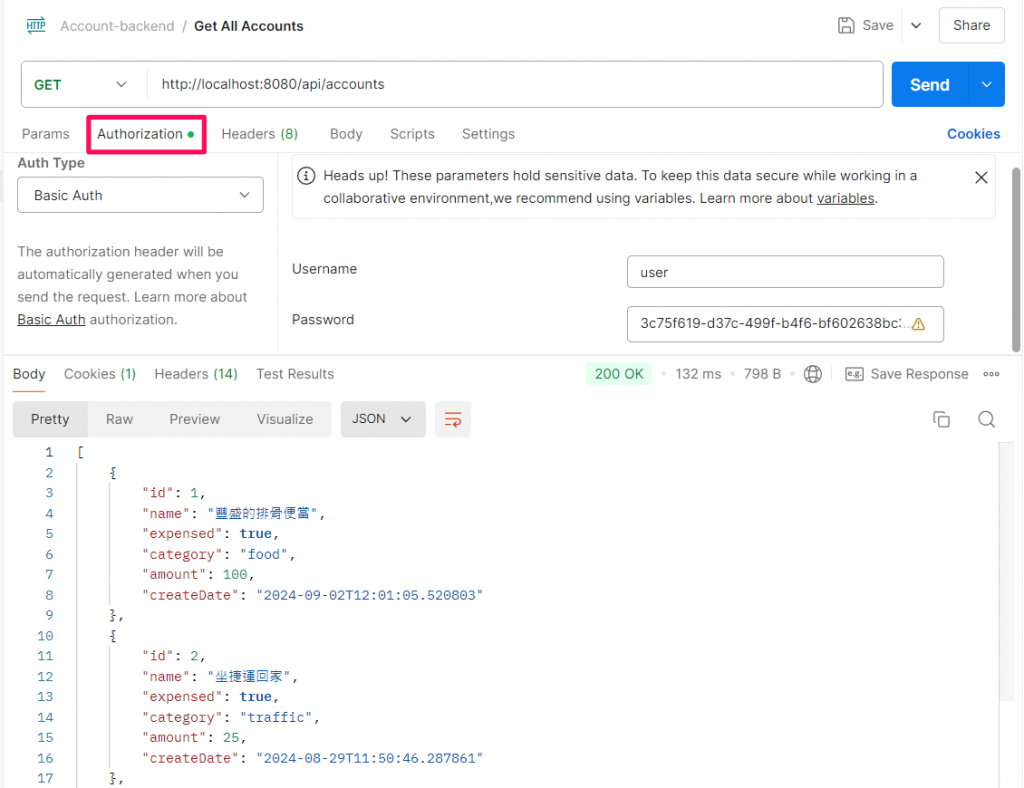
這個時候,我們要回到Spring boot Security中,會發現啟動的時候程式會給我一串密碼,因為我們在設置Config的時候沒有輸入任何的帳號密碼,沒有帳密就沒有任何帳號可以管理角色權限,所以程式會自動幫我們創建一個Admin的帳號,名稱就預設為user,密碼就會出現在這裡,我們只要複製這個密碼就可以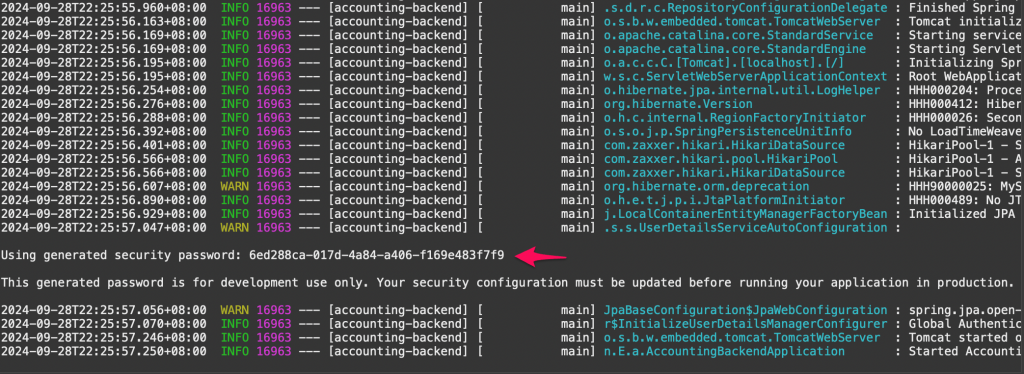
再次使用這張圖,可以看到顯示200OK,然後有顯示出所有的資料,就代表我們已經通過認證,可以得到結果了。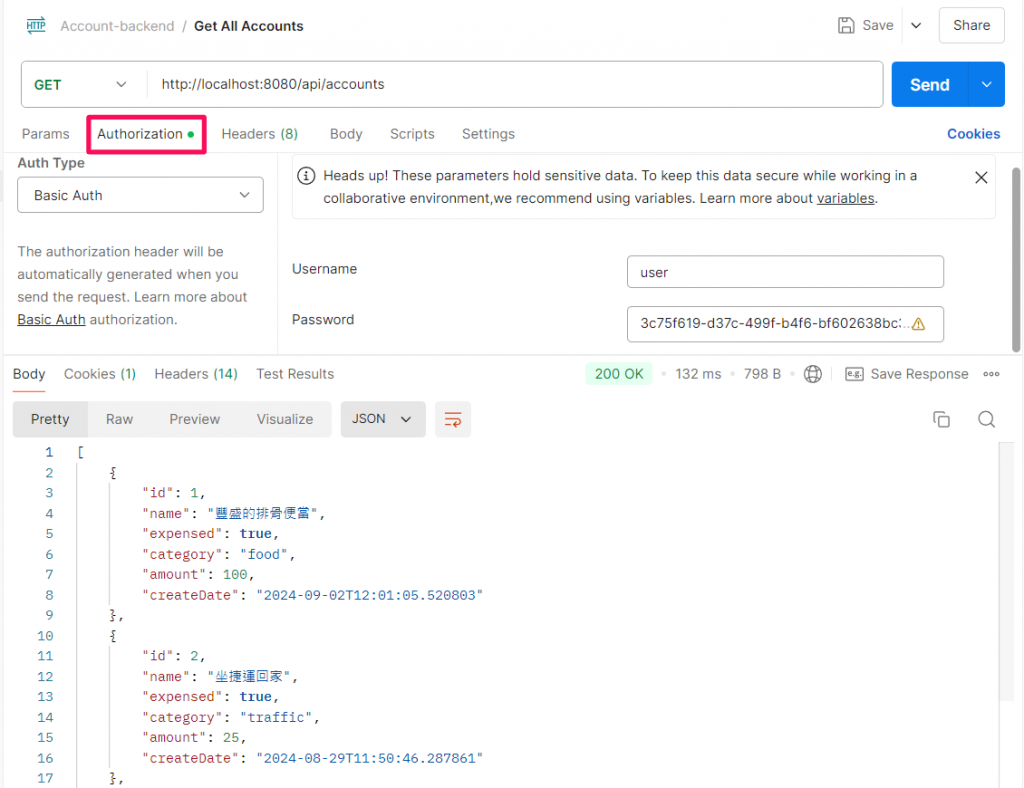
我們也可以用網址的方式,如果輸入localhost:8080/api/accounts/1,網頁就會調出要輸入帳號密碼的選項,我們只要根據需求輸入帳號密碼,網頁仍然會回傳資料給我們。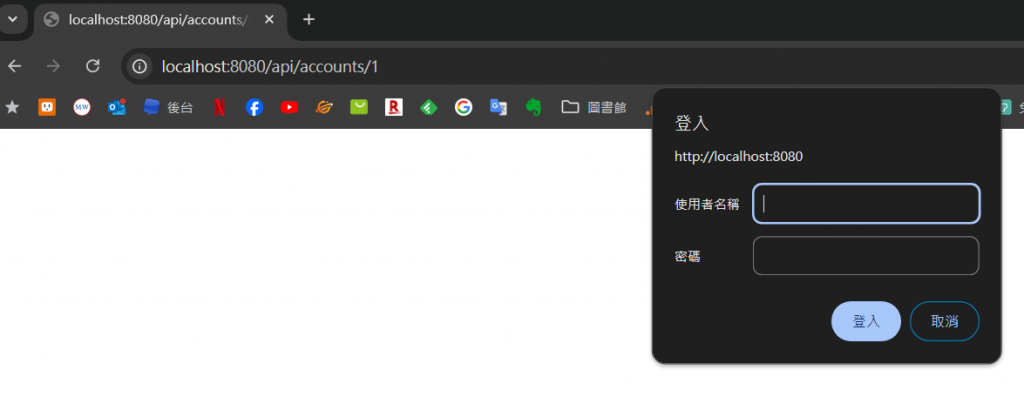
回傳的結果如下
到這裡,我們就成功的設置了一個CSRF的驗證,只有得到正確帳號密碼的呼叫才能夠使用這個API了。這個時候,如果我們再用React呼叫後端的話,就會發現我們都無法呼叫成功,因為我們需要提供帳號密碼才能夠取得這些API的資料。這也是之後我們會教大家的,怎麼使用React輸入帳號密碼來呼叫這些API。
