
嗨!今天要跟大家分享的是如何在 Nuxt 3 專案中運用 Pinia 這個強大的狀態管理工具,並且實作一個客製化的 Loading 元件。無論你是剛接觸 Vue 生態系的新手,還是想要更新技能的資深開發者,這篇文章都會帶給你滿滿的收穫!
我們會從最基礎的 Pinia 介紹開始,一步步帶你實作到最後的成品。準備好你的開發環境,讓我們一起來深入探索 Nuxt 3 和 Pinia 的奧妙吧!
Pinia 是 Vue 生態系統中的新一代狀態管理庫。它提供了一種簡單、直觀的方式來管理應用程序的狀態。Pinia 的主要特點包括:
首先,我們要在專案目錄中執行以下指令:
npm install pinia @pinia/nuxt
💡 小提醒:如果你跟我一樣遇到安裝問題,別擔心!試試看到
package.json檔案中,將"vue": "latest"改成"vue": "^3.4.0",這個小撇步通常能解決問題喔!
```jsx
  "dependencies": {
    "vue": "^3.4.0"
  },
```
接下來,我們要在 nuxt.config.ts 中把 Pinia 加進去:
export default defineNuxtConfig({
  modules: ['@pinia/nuxt'],
})
這個設定就像是在告訴 Nuxt:「欸,我要用 Pinia 喔!」這樣 Nuxt 就會幫我們把 Pinia 整合到專案中,讓我們可以盡情使用它的所有功能。
現在,讓我們來創建一個 store 吧!我們要在 stores 目錄下創建一個 api.ts 檔案。
// stores/api.ts

// 從 Pinia 中匯入 defineStore 函數,這是我們創建 store 的關鍵工具
import { defineStore } from 'pinia'

// 匯入 axios,這是一個用來發送 HTTP 請求的工具
import axios from 'axios'

// 定義我們 API 的基礎網址
const baseURL = '<https://two024it-test-app.onrender.com>'

// 創建一個 axios 實例,設定好基礎網址
const api = axios.create({
  baseURL
})

// 定義一個名為 'api-store' 的 store
export const useApiStore = defineStore('api-store', {
  // 在這裡定義可以執行的動作
  actions: {
    // 這是一個用來獲取食物列表的函數
    async fetchFoodList() {
      // 發送 GET 請求到 '/freshfoods/' 路徑
      const response = await api.get('/freshfoods/')
      return response // 返回收到的回應
    }
    // 你可以在這裡添加更多的 API 操作
  }
})
讓我們來解釋一下這段程式碼:
fetchFoodList 方法,用來從伺服器獲取食物列表。最後,讓我們來看看如何在元件中使用我們剛剛創建的 store。我們將在 pages/calculator.vue 中使用它:
<script setup>
// 匯入在 stores/api.ts 中定義的 API store
import { useApiStore } from '~/stores/api'

// 初始化 API store,使其在此元件中可用
const apiStore = useApiStore()

// 創建一個響應式變數來儲存食物列表
// ref 函數使得 Vue 可以追蹤這個變數的變化
const foodList = ref([])

// 定義一個非同步函數來獲取食物列表
async function fetchFoods() {
  try {
    // 調用 store 中的方法來獲取食物列表
    const res = await apiStore.fetchFoodList()

    // 從響應中提取數據
    const result = res.data

    // 在控制台輸出結果以便調試
    console.log(result)

    // 檢查是否成功獲取數據
    if (result && result.status === 'success') {
      // 將獲取的數據存入響應式變數
      foodList.value = result.data

      // 再次在控制台輸出,確認數據已正確存儲
      console.log(foodList.value)
    }
  } catch (e) {
    // 如果發生錯誤,在控制台輸出錯誤信息
    console.log(e)
  }
}

// 當元件被掛載到頁面上時,自動調用 fetchFoods 函數
onMounted(() => {
  fetchFoods()
})
</script>

<template>
  <div>
    <h1>食品列表</h1>
    <pre>
      <!-- 使用雙大括號語法將 foodList 的內容顯示在頁面上 -->
      {{ foodList }}
    </pre>
  </div>
</template>
讓我們來解釋一下這個元件:
foodList 的值改變時,Vue 會自動更新相關的畫面。fetchFoods 是一個非同步函數。它可能需要一些時間來完成,但不會阻塞其他程式碼的執行。try 區塊中的程式碼出錯,就會執行 catch 區塊中的程式碼。{{ foodList }} 會將 foodList 的內容直接顯示在頁面上。畫面上印出的就是我們取回來的食物資料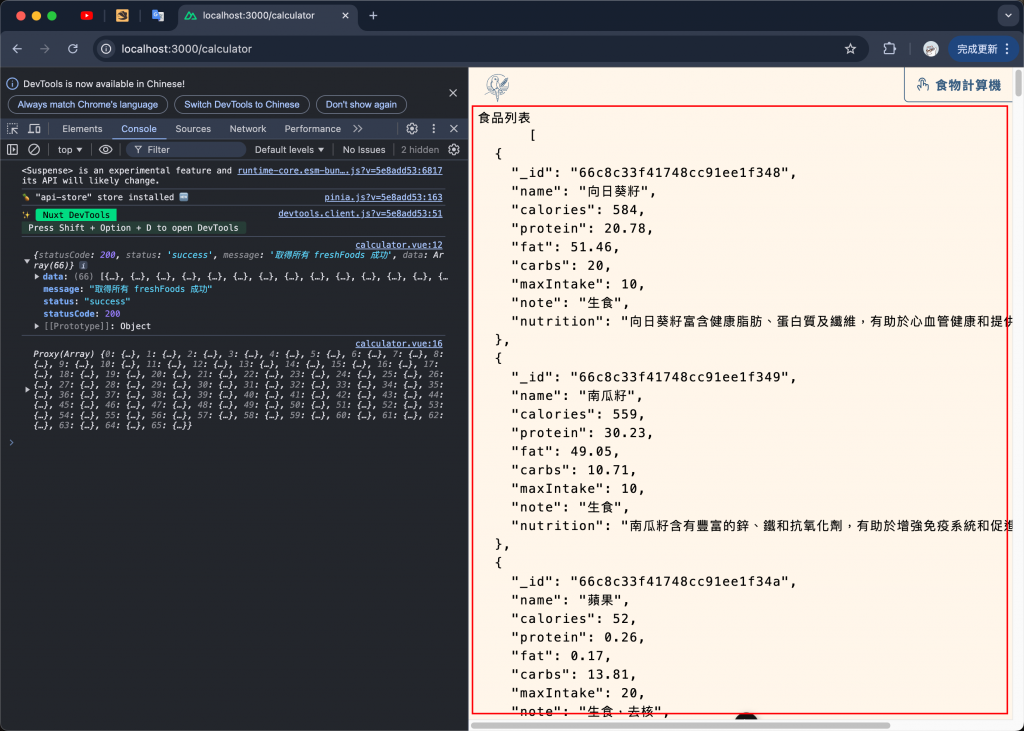
前往 Lottie 網站 尋找喜歡的 GIF 動畫。
下載選中的 GIF 檔案。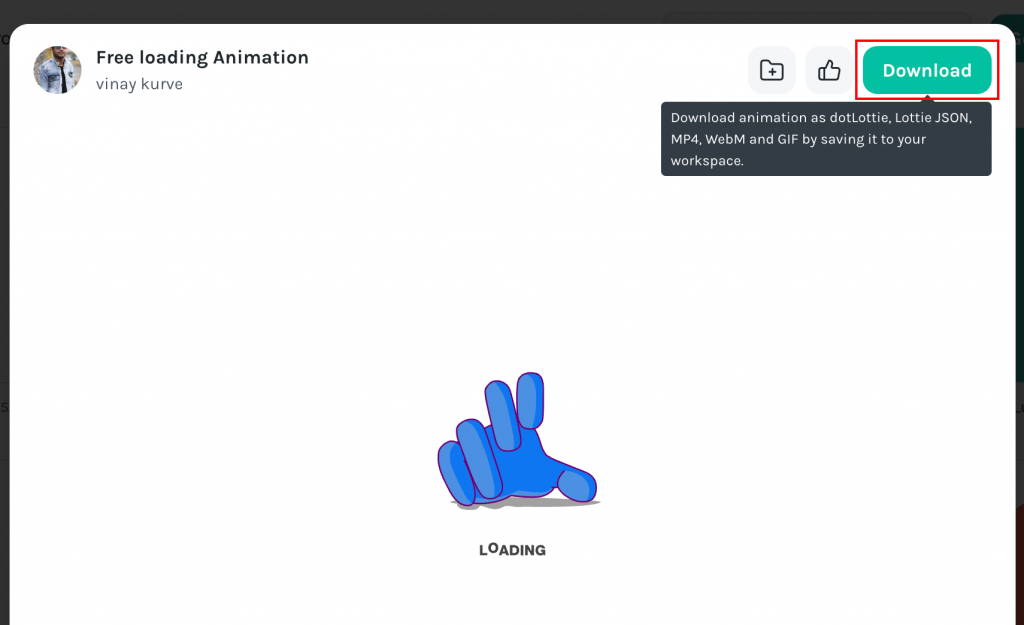
這是流程示範,可以選自己喜歡的下載,我也不是下載這個動畫 XD
注意免費的有下載數量限制!
將下載的 GIF 檔案放入 assets/images/ 資料夾 (我的 GIF 檔案命名為 birdGif.gif )
創建 stores/eventBus.ts 檔案:
// stores/eventBus.ts

// 創建一個響應式變數來控制 Loading 狀態
export const isLoading = ref(false)

// 顯示 Loading 的函數
export function showLoading() {
  isLoading.value = true
}

// 隱藏 Loading 的函數
export function hideLoading() {
  isLoading.value = false
}
詳細解釋:
export const isLoading = ref(false):
ref 函數創建了一個響應式變數。false,表示一開始不顯示 loading。export 使得這個變數可以在其他文件中被引入和使用。export function showLoading() 和 export function hideLoading():
isLoading 的值。showLoading() 將 isLoading 設為 true,表示開始載入。hideLoading() 將 isLoading 設為 false,表示載入結束。補充說明:事件總線(Event Bus)是一種常見的設計模式,用於在不同元件間進行通訊。在這裡,我們用它來管理全局的 Loading 狀態。這種方法特別適合處理跨元件的狀態,比如 Loading 狀態這種需要在整個應用中共享的資訊。
創建 components/LoadingTool.vue 檔案:
<script setup lang="ts">
import { isLoading } from '~/stores/eventBus'
</script>

<template>
  <div>
    <div v-if="isLoading" class="spinner-container">
      <div class="">
        <img src="~/assets/images/birdGif.gif" alt="birdGif" />
      </div>
    </div>
  </div>
</template>

<style scoped>
.spinner-container {
  @apply bg-bg bg-opacity-70;
  position: fixed;
  inset: 0;
  z-index: 1300;
  display: flex;
  justify-content: center;
  align-items: center;
}
</style>
詳細解釋:
<script setup lang="ts">:
setup 表示這個腳本區塊會在組件創建時自動執行。lang="ts" 表示使用 TypeScript。import { isLoading } from '~/stores/eventBus':
isLoading 變數,使得這個組件可以根據全局狀態來顯示或隱藏。<template> 部分:
v-if="isLoading": 這是一個 Vue 指令,當 isLoading 為 true 時,才會顯示這個 div。<img src="~/assets/images/birdGif.gif" alt="birdGif" />: 顯示 loading 動畫。<style scoped>:
scoped 表示這些樣式只應用於這個組件。.spinner-container 的樣式設置:
@apply bg-bg bg-opacity-70;: 這是 Tailwind CSS 的語法,設置背景和透明度。position: fixed; inset: 0;: 使 loading 覆蓋整個螢幕。z-index: 1300;: 確保 loading 顯示在其他元素之上。display: flex; justify-content: center; align-items: center;: 使 loading 動畫居中顯示。補充說明:Vue 3 的組合式 API(Composition API)是一種新的程式碼組織方式,它讓我們能更靈活地組織和重用程式碼。
<script setup>是其中一個語法糖,它簡化了組合式 API 的使用方式。使用<script setup>讓我們的程式碼更簡潔,同時保持了強大的功能性。
修改 app.vue 檔案:
<template>
  <div class="relative flex min-h-screen w-full flex-col">
    <!-- navbar -->
    <header class="z-20">
      <Header />
    </header>

    <!-- pages -->
    <main class="page-wrapper">
      <NuxtPage />
    </main>

    <!-- 將做好的 Loading 元件放這 -->
    <LoadingTool />
  </div>
</template>
詳細解釋:
<Header />: 這是導航欄組件,放在頁面頂部。<NuxtPage />: 這是 Nuxt 3 的特殊組件,用於顯示當前路由對應的頁面內容。<LoadingTool />: 這裡引入了我們剛才創建的 Loading 組件。
修改 pages/calculator.vue 檔案:
<script setup>
import { useApiStore } from '~/stores/api'
import { showLoading, hideLoading } from '~/stores/eventBus' // 引入函數

const apiStore = useApiStore()
const foodList = ref([])

async function fetchFoods() {
  try {
    showLoading() // 顯示 Loading
    const res = await apiStore.fetchFoodList()
    const result = res.data

    console.log(result)

    if (result && result.status === 'success') {
      foodList.value = result.data
      console.log(foodList.value)
    }
  } catch (e) {
    console.log(e)
  } finally {
    hideLoading() // 隱藏 Loading
  }
}

onMounted(() => {
  fetchFoods()
})
</script>

<template>
  <div>
    <h1>食品列表</h1>
    <pre>
      {{ foodList }}
    </pre>
  </div>
</template>
詳細解釋:
showLoading 和 hideLoading: 用於控制 loading 狀態的函數。async function fetchFoods():
showLoading(): 在開始獲取數據前顯示 loading。await apiStore.fetchFoodList(): 調用 API 獲取數據。foodList 中。hideLoading(): 在 finally 區塊中調用,確保無論成功與否都會隱藏 loading。補充說明:非同步函數(Async Function)和
try-catch-finally結構是處理非同步操作的重要工具。非同步函數允許我們以同步的寫法處理非同步操作,大大提高了程式碼的可讀性。而try-catch-finally結構則幫助我們優雅地處理可能發生的錯誤,確保無論操作成功與否,都能執行必要的清理工作(在這裡是隱藏 Loading)。
這種設計允許我們在數據加載過程中顯示 loading 效果,提升用戶體驗。同時,由於 loading 狀態是全局管理的,我們可以在應用的任何部分輕鬆地控制它的顯示和隱藏。
哇!恭喜你完成了這趟 Nuxt 3 和 Pinia 的學習之旅!我們不僅學會了如何使用 Pinia 進行狀態管理,還成功實作了一個超酷的自定義 Loading 元件。這些技能絕對會讓你的前端開發功力大幅提升!
記住,程式開發就像是在玩樂高積木,我們今天學到的每個概念都是一塊重要的積木。Pinia 是管理狀態的積木,自定義 Loading 元件則是提升使用者體驗的積木。隨著你不斷學習和實踐,你會發現自己能夠搭建出越來越複雜、越來越酷炫的應用程式。
最後,別忘了實際動手做做看!理論學習很重要,但真正的進步來自於實踐。嘗試在自己的專案中運用這些技巧,你會發現更多有趣的應用方式。
繼續保持學習的熱情,相信不久的將來,你一定會成為一位出色的前端工程師!加油!
大家有沒有想要更詳細補充的部分呢?歡迎在下方留言分享喔!讓我們一起在 Nuxt3 的世界中探險吧!加油!
(對了,如果你覺得今天的內容對你有幫助,別忘了給個讚支持一下喔!這會是我繼續努力的動力呢~)
