Pods 是 Kubernetes 中最小的可部署單元,通常包含一個或多個容器。
創建一個簡單的 Pod:
創建文件 my-pod.yaml:
apiVersion: v1
kind: Pod
metadata:
  name: my-pod
spec:
  containers:
  - name: nginx
    image: nginx:1.14.2
    ports:
    - containerPort: 80
應用 Pod 配置:
kubectl apply -f my-pod.yaml
查看 Pod 狀態:
kubectl get pods
kubectl describe pod my-pod
訪問 Pod:
kubectl port-forward my-pod 8080:80
然後在瀏覽器訪問 http://localhost:8080
Deployments 管理 Pod 的創建和擴展,提供聲明式更新。
創建 Deployment:
創建文件 my-deployment.yaml:
apiVersion: apps/v1
kind: Deployment
metadata:
  name: nginx-deployment
spec:
  replicas: 3
  selector:
    matchLabels:
      app: nginx
  template:
    metadata:
      labels:
        app: nginx
    spec:
      containers:
      - name: nginx
        image: nginx:1.14.2
        ports:
        - containerPort: 80
應用 Deployment:
kubectl apply -f my-deployment.yaml
查看 Deployment 狀態:
kubectl get deployments
kubectl describe deployment nginx-deployment
更新 Deployment(例如,更改鏡像版本):
kubectl set image deployment/nginx-deployment nginx=nginx:1.16.1
回滾 Deployment:
kubectl rollout undo deployment/nginx-deployment

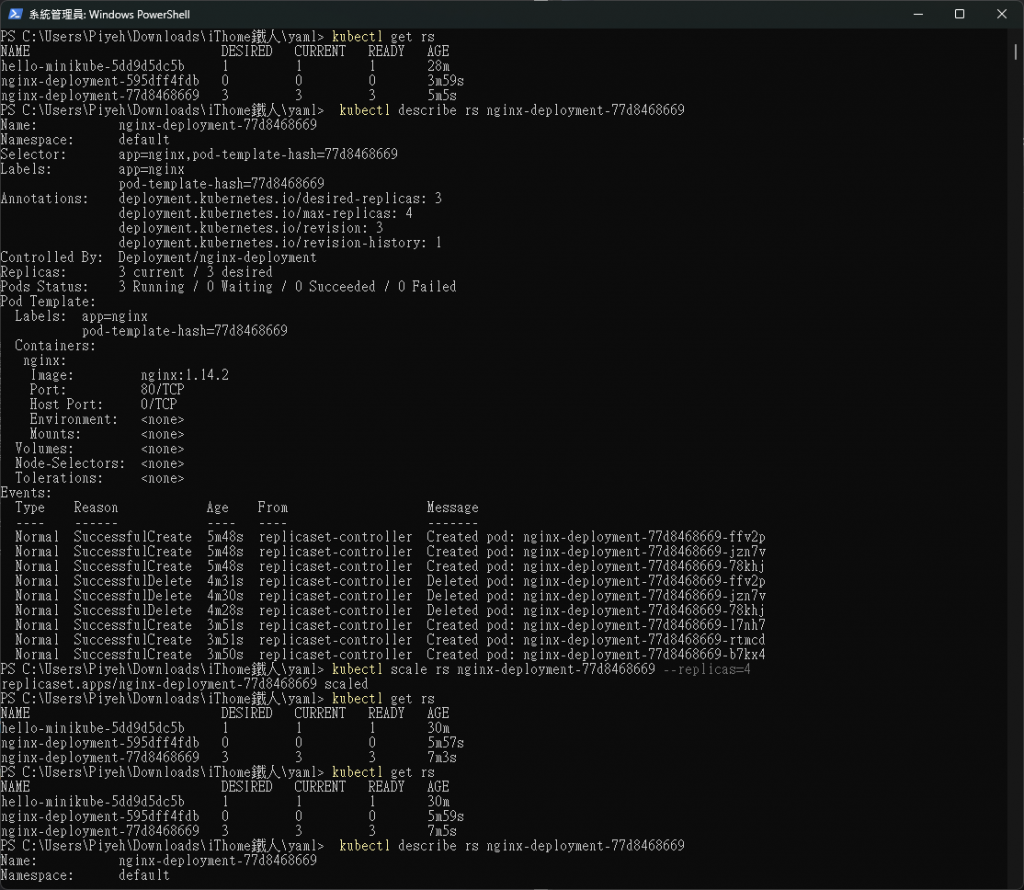
ReplicaSets 確保指定數量的 Pod 副本在運行。通常通過 Deployment 間接使用。
查看 Deployment 創建的 ReplicaSet:
kubectl get rs
描述 ReplicaSet:
kubectl describe rs <replicaset-name>
手動縮放 ReplicaSet(不推薦,通常應該縮放 Deployment):
kubectl scale rs <replicaset-name> --replicas=4
Service 為一組 Pods 提供穩定的網絡端點。
創建 Service:
創建文件 my-service.yaml:
apiVersion: v1
kind: Service
metadata:
  name: nginx-service
spec:
  selector:
    app: nginx
  ports:
    - protocol: TCP
      port: 80
      targetPort: 80
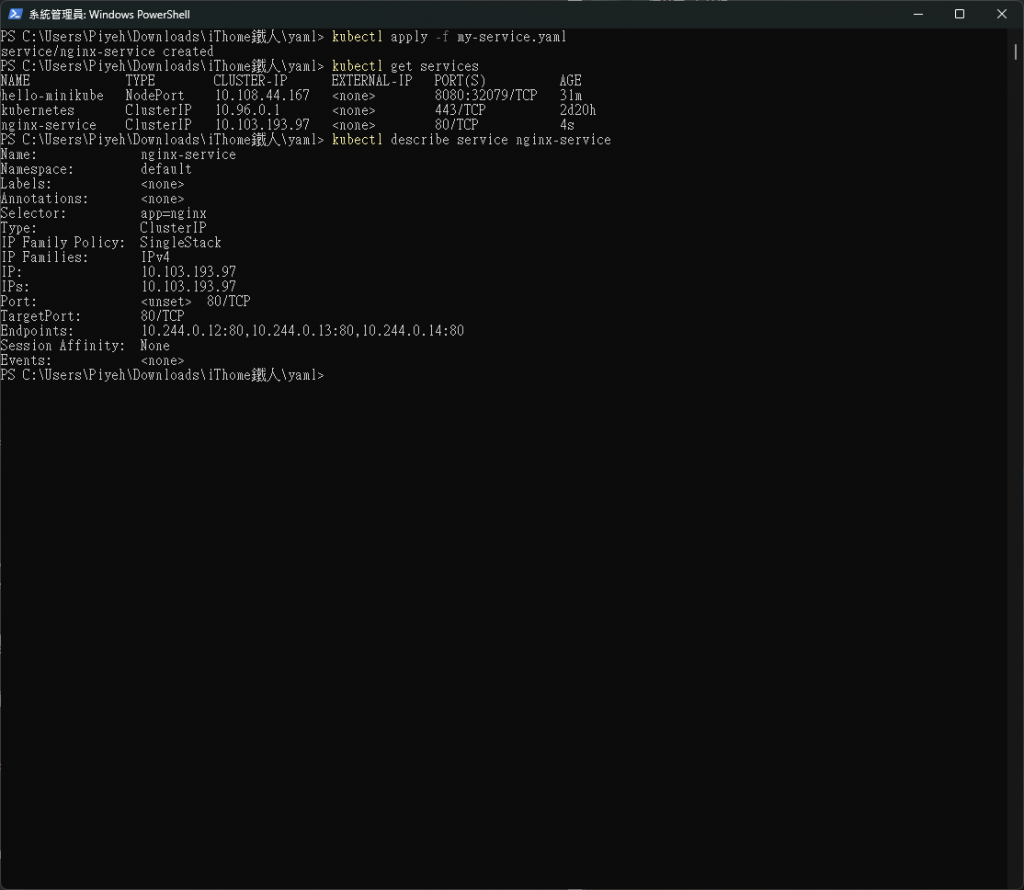
應用 Service:
kubectl apply -f my-service.yaml
查看 Service:
kubectl get services
kubectl describe service nginx-service
創建 NodePort Service:
修改 my-service.yaml:
apiVersion: v1
kind: Service
metadata:
  name: nginx-nodeport
spec:
  type: NodePort
  selector:
    app: nginx
  ports:
    - port: 80
      targetPort: 80
      nodePort: 30080  # 可選,如果不指定會自動分配
應用並查看:
kubectl apply -f my-service.yaml
kubectl get services
訪問(如果使用 Minikube):
minikube service nginx-nodeport --url
創建 LoadBalancer Service(注意:需要雲提供商支持):
修改 my-service.yaml:
apiVersion: v1
kind: Service
metadata:
  name: nginx-loadbalancer
spec:
  type: LoadBalancer
  selector:
    app: nginx
  ports:
    - port: 80
      targetPort: 80
應用並查看:
kubectl apply -f my-service.yaml
kubectl get services
在支持的環境中,你會看到一個外部 IP 分配給這個服務。

這個實作過程涵蓋了 Kubernetes 的核心概念,包括 Pods、Deployments、ReplicaSets 和不同類型的 Services。通過這些步驟,你可以親自體驗這些概念是如何在實際環境中運作的。


 iThome鐵人賽