前一章節,介紹了 Kueue 配置,經常在機器學習的訓練領域使用到。而本章將深入探討如何在 Google Kubernetes Engine (GKE) 上部署一個利用 GPU 資源的機器學習訓練模型,並構建一個簡化版的機器學習流水線 (ML pipeline)。
我們將逐步演示如何在 GKE 集群中訓練模型,並將訓練好的模型的預測結果有效地存儲到 Cloud Storage 中。 此架構允許我們將訓練和推論過程解耦,提升效率和可擴展性。
後續將示範如何從 Cloud Storage 中提取這些預測結果,並在其他的機器上進行推論,模擬真實世界的應用場景。 這個流程展示了如何利用雲原生技術構建一個彈性且可擴展的機器學習工作流程,從模型訓練到推論部署,實現端到端的機器學習解決方案。 透過本章的學習,讀者將能夠掌握在 GKE 上進行 GPU 加速訓練以及與 Cloud Storage 整合的關鍵技巧。
本文章需要參考 Day19 GKE 共享的魔法卷軸(二)及 Day6 GKE 服務的一張身份證 GKE IAM Workload Identity
部署實驗環境所需一台 H100(a3-highgpu-8g) 及一台 T4(n1-standard-4+nvidia-tesla-t4) 的 Node Pool,可以參考 Day3 的 Terraform 範例,以下為 T4 及 H100 的 GPU Node 的 Terraform 配置文件。
node-pool-variables.tf
# node-pool-variables.tf
module "gke" {
  node_pools = [
    var.model_training.config,
    var.node_pool_h100-standard.config,
  ]

  node_pools_labels = {
    "${var.model_training.config.name}" = var.model_training.kubernetes_label
    "${var.node_pool_h100-standard.config.name}" = var.node_pool_h100-standard.kubernetes_label
  }

  node_pools_taints = {
    "${var.model_training.config.name}" = var.model_training.taints
	  "${var.node_pool_h100-standard.config.name}" = var.node_pool_h100-standard.taints
  }

  node_pools_resource_labels = {
    "${var.model_training.config.name}" = var.model_training.node_pools_resource_labels
    "${var.node_pool_h100-standard.config.name}" = var.node_pool_h100-standard.node_pools_resource_labels
  }
}

### Node pool
variable "model_training" {
  default = {
      config = {
        name               = "model-training"
        machine_type       = "n1-standard-4"
        accelerator_count  = "1"
        accelerator_type   = "nvidia-tesla-t4"
        gpu_driver_version = "LATEST"
        node_locations     = "us-central1-a"
        autoscaling        = false
        max_pods_per_node  = 64
        node_count         = 1
        local_ssd_count    = 0
        spot               = false
        disk_size_gb       = 300
        disk_type          = "pd-standard"
        image_type         = "COS_CONTAINERD"
        enable_gcfs        = true
        enable_gvnic       = true
        logging_variant    = "DEFAULT"
        auto_repair        = true
        auto_upgrade       = true
        preemptible        = false

      }
      node_pools_resource_labels = {}
      kubernetes_label = {
        role = "t4"
      }
      taints = []
    }
}
variable "node_pool_h100-standard" {
  default = {
    config = {
      name               = "h100-standard"
      machine_type       = "a3-highgpu-8g"
      accelerator_type   = "nvidia-h100-80gb"
      accelerator_count  = "8"
      gpu_driver_version = "LATEST"
      node_locations     = "us-west4-a"
      max_pods_per_node  = 64
      autoscaling        = false
      node_count         = 1
      local_ssd_count    = 0
      disk_size_gb       = 2000
      local_ssd_ephemeral_storage_count = 16
      spot               = true
      disk_type          = "pd-ssd"
      image_type         = "COS_CONTAINERD"
      enable_gcfs        = false
      enable_gvnic       = false
      logging_variant    = "DEFAULT"
      auto_repair        = true
      auto_upgrade       = true
      preemptible        = false
    }
    kubernetes_label = {
      role = "h100"
    }
    taints = []
  }
}
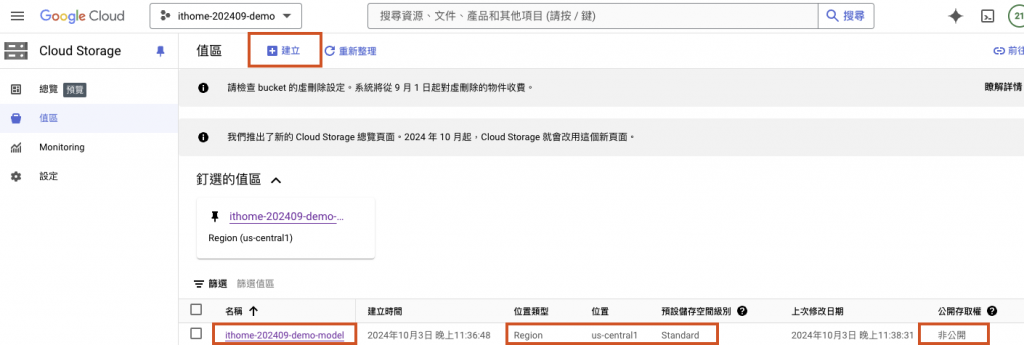
建立一個名稱為 ithome-202409-demo-model 位置選擇單區 us-central-1 訪問權限控制統一非公開的標準 Bucket(儲存桶),在此儲存桶中創建一個 tensorflow-mnist-example 資料夾,資料夾下有以下三個程式文件,requirements.txt, tensorflow_mnist_batch_predict.py, tensorflow_mnist_train_distributed.py
文件目錄如下
$GCS_Bucket
└── tensorflow-mnist-example
    ├── requirements.txt
    ├── tensorflow_mnist_batch_predict.py
    └── tensorflow_mnist_train_distributed.py
requirements.txt
# requirements.txt
tensorflow-datasets
推論模型使用的程式碼(tensorflow_mnist_batch_predict.py)
# tensorflow_mnist_batch_predict.py
import os
os.environ['TF_CPP_MIN_LOG_LEVEL'] = '2'
import tensorflow as tf
import numpy as np
import keras

strategy = tf.distribute.MirroredStrategy()
print('Number of devices: {}'.format(strategy.num_replicas_in_sync))

def scale(image):
    image = tf.cast(image, tf.float32)
    image /= 255

    return image

images_dir = "/data/mnist_predict/"

img_dataset = keras.utils.image_dataset_from_directory(
    images_dir,
    image_size=(28, 28),
    color_mode="grayscale",
    label_mode=None,
    labels=None,
    shuffle=False
)

file_paths = img_dataset.file_paths

img_prediction_dataset = img_dataset.map(scale)

model_path = '/data/mnist_saved_model/mnist.keras'

with strategy.scope():
    replicated_model = keras.models.load_model(model_path)
    replicated_model.compile(
        loss=keras.losses.SparseCategoricalCrossentropy(from_logits=True),
        optimizer=keras.optimizers.Adam(),
        metrics=['accuracy'])

    predictions = replicated_model.predict(img_prediction_dataset)
    scores = tf.nn.softmax(predictions)
    for path, score in zip(file_paths, scores):
        print(
            "The image {} is the number {} with a {:.2f} percent confidence."
            .format(path, np.argmax(score), 100 * np.max(score))
        )
訓練模型使用的程式碼(tensorflow_mnist_train_distributed.py)
# tensorflow_mnist_train_distributed.py
import os
os.environ['TF_CPP_MIN_LOG_LEVEL'] = '2'
import tensorflow_datasets as tfds
import tensorflow as tf
import keras
import glob

datasets, info = tfds.load(name='mnist', with_info=True, as_supervised=True)

mnist_train, mnist_test = datasets['train'], datasets['test']

print('******************')
print('MNIST TRAINING JOB')
print('******************')

strategy = tf.distribute.MirroredStrategy()
print('Number of devices: {}'.format(strategy.num_replicas_in_sync))
num_train_examples = info.splits['train'].num_examples
num_test_examples = info.splits['test'].num_examples

BUFFER_SIZE = 10000

BATCH_SIZE_PER_REPLICA = 64
BATCH_SIZE = BATCH_SIZE_PER_REPLICA * strategy.num_replicas_in_sync

def scale(image, label):
    image = tf.cast(image, tf.float32)
    image /= 255

    return image, label

train_dataset = mnist_train.map(scale).cache().shuffle(BUFFER_SIZE).batch(BATCH_SIZE)
eval_dataset = mnist_test.map(scale).batch(BATCH_SIZE)

with strategy.scope():
    model = keras.Sequential([
        keras.Input(shape=(28, 28, 1)),
        keras.layers.Conv2D(32, kernel_size=(3, 3), activation="relu"),
        keras.layers.MaxPooling2D(),
        keras.layers.Flatten(),
        keras.layers.Dense(64, activation='relu'),
        keras.layers.Dense(10)
    ])

    model.compile(loss=keras.losses.SparseCategoricalCrossentropy(from_logits=True),
                    optimizer=keras.optimizers.Adam(),
                    metrics=['accuracy'])

# Define the checkpoint directory to store the checkpoints.
checkpoint_dir = './training_checkpoints'
# Define the name of the checkpoint files.
checkpoint_prefix = os.path.join(checkpoint_dir, "ckpt_{epoch}.weights.h5")

def decay(epoch):
    if epoch < 3:
        return 1e-3
    elif epoch >= 3 and epoch < 7:
        return 1e-4
    else:
        return 1e-5

# Define a callback for printing the learning rate at the end of each epoch.
class PrintLR(keras.callbacks.Callback):
    def on_epoch_end(self, epoch, logs=None):
        print('\nLearning rate for epoch {} is {}'.format(epoch + 1,
                                                        model.optimizer.learning_rate.numpy()))

callbacks = [
    tf.keras.callbacks.TensorBoard(log_dir='./logs'),
    tf.keras.callbacks.ModelCheckpoint(filepath=checkpoint_prefix,
                                       save_weights_only=True),
    tf.keras.callbacks.LearningRateScheduler(decay),
    PrintLR()
]

EPOCHS = 12

model.fit(train_dataset, epochs=EPOCHS, callbacks=callbacks)

# Function to find the latest .h5 file
def find_latest_h5_checkpoint(checkpoint_dir):
    list_of_files = glob.glob(f'{checkpoint_dir}/*.h5')
    if list_of_files:
        latest_file = max(list_of_files, key=os.path.getctime)
        return latest_file
    else:
        return None

model.load_weights(find_latest_h5_checkpoint(checkpoint_dir))

eval_loss, eval_acc = model.evaluate(eval_dataset)

print('Eval loss: {}, Eval accuracy: {}'.format(eval_loss, eval_acc))

path = '/data/mnist_saved_model'
os.makedirs(path, exist_ok=True)

model_file = '/data/mnist_saved_model/mnist.keras'
model.save(model_file)

print('Training finished. Model saved')
使用 Day6 的教學,在 ai Namespace 下創建 K8s SA demo-ai-cluster-general 使其和 GCP SA demo-ai-cluster-general 綁定,具有 roles/storage.insightsCollectorService 及 roles/storage.objectAdmin的權限,因為筆者有跨專案存取 GCS ,所以將 GCS 所在的專案名稱及權限填在這裡 additional_projects
    ## Service account
    ai = {
      gcp_service_account           = "demo-ai-cluster-general"
      k8s_service_account           = "demo-ai-cluster-general"
      k8s_service_account_namespace = "ai"
      use_existing_gcp_sa           = false
      use_existing_k8s_sa           = false
      roles = [],

      # 填入管理 GCS 所在的專案
      additional_projects = {
        "ithome-202409-demo" = [
          "roles/storage.insightsCollectorService",
          "roles/storage.objectAdmin"
        ]
      }
    },
MNIST 數據集(Modified National Institute of Standards and Technology database)是一個大型手寫數字圖像數據集,廣泛用於圖像識別和機器學習領域的訓練和測試。它包含 60,000 個訓練圖像和 10,000 個測試圖像,均為 28x28 像素的灰度圖像,代表 0 到 9 的數字。
這些文件使用特定的二進制格式存儲數據,需要使用相應的代碼進行解析。 許多機器學習庫(如 TensorFlow、PyTorch 等)提供內置函數可以直接加載 MNIST 數據集。
它為研究人員提供了一個簡單的測試平台,可以快速驗證新算法的有效性,並為初學者提供了一個很好的入門數據集。
使用指令 kubectl apply -f training-job.yaml 創建 ai Namespace 的 Job
# training-job.yaml
apiVersion: batch/v1
kind: Job
metadata:
  name: mnist-training-job
  namespace: ai
spec:
  template:
    metadata:
      name: mnist
      annotations:
        gke-gcsfuse/volumes: "true"
    spec:
      nodeSelector:
        # 改成所使用的機器標籤,這裡使用 nvidia-tesla-t4
        cloud.google.com/gke-accelerator: nvidia-tesla-t4
      tolerations:
      - key: "nvidia.com/gpu"
        operator: "Exists"
        effect: "NoSchedule"
      containers:
      - name: tensorflow
        image: tensorflow/tensorflow:latest-gpu
        command: ["/bin/bash", "-c", "--"]
        args: ["cd /data/tensorflow-mnist-example; pip install -r requirements.txt; python tensorflow_mnist_train_distributed.py"]
        resources:
          limits:
            nvidia.com/gpu: 1
            cpu: 1
            memory: 3Gi
        volumeMounts:
        # 將掛載進來的 GCS Bucket 全部目錄掛載到 Pod 內的 /data 目錄下
        - name: gcs-fuse-csi-vol
          mountPath: /data
          readOnly: false
      # 替換成剛剛創建的 K8s SA 具有 GCS 物件擁有者權限
      serviceAccountName: $Workload_Identity_ServiceAccount
      volumes:
      # 將掛載進來的 GCS Bucket
      - name: gcs-fuse-csi-vol
        csi:
          driver: gcsfuse.csi.storage.gke.io
          readOnly: false
          volumeAttributes:
            # 填入儲存桶名稱
            bucketName: ithome-202409-demo-model
            mountOptions: "implicit-dirs"
      restartPolicy: "Never"
等待作業處於 Completed 狀態,T4 GPU 大約訓練 5 分鐘左右可以完成,使用以下指令確認 Job 狀態。
$ watch -n 2 kubectl get job -n ai
NAME                 STATUS     COMPLETIONS   DURATION   AGE
mnist-training-job   Complete   1/1           4m44s      5m
接下來可以到 GCS Bucket 確認 Model 是否存在,訓練完成的 Model 會保存在這個路徑下$BUCKET_NAME/mnist_saved_model/mnist.keras
進入 Github 網址,內有 10 張手寫的數字圖片,要給訓練完成的 Model 進行推論。在 GCS Bucket 下創建 mnist_predict 資料夾,將此目錄下的 10 張圖片,保存在 $GCS_Bucket/mnist_predict 資料夾下,此時 GCS Bucket 的目錄結構如下:
$GCS_Bucket
├── mnist_saved_model
│   └── mnist.keras
├── tensorflow-mnist-example
│   ├── logs/...
│   ├── training_checkpoints/...
│   ├── requirements.txt
│   ├── tensorflow_mnist_batch_predict.py
│   └── tensorflow_mnist_train_distributed.py
└── mnist_predict
    ├── 0.png
    ├── 1.png
    ├── 2.png
    ├── 3.png
    ├── 4.png
    ├── 5.png
    ├── 6.png
    ├── 7.png
    ├── 8.png
    └── 9.png
以下使用 H100 機器進行推論
kubectl apply -f mnist-inference-job.yaml
# mnist-inference-job.yaml
apiVersion: batch/v1
kind: Job
metadata:
  name: mnist-inference-job
  namespace: ai
spec:
  template:
    metadata:
      name: mnist
      annotations:
        gke-gcsfuse/volumes: "true"
    spec:
      nodeSelector:
        # 改成所使用的機器標籤,這裡使用 nvidia-h100-80gb
        cloud.google.com/gke-accelerator: nvidia-h100-80gb
      tolerations:
      - key: "nvidia.com/gpu"
        operator: "Exists"
        effect: "NoSchedule"
      containers:
      - name: tensorflow
        image: tensorflow/tensorflow:latest-gpu
        command: ["/bin/bash", "-c", "--"]
        args: ["cd /data/tensorflow-mnist-example; pip install -r requirements.txt; python tensorflow_mnist_batch_predict.py"]
        resources:
          limits:
            nvidia.com/gpu: 1
            cpu: 1
            memory: 3Gi
        volumeMounts:
        # 將掛載進來的 GCS Bucket 全部目錄掛載到 Pod 內的 /data 目錄下
        - name: gcs-fuse-csi-vol
          mountPath: /data
          readOnly: false
      # 替換成剛剛創建的 K8s SA 具有 GCS 物件擁有者權限
      serviceAccountName: $Workload_Identity_ServiceAccount
      volumes:
      # 將掛載進來的 GCS Bucket
      - name: gcs-fuse-csi-vol
        csi:
          driver: gcsfuse.csi.storage.gke.io
          readOnly: false
          volumeAttributes:
            # 填入儲存桶名稱
            bucketName: ithome-202409-demo-model
            mountOptions: "implicit-dirs"
      restartPolicy: "Never"
使用以下指令查看 Job Logs,kubectl logs -f jobs/mnist-inference-job -c tensorflow -n ai。
Log 中顯示該 Job 使用 TensorFlow 對 MNIST 數據集中的圖片進行了推斷,處理了位於 Pod 內/data/mnist_predict 目錄下的 0 到 9 的 PNG 圖片,並輸出了每張圖片的預測數字以及置信度。 所有圖片都被正確識別,置信度都非常高,大多接近 100%。
$ kubectl logs -f jobs/mnist-inference-job -c tensorflow -n ai
... 以上省略 ...
1/1 ━━━━━━━━━━━━━━━━━━━━ 1s 876ms/step
The image /data/mnist_predict/0.png is the number 0 with a 100.00 percent confidence.
The image /data/mnist_predict/1.png is the number 1 with a 99.97 percent confidence.
The image /data/mnist_predict/2.png is the number 2 with a 100.00 percent confidence.
The image /data/mnist_predict/3.png is the number 3 with a 99.85 percent confidence.
The image /data/mnist_predict/4.png is the number 4 with a 100.00 percent confidence.
The image /data/mnist_predict/5.png is the number 5 with a 100.00 percent confidence.
The image /data/mnist_predict/6.png is the number 6 with a 100.00 percent confidence.
The image /data/mnist_predict/7.png is the number 7 with a 100.00 percent confidence.
The image /data/mnist_predict/8.png is the number 8 with a 100.00 percent confidence.
The image /data/mnist_predict/9.png is the number 9 with a 99.29 percent confidence.
本文示範了如何在 Google Kubernetes Engine (GKE) 上使用 GPU 訓練和部署一個簡單的機器學習流水線,以 MNIST 手寫數字數據集為例。
訓練階段:
推論階段:
核心技術:
希望展示的簡易版機器學習工作流程,從數據準備、模型訓練到推論部署,都利用了 GCP 雲原生技術,實現了高效且可擴展的解決方案,可以幫助讀者迅速踏入 GKE ML 的世界中。