想建立一個行程表,當然少不了日期及時間的欄位呀!因此今天筆者將在TimeBlock物件中加入日期與時間的property,並讓資料成功寫入資料庫中。
DateTime官方API文件檔案:DateTime classdata/models/child_blocks.dart僅有以下幾個地方需要修改:
TimeBlock的建構式constructorTimeBlock的toMap()函式(將Block轉為Map)TimeBlock的toBlock()函式(將Map轉為Block)class TimeBlock extends Block {
late DateTime estimatedTime, deadline;
TimeBlock()
: estimatedTime = DateTime.now(),
deadline = DateTime.now();
TimeBlock.name(super.name)
: estimatedTime = DateTime.now(),
deadline = DateTime.now(),
super.name();
TimeBlock.detail(
{super.name,
super.category,
super.notes,
DateTime? estimatedTime,
DateTime? deadline})
: super.detail() {
if (estimatedTime == null) {
this.estimatedTime = DateTime.now();
} else {
this.estimatedTime = estimatedTime;
}
if (deadline == null) {
this.deadline = DateTime.now();
} else {
this.deadline = deadline;
}
}
在宣告變數時,須注意要在變數類別前加上late,代表之後才會設定其值。而在建構式中,必須設定日期時間的值,在此設定為使用者建立TimeBlock物件的時間:DateTime.now()
  @override
  Map<String, Object?> toMap() {
    return {
      'id': id,
      'name': name,
      'category': category,
      'estimatedTime': estimatedTime.toString(),
      'deadline': deadline.toString(),
      'notes': notes,
    };
  }
在這個Map的部份,要將Block物件的所有內容的資料型態都轉為字串String,因此使用DateTime.toString()來將資料轉成如"2024-10-09 22:48:22.788296"的字串型態。
  @override
  TimeBlock toBlock(Map<String, Object?> data) {
    return TimeBlock.detail(
      name: data['name'].toString(),
      category: data['category'].toString(),
      estimatedTime: DateTime.tryParse(data['estimatedTime'].toString()),
      deadline: DateTime.tryParse(data['deadline'].toString()),
      notes: data['notes'].toString(),
    );
  }
在toMap中,使用了DateTime.toString()來將日期時間轉為字串,而這個字串的格式能夠再使用DateTime.tryParse()來將其轉回DateTime物件。
這部份須注意,要使用tryParse(),而非parse(),若直接使用後者,若parsing的過程有錯誤,會使得資料庫無法在應用程式中讀取與顯示。
現在,來在建立新物件的頁面放上日期時間的設定欄位吧!
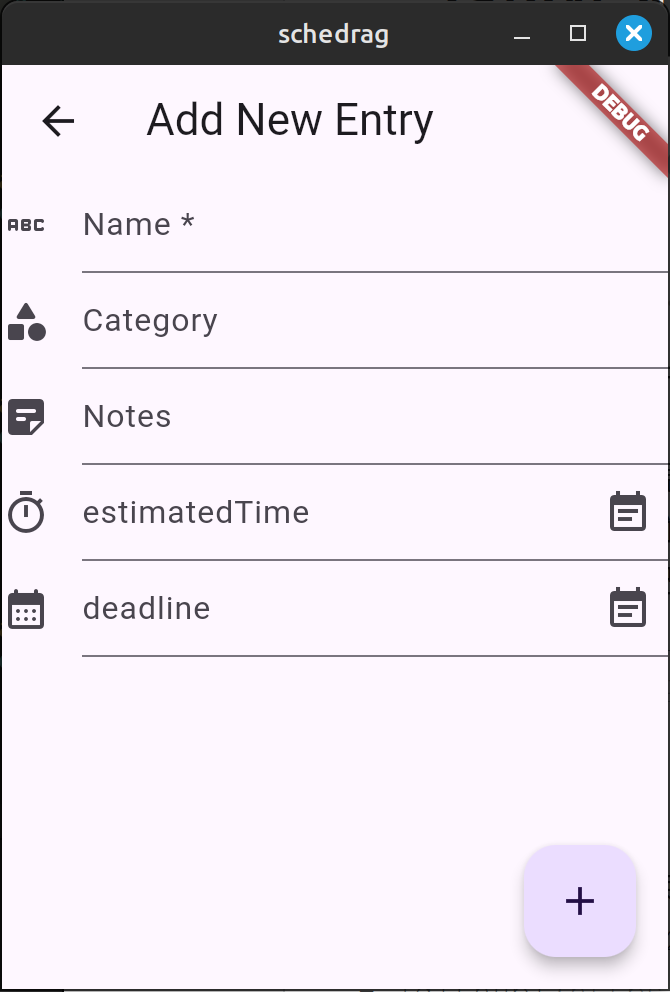
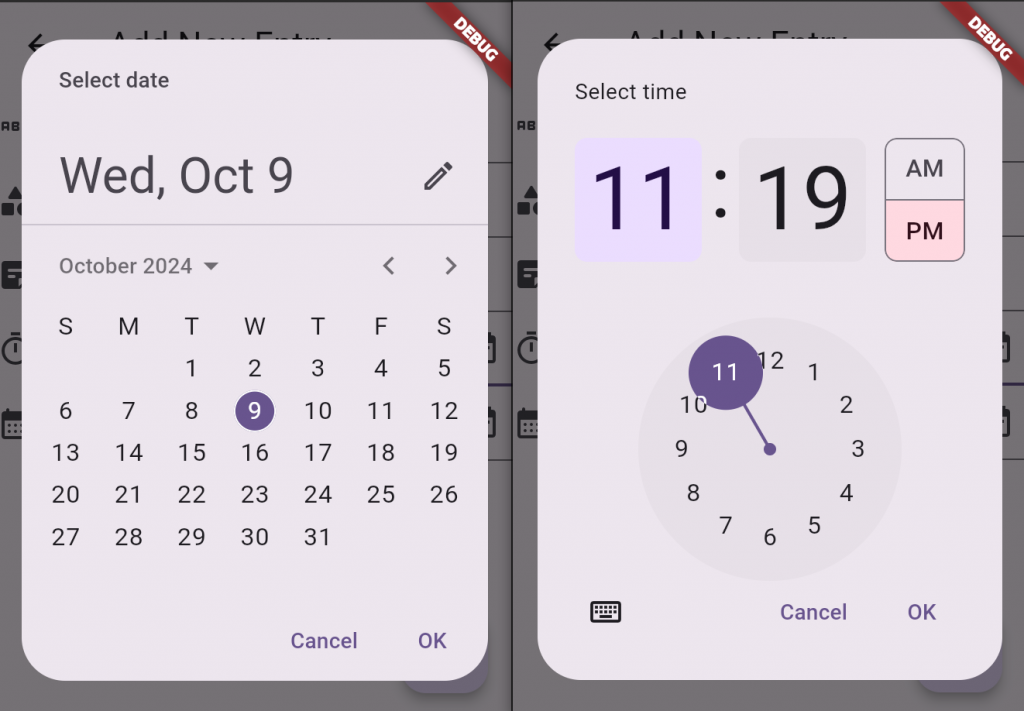
加入新程式碼後,新增介面將會長像這樣:

這部份的的FormField是使用DateTimeFormField的API。
首先先在pubspec.yaml加入下列package:
dependencies:
  intl: ^0.19.0
  date_field: ^5.3.0
我們接下來將使用date_field中的DateTimeFormField物件,至於intl則是用於初始化時間設定,方法如下:
import 'package:intl/intl_standalone.dart' if (dart.library.html) 'package:intl/intl_browser.dart';

Future main() async {
  // init time
  WidgetsFlutterBinding.ensureInitialized();
  await findSystemLocale();

  runApp(const MyApp());
}
上圖中的兩個輸入欄位的程式碼如下:
DateTimeFormField(
  decoration: const InputDecoration(
    icon: Icon(Icons.timer_outlined),
    labelText: "estimatedTime",
  ),
  onChanged: (value) => setState(() => times[0] = value),
),
DateTimeFormField(
  decoration: const InputDecoration(
    icon: Icon(Icons.calendar_month_rounded),
    labelText: "deadline",
  ),
  onChanged: (value) => setState(() => times[1] = value),
)
與之前的TextFormField不同,DateTimeFormField沒有controller可以設定,取而代之的是必須設定資料受到更改時要做的動作:onChanged。在此設定受更改時將使用者輸入的數值存入此頁面的物件_EntryFormState的變數List<DateTime?> times之中。
最後再簡單修改一下新增按鈕的db.insert內容,就大功告成了!
 floatingActionButton: FloatingActionButton(
  onPressed: () {
    if (db != null && _formKey.currentState!.validate()) {
      db?.insert(TimeBlock.detail(
          name: controllers[Tags.name.index].text,
          category: controllers[Tags.category.index].text,
          estimatedTime: times[0],
          deadline: times[1],
          notes: controllers[Tags.notes.index].text));
      Navigator.pop(context);
    }
  },
  child: const Icon(Icons.add),
),
成功新增後如果去開啟資料庫的db檔案,可以看到最下方已經成功新增了擁有日期時間的資料了!
今天的部份就到此結束,謝謝閱讀到這裡的讀者。有任何問題或是想說的都歡迎留言及email,明天會繼續努力的!
