本文將簡單示範如何使用 ADO.NET 實體資料模型,建立資料庫連接!
實作開始
打開Visual Studio,並選擇建立的專案種類Windows forms app (.net framework)。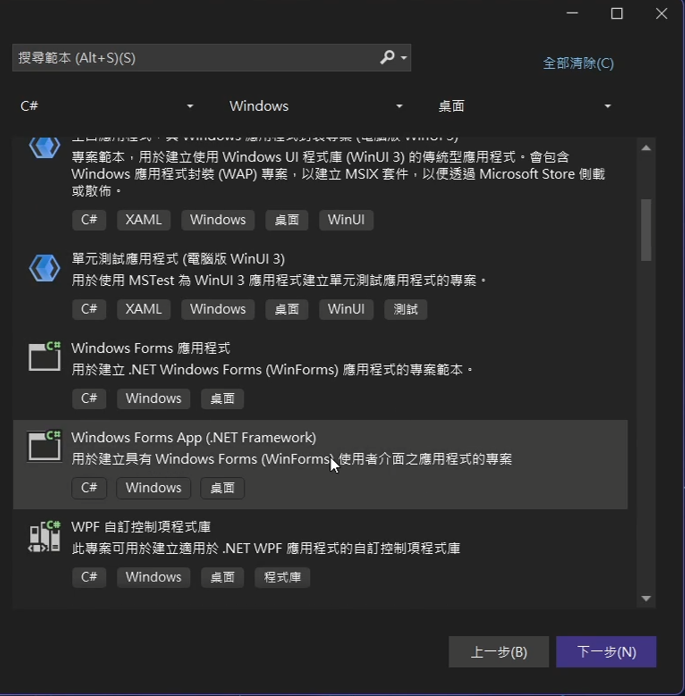
前往自己的資料庫然後輸入指令。
本篇使用的是SSMS 資料庫管理系統。
資料庫種類為SQL SERVER。
1.創建資料庫
CREATE DATABASE TEST
2.使用資料庫
USE TEST;
3.建立資料表
CREATE TABLE users (
    ID INT IDENTITY(1,1) PRIMARY KEY,
    NAME NVARCHAR(100) NOT NULL,
    PHONE NVARCHAR(20) NOT NULL
);
4.插入資料
INSERT INTO users (NAME, PHONE) VALUES
('Steve', '0912345678'),
('Alice', '0987654321'),
('Jason', '0955112233');
1.新增資料夾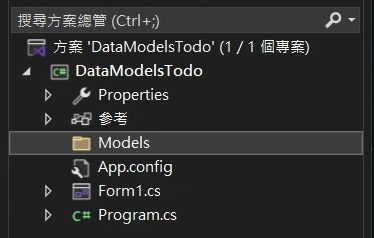
2.在資料夾內,新增項目選擇ADO.NET實體資料模型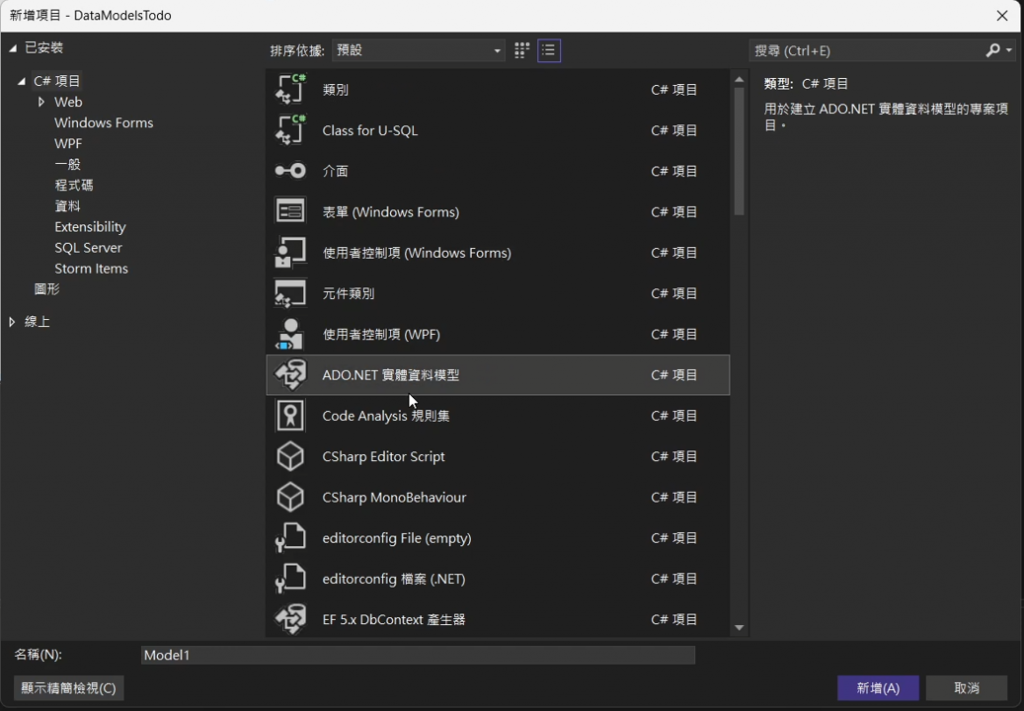
3.資料模型選擇來自資料庫的EF Designer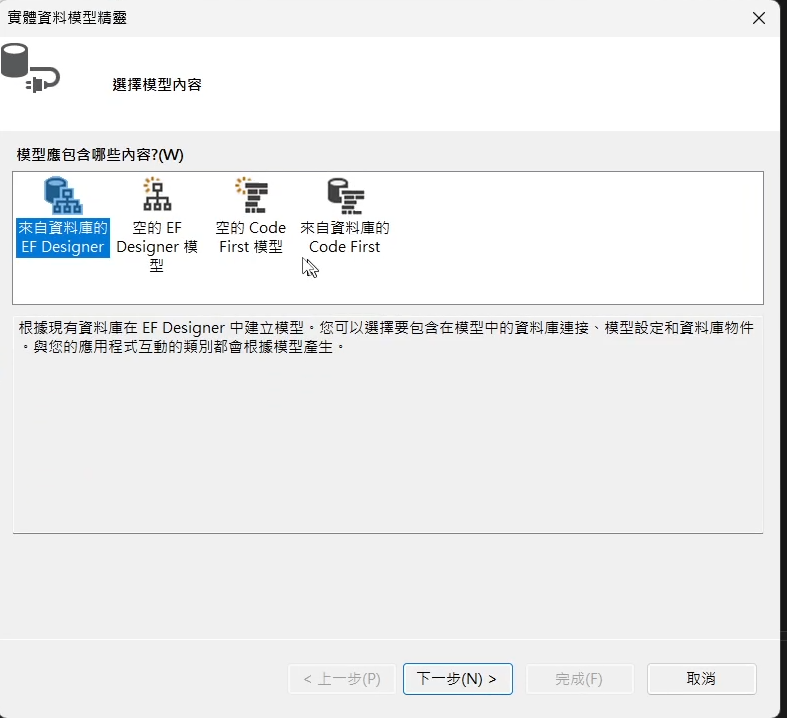
4.再來選擇新增連接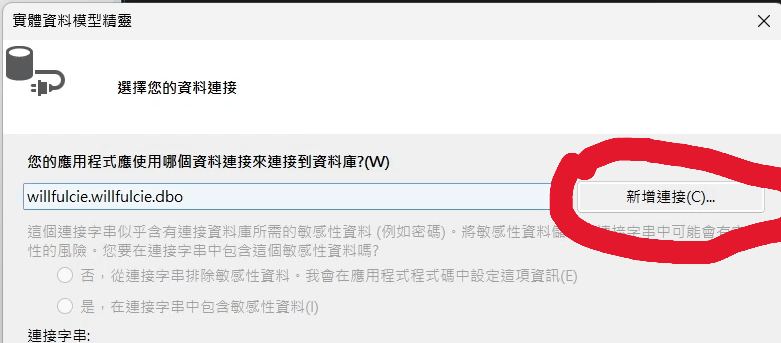
5.由於資料是從資料庫取得的,這邊資料來源要改成Microsoft SQL server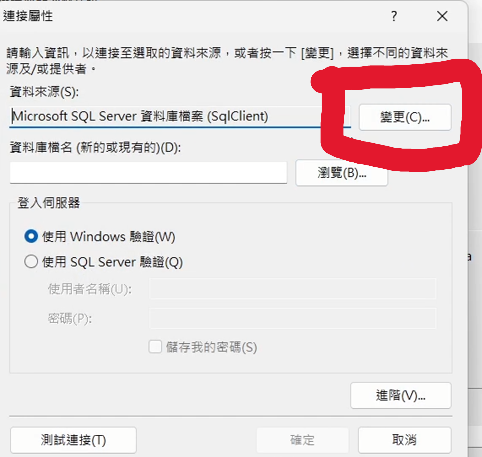

6.驗證方式請選擇SQL server 驗證,資料庫名稱也要打上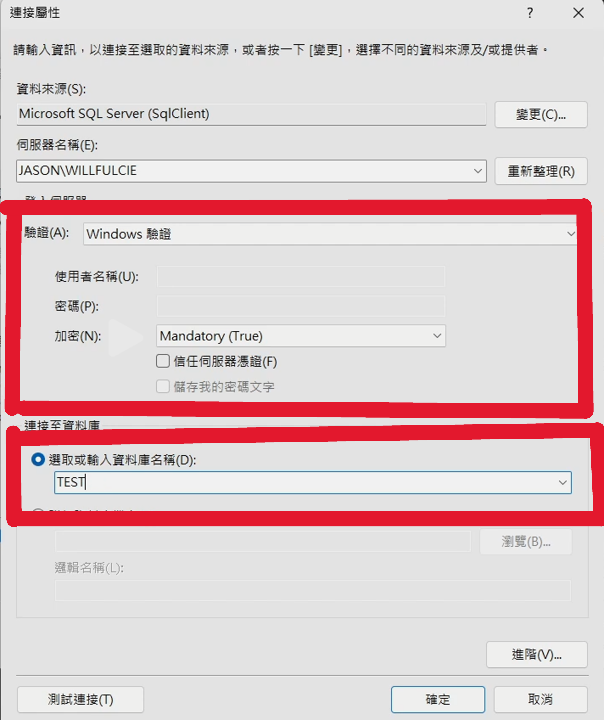
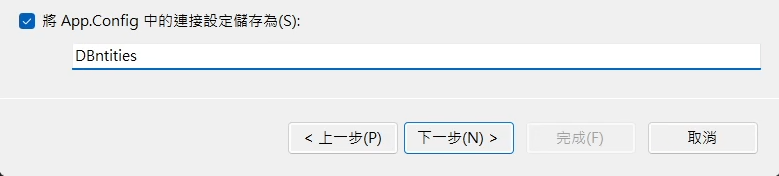
7.選擇完後可以改一下名稱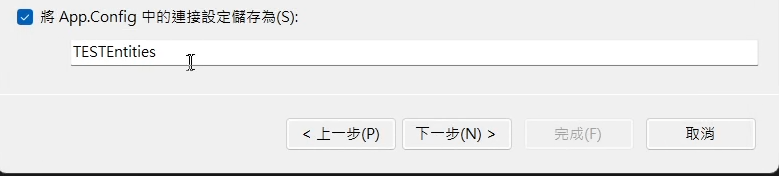
8.接下來就要選擇資料的內容了,這邊我就選剛剛建立的資料表,底下的模型命名空間會影響程式的寫法,這邊我稍微改一下名字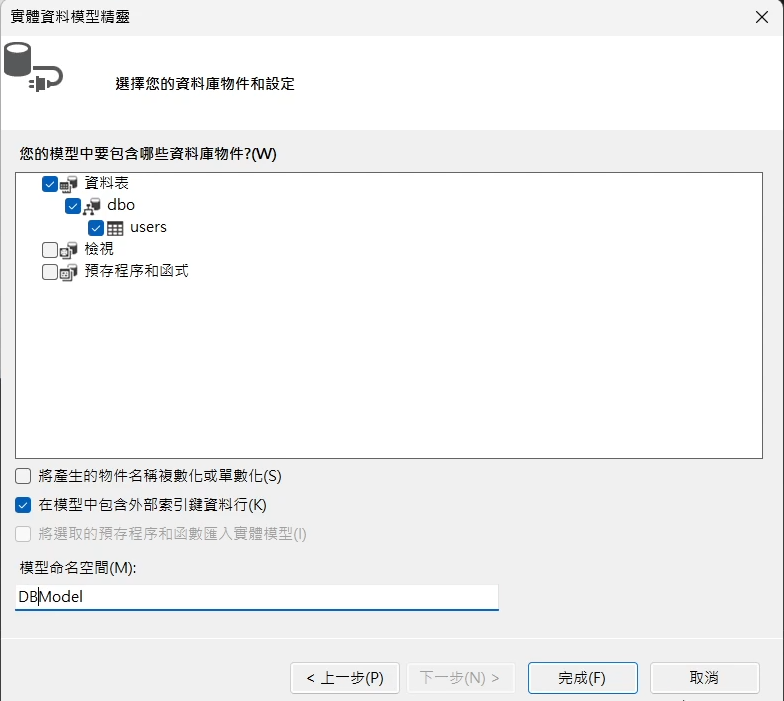
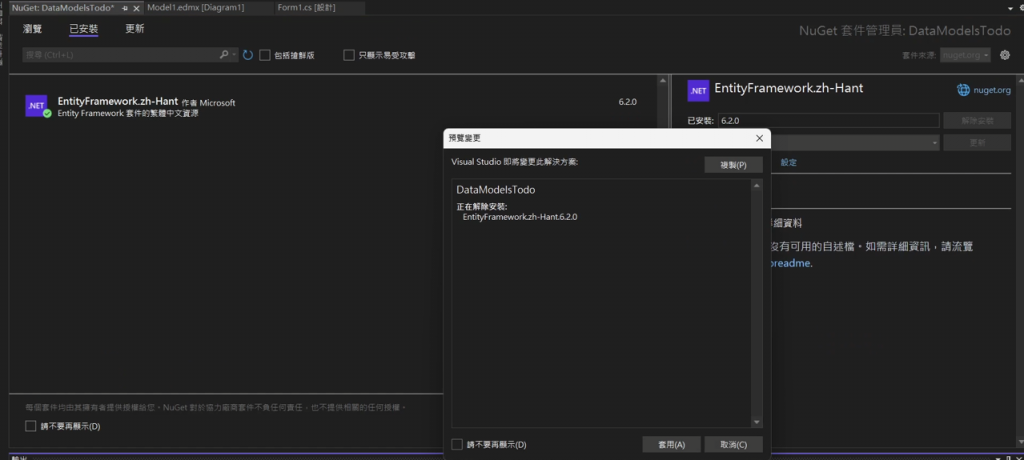
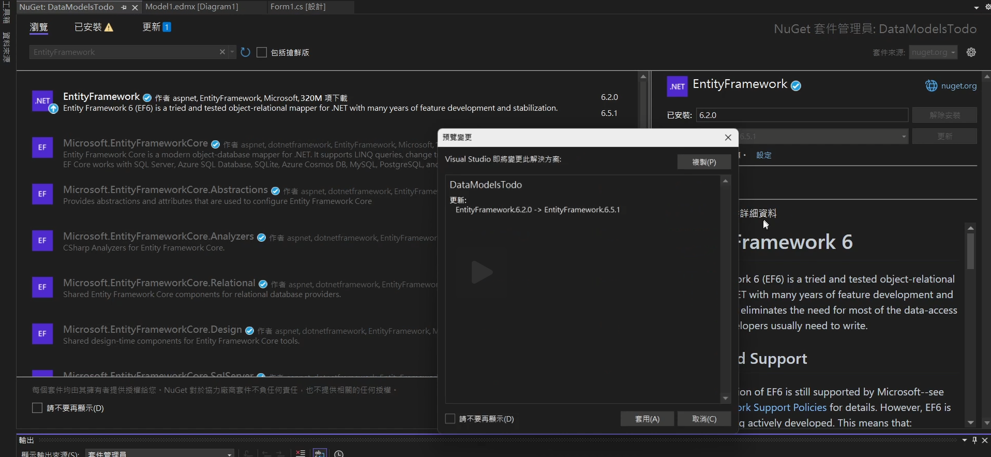
9.完成後如果出現此錯誤的話,只需要更新套件到最新版就好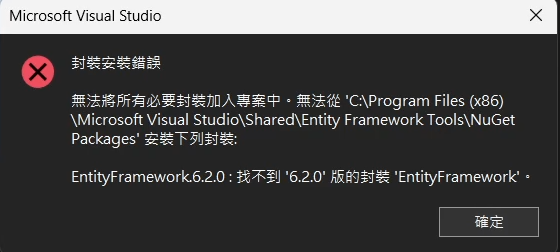
10.對專案點擊右鍵,打開管理NuGet套件,將套件更新就好了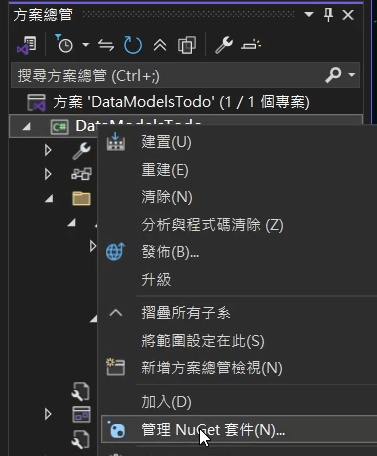
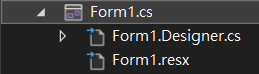
1.在Form1.Designer.cs,將class Form1的內容改成下列,主要是透過 Button 來控制資料操作,並透過 DataGridView 來顯示資料
        private System.ComponentModel.IContainer components = null;

        protected override void Dispose(bool disposing)
        {
            if (disposing && (components != null))
            {
                components.Dispose();
            }
            base.Dispose(disposing);
        }
        private void InitializeComponent()
        {
            this.RUN = new System.Windows.Forms.Button();
            this.Add = new System.Windows.Forms.Button();
            this.AddRange = new System.Windows.Forms.Button();
            this.Remove = new System.Windows.Forms.Button();
            this.RemoveRange = new System.Windows.Forms.Button();
            this.RemoveAt = new System.Windows.Forms.Button();
            this.dataGridView1 = new System.Windows.Forms.DataGridView();
            ((System.ComponentModel.ISupportInitialize)(this.dataGridView1)).BeginInit();
            this.SuspendLayout();
            //
            // RUN
            //
            this.RUN.Location = new System.Drawing.Point(50, 50);
            this.RUN.Name = "RUN";
            this.RUN.Size = new System.Drawing.Size(100, 30);
            this.RUN.TabIndex = 0;
            this.RUN.Text = "顯示資料";
            this.RUN.UseVisualStyleBackColor = true;
            this.RUN.Click += new System.EventHandler(this.RUN_Click);
            //
            // Add
            //
            this.Add.Location = new System.Drawing.Point(50, 100);
            this.Add.Name = "Add";
            this.Add.Size = new System.Drawing.Size(100, 30);
            this.Add.TabIndex = 1;
            this.Add.Text = "新增";
            this.Add.UseVisualStyleBackColor = true;
            this.Add.Click += new System.EventHandler(this.Add_Click);
            //
            // AddRange
            //
            this.AddRange.Location = new System.Drawing.Point(50, 150);
            this.AddRange.Name = "AddRange";
            this.AddRange.Size = new System.Drawing.Size(100, 30);
            this.AddRange.TabIndex = 2;
            this.AddRange.Text = "批量新增";
            this.AddRange.UseVisualStyleBackColor = true;
            this.AddRange.Click += new System.EventHandler(this.AddRange_Click);
            //
            // Remove
            //
            this.Remove.Location = new System.Drawing.Point(50, 200);
            this.Remove.Name = "Remove";
            this.Remove.Size = new System.Drawing.Size(100, 30);
            this.Remove.TabIndex = 3;
            this.Remove.Text = "刪除";
            this.Remove.UseVisualStyleBackColor = true;
            this.Remove.Click += new System.EventHandler(this.Remove_Click);
            //
            // RemoveRange
            //
            this.RemoveRange.Location = new System.Drawing.Point(50, 250);
            this.RemoveRange.Name = "RemoveRange";
            this.RemoveRange.Size = new System.Drawing.Size(100, 30);
            this.RemoveRange.TabIndex = 4;
            this.RemoveRange.Text = "批量刪除";
            this.RemoveRange.UseVisualStyleBackColor = true;
            this.RemoveRange.Click += new System.EventHandler(this.RemoveRange_Click);
            //
            // RemoveAt
            //
            this.RemoveAt.Location = new System.Drawing.Point(50, 300);
            this.RemoveAt.Name = "RemoveAt";
            this.RemoveAt.Size = new System.Drawing.Size(100, 30);
            this.RemoveAt.TabIndex = 5;
            this.RemoveAt.Text = "刪除索引";
            this.RemoveAt.UseVisualStyleBackColor = true;
            this.RemoveAt.Click += new System.EventHandler(this.RemoveAt_Click);
            //
            // dataGridView1
            //
            this.dataGridView1.ColumnHeadersHeightSizeMode = System.Windows.Forms.DataGridViewColumnHeadersHeightSizeMode.AutoSize;
            this.dataGridView1.Location = new System.Drawing.Point(200, 50);
            this.dataGridView1.Name = "dataGridView1";
            this.dataGridView1.RowHeadersWidth = 51;
            this.dataGridView1.RowTemplate.Height = 27;
            this.dataGridView1.Size = new System.Drawing.Size(550, 330);
            this.dataGridView1.TabIndex = 6;
            //
            // Form1
            //
            this.AutoScaleDimensions = new System.Drawing.SizeF(8F, 15F);
            this.AutoScaleMode = System.Windows.Forms.AutoScaleMode.Font;
            this.ClientSize = new System.Drawing.Size(800, 450);
            this.Controls.Add(this.dataGridView1);
            this.Controls.Add(this.RUN);
            this.Controls.Add(this.Add);
            this.Controls.Add(this.AddRange);
            this.Controls.Add(this.Remove);
            this.Controls.Add(this.RemoveRange);
            this.Controls.Add(this.RemoveAt);
            this.Name = "Form1";
            this.Text = "資料管理系統";
            ((System.ComponentModel.ISupportInitialize)(this.dataGridView1)).EndInit();
            this.ResumeLayout(false);

        }
        private System.Windows.Forms.Button RUN;
        private System.Windows.Forms.Button Add;
        private System.Windows.Forms.Button AddRange;
        private System.Windows.Forms.Button Remove;
        private System.Windows.Forms.Button RemoveRange;
        private System.Windows.Forms.Button RemoveAt;
        private System.Windows.Forms.DataGridView dataGridView1;
成功的話應該會長這樣
2.對From1.cs點擊右鍵,打開程式碼,將class Form1的內容改成下列,主要用於實作示範的程式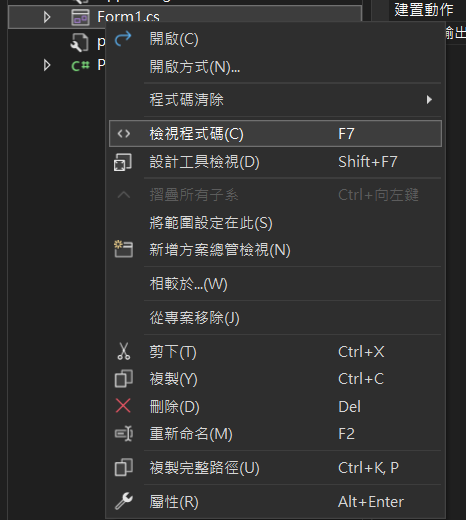
       public partial class Form1 : Form
    {
        public Form1()
        {
            InitializeComponent();
        }

        private Models.DBntities db = new Models.DBntities(); // 建立資料庫物件

        // 「顯示資料」按鈕
        private void RUN_Click(object sender, EventArgs e)
        {
            List<Models.users> obj = db.users.ToList();
            dataGridView1.DataSource = obj;
        }

        // 新增一筆使用者資料
        private void Add_Click(object sender, EventArgs e)
        {
            var newuser = new Models.users { NAME = "MoMo", PHONE = "0912345678" };
            db.users.Add(newuser); // 新增資料至資料庫
            db.SaveChanges(); // 儲存變更
            MessageBox.Show("新增成功!");
            RUN_Click(sender, e); // 重新載入資料
        }

        // 批量新增多筆使用者資料
        private void AddRange_Click(object sender, EventArgs e)
        {
            var userslist = new List<Models.users>
            {
                new Models.users { NAME = "Wilfulcie", PHONE = "0987654321" },
                new Models.users { NAME = "Josh", PHONE = "0955112233" }
            };
            db.users.AddRange(userslist); // 批量新增
            db.SaveChanges(); // 儲存變更
            MessageBox.Show("多筆新增成功!");
            RUN_Click(sender, e);
        }

        // 刪除指定 ID 的使用者資料
        private void Remove_Click(object sender, EventArgs e)
        {
            int userid = 1; // 假設要刪除 ID 為 1 的使用者
            var user = db.users.Find(userid);
            if (user != null)
            {
                db.users.Remove(user); // 刪除使用者
                db.SaveChanges(); // 儲存變更
                MessageBox.Show("刪除成功!");
                RUN_Click(sender, e);
            }
            else
            {
                MessageBox.Show("找不到該用戶!");
            }
        }

        // 批量刪除符合條件的使用者資料
        private void RemoveRange_Click(object sender, EventArgs e)
        {
            var userstoremove = db.users.Where(u => u.NAME.Contains("J")).ToList(); // 篩選符合條件的使用者
            if (userstoremove.Any())
            {
                db.users.RemoveRange(userstoremove); // 批量刪除
                db.SaveChanges(); // 儲存變更
                MessageBox.Show("多筆刪除成功!");
                RUN_Click(sender, e);
            }
            else
            {
                MessageBox.Show("找不到符合條件的用戶!");
            }
        }

        // 「刪除索引」按鈕
        private void RemoveAt_Click(object sender, EventArgs e)
        {
            var allusers = db.users.ToList(); // 取得所有使用者
            if (allusers.Count > 0)
            {
                db.users.Remove(allusers[0]); // 移除第一筆資料
                db.SaveChanges(); // 儲存變更
                MessageBox.Show("索引刪除成功!");
                RUN_Click(sender, e);
            }
            else
            {
                MessageBox.Show("沒有資料可刪除!");
            }
        }
    }
指令列表
| 指令 | 功能 |
|---|---|
| Add() | 新增 |
| AddRange() | 多筆新增 |
| Remove() | 移除指定資料 |
| RemoveRange() | 移除多筆資料 |
| RemoveAt() | 移除指定索引的資料 |
| SaveChange() | 儲存最終結果 |
我們在 Form1 中建立 DBEntities 物件來操作資料庫:
DBEntities的物件名來自上圖
// 建立資料庫物件,用於操作 users 資料表
private Models.DBEntities db = new Models.DBEntities();
當使用者點擊 顯示資料 按鈕時,程式會從 users 資料表讀取所有資料,並顯示於 dataGridView1。
// 顯示所有使用者資料
private void RUN_Click(object sender, EventArgs e)
{
    List<Models.users> obj = db.users.ToList(); // 取得所有使用者資料
    dataGridView1.DataSource = obj; // 顯示於 DataGridView
}
點擊 新增 按鈕後,我們會將一筆新資料 MoMo 加入 users 資料表中,並儲存變更。
// 新增一筆使用者資料
private void Add_Click(object sender, EventArgs e)
{
    var newuser = new Models.users { NAME = "MoMo", PHONE = "0912345678" };
    db.users.Add(newuser); // 新增資料至資料庫
    db.SaveChanges(); // 儲存變更
    MessageBox.Show("新增成功!");
    RUN_Click(sender, e); // 重新載入資料
}
點擊 批量新增,可一次新增多筆資料。
// 批量新增多筆使用者資料
private void AddRange_Click(object sender, EventArgs e)
{
    var userslist = new List<Models.users>
    {
        new Models.users { NAME = "Wilfulcie", PHONE = "0987654321" },
        new Models.users { NAME = "Josh", PHONE = "0955112233" }
    };
    db.users.AddRange(userslist); // 批量新增
    db.SaveChanges(); // 儲存變更
    MessageBox.Show("多筆新增成功!");
    RUN_Click(sender, e);
}
點擊 刪除 按鈕後,會刪除 ID = 1 的資料。
// 刪除指定 ID 的使用者資料
private void Remove_Click(object sender, EventArgs e)
{
    int userid = 1; // 假設要刪除 ID 為 1 的使用者
    var user = db.users.Find(userid);
    if (user != null)
    {
        db.users.Remove(user); // 刪除使用者
        db.SaveChanges(); // 儲存變更
        MessageBox.Show("刪除成功!");
        RUN_Click(sender, e);
    }
    else
    {
        MessageBox.Show("找不到該用戶!");
    }
}
點擊 批量刪除 按鈕後,會刪除所有 NAME 包含 J 的資料。
// 批量刪除符合條件的使用者資料
private void RemoveRange_Click(object sender, EventArgs e)
{
    var userstoremove = db.users.Where(u => u.NAME.Contains("J")).ToList(); // 篩選符合條件的使用者
    if (userstoremove.Any())
    {
        db.users.RemoveRange(userstoremove); // 批量刪除
        db.SaveChanges(); // 儲存變更
        MessageBox.Show("多筆刪除成功!");
        RUN_Click(sender, e);
    }
    else
    {
        MessageBox.Show("找不到符合條件的用戶!");
    }
}
點擊 刪除索引 按鈕後,刪除 users 中的第一筆資料。
// 刪除清單中的第一筆資料
private void RemoveAt_Click(object sender, EventArgs e)
{
    var allusers = db.users.ToList(); // 取得所有使用者
    if (allusers.Count > 0)
    {
        db.users.Remove(allusers[0]); // 移除第一筆資料
        db.SaveChanges(); // 儲存變更
        MessageBox.Show("索引刪除成功!");
        RUN_Click(sender, e);
    }
    else
    {
        MessageBox.Show("沒有資料可刪除!");
    }
}
你都己經做 API 了,怎麼不整合起來呢?? 以 MVC 為基礎為主來提供 WinForm 整合,還比較有一個新意,不然就是照書抄再貼上來
這是作業哈哈
 willfulcie

 iThome鐵人賽