Alright, Alright, 這裡是鐵匠史密斯~
前兩天我們處理了畫布 screen ,以及將其畫在設置成作用中緩衝區的 hConsole 上,使得 Console 顯示的畫面是我們自定義的畫布!
那,「 我們的遊戲世界是怎麼出來的呢? 」
該是來畫地圖 wstring map 的時刻了
wstring map直接上程式碼~
#include <iostream>
#include <Windows.h>
#include <string>
using namespace std;

int nMapWidth { 16 };
int nMapHeight { 16 };

float fPlayerX{ 8.0f };
float fPlayerY{ 11.0f };

int main()
{
    const int nScreenWidth { 80 };
    const int nScreenHeight { 30 };

    // Create the canvas
    wchar_t* screen{ new wchar_t[nScreenWidth * nScreenHeight] };
    .
    .
    .
    // Create world map
    std::wstring map{};

    map += L"################";
    map += L"#..............#";
    map += L"#..............#";
    map += L"#..............#";
    map += L"#..............#";
    map += L"#..............#";
    map += L"#..............#";
    map += L"#..............#";
    map += L"#..............#";
    map += L"#..............#";
    map += L"#..............#";
    map += L"#..............#";
    map += L"#..............#";
    map += L"#..............#";
    map += L"#..............#";
    map += L"################";

    while (true) {
        // Write cavas into console to show screen
        WriteConsoleOutputCharacter(hConsole, screen, nScreenWidth * nScreenHeight, { 0,0 }, &dwBytesWritten);
    }
    return 0;

}
上面可以知道,我們初始化了 nMapWidth , nMapHeight 以及 map, map 資料型態為 wstring , 表面上是擁有擴充字元(wide character)的字串(1-D 陣列),但我們利用多次 += 的方式,讓 map 代表了 2-D的地圖 : 每一行 16 個字元,共 16 行
→ 就是 16×16 的地圖
wstring vs wchar_t ?為什麼明明都是使用擴充字元(wide character),卻有分成 wstring 以及 wchar_t 呢?
對我來說,差別如下:
wchar_t* 在本程式中是一個 array,array是大小不能變動的陣列,且聽說是專門用在Windows API(就是Day 3 建立、設置畫面緩衝區的功能)wstring 是一個 list,是一個大小可變動的陣列,是C++ STL 標準庫的資料型別之一, 這樣我們就可以任意改變地圖的大小了!小弟認為這些資料型別又可以寫成多篇文章了lol 之後來研究一下~
是,我們是乞丐超人,我們不能創造以面(polygon)構成的地圖,我們目前只能創造以"點"的形式構成的地圖
我們以 # 為牆壁, . 為空地的地圖 (16 x 16) 目前長這樣: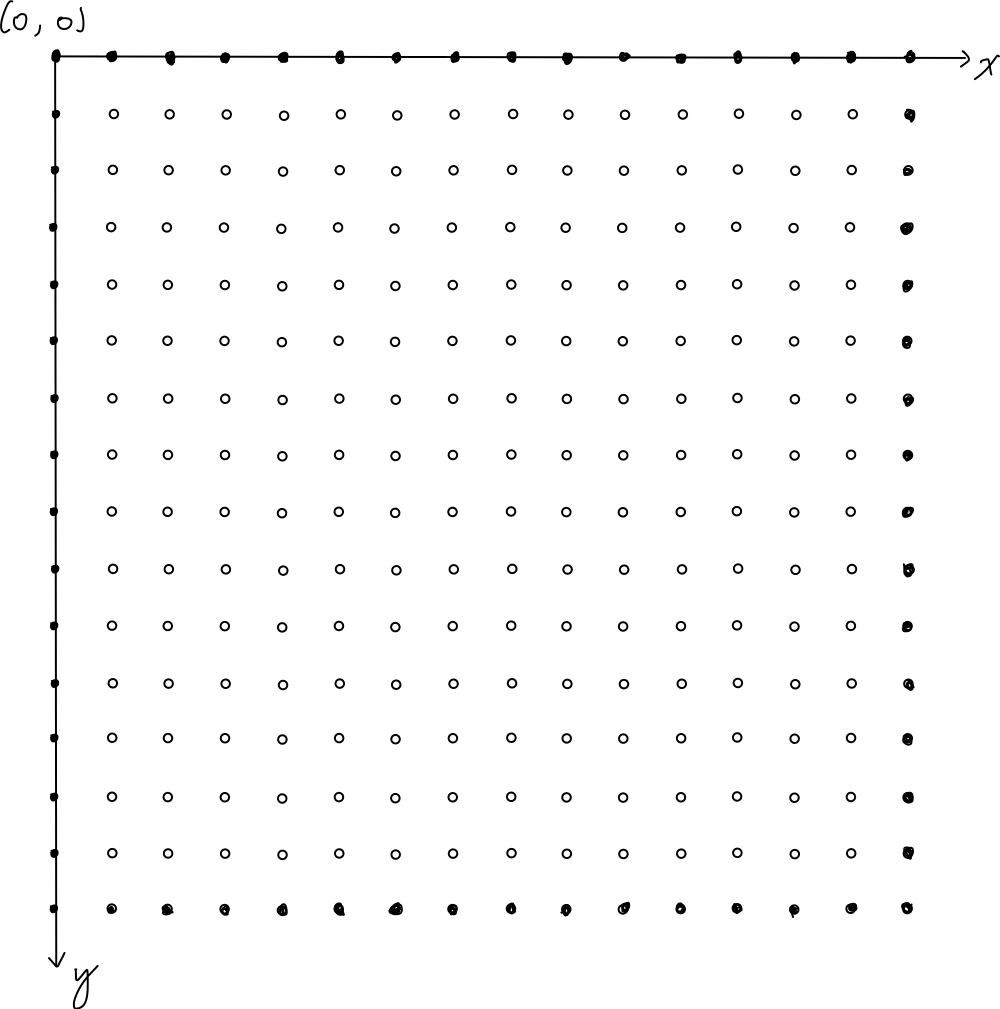
就像平面顯示器的顯示順序,以及OpenCV的座標一樣,在Computer Graphic(計算機圖學)中都是:
其實,我們初始化 nMapWidth 以及 nMapHeight 是為了存取陣列內容的數值:
map[y * nMapWidth + x]
這樣我們就是以2-D座標的方式存取1-D擴充字元陣列中,特定index的值
假如,我想取得(x, y) = (2, 3)的值(已知 nMapWidhth = 16 ),就是:
map[3 * 16 + 2] = map[50]
為什麼要在世界地圖中取值? 後面會再度提到
wstring map
目前進度的程式碼如下:
#include <iostream>
#include <Windows.h>
#include <string>
using namespace std;

int nMapWidth { 16 };
int nMapHeight { 16 };

float fPlayerX{ 8.0f };
float fPlayerY{ 11.0f };

int main()
{
    const int nScreenWidth { 80 };
    const int nScreenHeight { 30 };

    // Create the canvas
    wchar_t* screen{ new wchar_t[nScreenWidth * nScreenHeight] };
    // Create elements in screen
    for (int i = 0; i < nScreenWidth * nScreenHeight; i++)
    {
        if (i < 1200)
            screen[i] = L' ';
        else
            screen[i] = L'%';
    }
    screen[nScreenWidth * nScreenHeight - 1] = '\0'; // null terminator


    // Create console handler (custom screen buffer)
    HANDLE hConsole{ CreateConsoleScreenBuffer(
        GENERIC_READ | GENERIC_WRITE, 0, NULL, CONSOLE_TEXTMODE_BUFFER, NULL) };
    // Set Active Screen Buffer so that console will show this buffer first
    SetConsoleActiveScreenBuffer(hConsole);
    DWORD dwBytesWritten{ 0 };


    // Create world map
    std::wstring map{};

    map += L"################";
    map += L"#..............#";
    map += L"#..............#";
    map += L"#..............#";
    map += L"#..............#";
    map += L"#..............#";
    map += L"#..............#";
    map += L"#..............#";
    map += L"#..............#";
    map += L"#..............#";
    map += L"#..............#";
    map += L"#..............#";
    map += L"#..............#";
    map += L"#..............#";
    map += L"#..............#";
    map += L"################";

    while (true) {
        // Write cavas into console to show screen
        WriteConsoleOutputCharacter(hConsole, screen, nScreenWidth * nScreenHeight, { 0,0 }, &dwBytesWritten);
    }
    return 0;

}
來了,明日要開始講解 fPlayerX 以及 fPlayerY 以及 RayCasting 基礎演算法的部分了,大概會拆個4-5天進行講解~
我們繼續走下去...30天...不簡單啊...

