Hello, fella! 這裡是鐵匠史密斯
我們今天就講述一下 C++ 大神 javidx9 是怎麼渲染地板的吧!
讓我們來回顧 地板、牆壁、天花板的占比
int nCeiling = (float)(nScreenHeight / 2.0) - nScreenHeight / ((float)fDistanceToWall);
int nFloor = (float)(nScreenHeight / 2.0) + nScreenHeight / ((float)fDistanceToWall)
由 nCeiling 、 nFloor 可以得知,當 fDistanceToWall 越大時, nCeiling 以及 nFloor 都在螢幕高度 y = nScreenHeight / 2.0 一半的位置
又因為
if (y < nCeiling) // If the pixel is above the nCeiling -> should be ceiling
{
    screen[y * nScreenWidth + x] = ' '; // Set to space
}
else if (y > nCeiling && y <= nFloor) // If the pixel is between the nCeiling and nFloor -> should be wall
{
    screen[y * nScreenWidth + x] = nShade; // Set to wall character
}
else // If the pixel is below the nFloor -> should be floor
{
...
}
可以知道:y < nCeiling : 屬於天花板y > nFloor : 屬於地板
我們可以推論得出:
y = nScreenHeight / 2.0 至 y = nScreenHeight
所以,我們在渲染天花板的時候,必須要考慮到上面的這個範圍,且因為玩家視野的關係,我們地板的渲染不像是牆壁大小、牆壁的渲染 一樣,依靠fDistance,我們只要遵從一個原理就好:
y = nScreenHeight / 2.0(螢幕的一半) -> 代表那處的地板離我們最遠
y = nScreenHeight -> 代表那處的地板離我們最近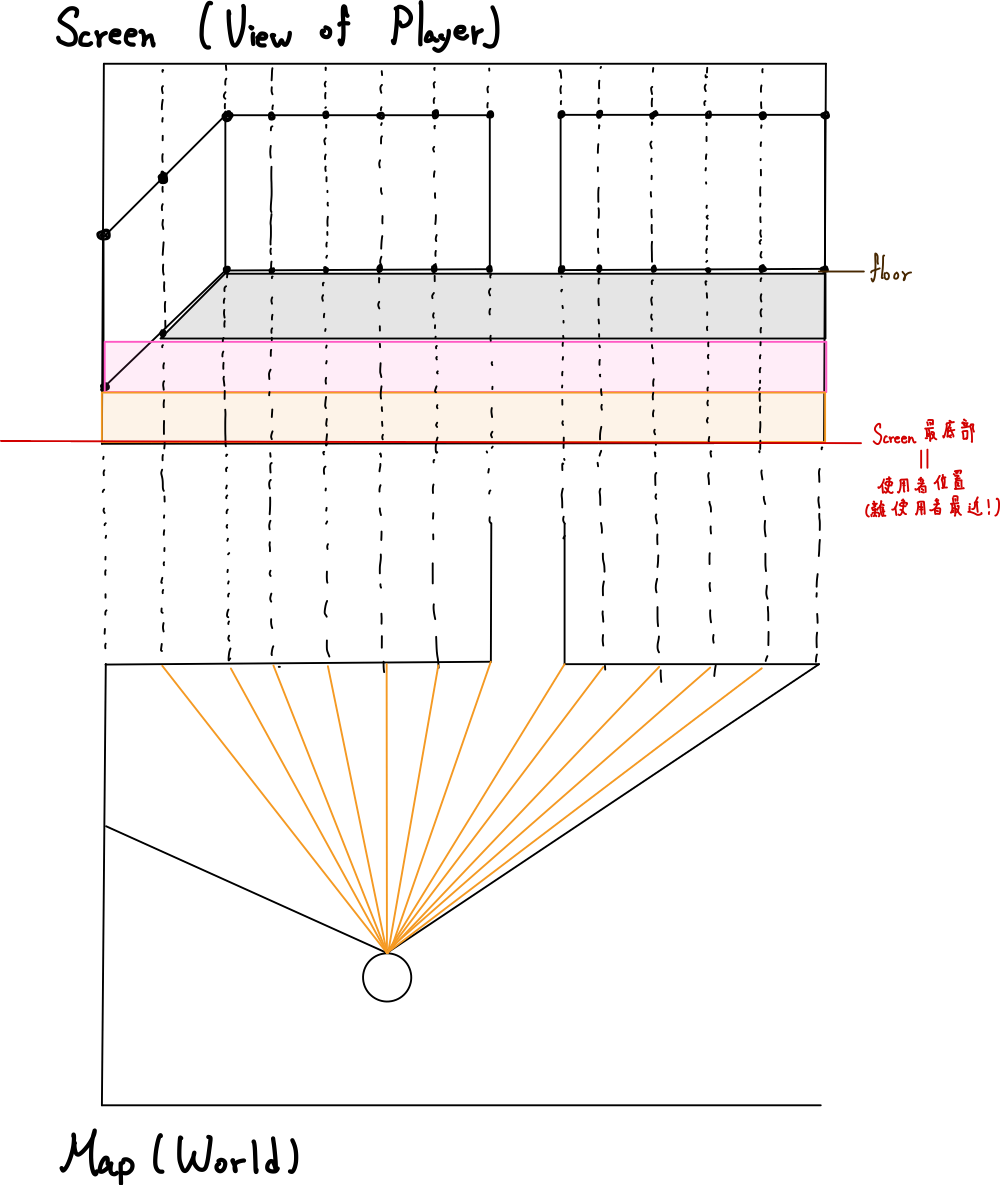
像圖片一樣,地板由上而下可以分成三個等分(程式中分為四個等分),如下:
// Shade floor based on poroption of the way from the center to the bottom of the screen
float b{ 1.0f - (((float)y - nScreenHeight / 2.0f) / ((float)nScreenHeight / 2.0f)) };
if (b < 0.25)
    nShade = '#';
else if (b < 0.5)
    nShade = 'x';
else if (b < 0.75)
    nShade = '.';
else if (b < 0.9)
    nShade = '-';
else
    nShade = ' ';
那javidx9 大神表示的公式:
float b{ 1.0f - (((float)y - nScreenHeight / 2.0f) / ((float)nScreenHeight / 2.0f)) };
是什麼呢?
對的,簡單來說,就是相對誤差。
也就是當下的 y 與 nScreenHeight / 2.0f 的相對誤差,利用這個相對誤差,我們可以制定4個臨界值(threshold),讓地板渲染成不同的字元: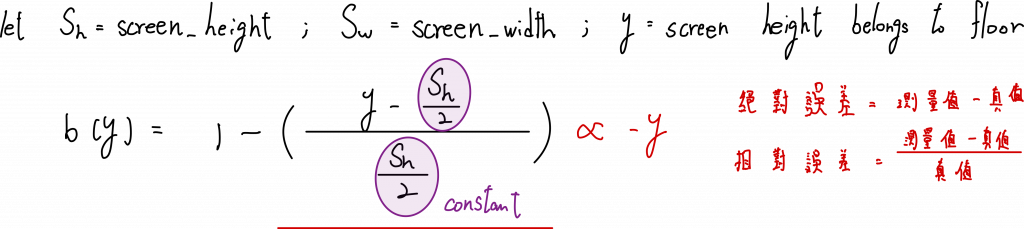
最簡單的驗證方式? 好吧,實在的紙跟筆永遠是你的好朋友:
來記錄 for 迴圈中, y值增加時,是如何渲染地板的吧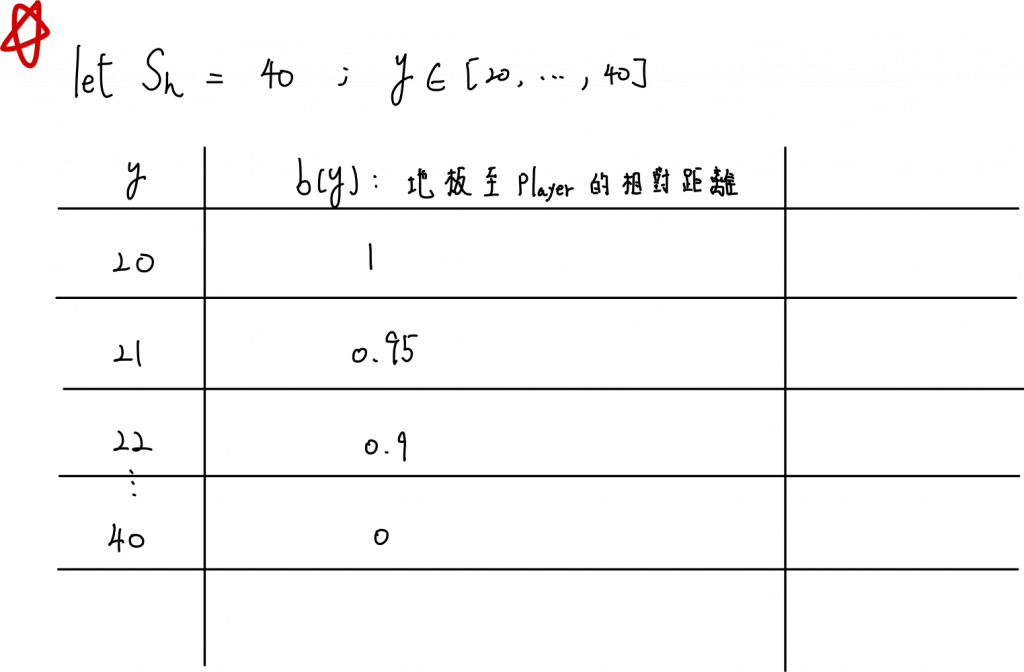
迭代後,我們可以知道,當 y = 40 = nScreenHegith 時, b = 0 ,此處的地板離我們最近,就可以用自己制定的4個臨界值(thershold)來判斷要渲染哪一個字元了
if (b < 0.25)
    nShade = '#';
else if (b < 0.5)
    nShade = 'x';
else if (b < 0.75)
    nShade = '.';
else if (b < 0.9)
    nShade = '-';
else
    nShade = ' ';
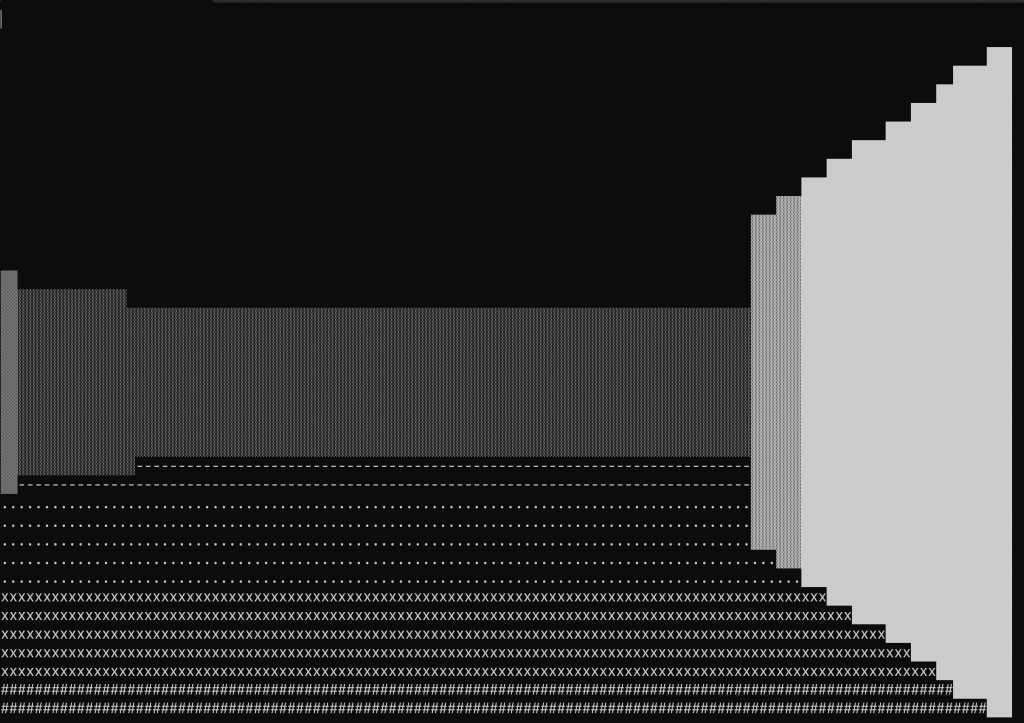
現在的畫面是不是越來越栩栩如生了呢~?
y = nScreenHeight / 2.0 到 y = nScreenHeight
fDistanceToWall 來決定高度與明暗,地板則依靠**「相對誤差 b」**來決定明暗#, x, ., -, ' ')今天我們把地板渲染的原理拆解清楚了,其實和光學的「遠近明暗」概念很像,
看似簡單的一行公式,背後卻是利用比例與人眼視覺直覺做出的巧妙設計。
明日我們再把角色的橫移完成吧~ 我們繼續走下去~

