
昨天我們已經介紹過 Basic Authentication 的概念:每次請求都把帳號密碼透過 Base64 編碼放進 Authorization Header。
今天我們就用 Spring Boot Security 來實際示範一次,看看它在程式裡要怎麼設定,以及怎麼用 Postman 測試。
這是我們這系列第一次使用到Eclispe,並且使用Spring boot Security的依賴,這邊如果不了解的,可以參考我之前寫的這份文章
大家可以直接去Clone第四天的專案來測試,這是我在第四天使用到的所有程式碼。
Git hub 程式碼:spring-security-30days day04
如果想要自己從新建立這份專案的,會推薦大家先了解如何創建Spring boot專案,並且如何注入POM依賴,學會之後就在POM中增加Spring boot Security跟Web的依賴。
		<dependency>
			<groupId>org.springframework.boot</groupId>
			<artifactId>spring-boot-starter-web</artifactId>
		</dependency>
	<dependency>
    	<groupId>org.springframework.boot</groupId>
    	<artifactId>spring-boot-starter-security</artifactId>
	</dependency>
前面都沒問題後,我們要先開始寫一個簡單的 BasicAuthController,這個的目的是建立一個API,將不同的API設定登入權限,讓我們可以實作。
package com.ansathsean.security;

import java.nio.charset.StandardCharsets;
import java.util.Base64;

import org.springframework.web.bind.annotation.GetMapping;
import org.springframework.web.bind.annotation.RestController;

import jakarta.servlet.http.HttpServletRequest;

@RestController
public class BasicAuthController {

    @GetMapping("/hello")
    public String hello() {
        return "Hello, you are authenticated!";
    }

    @GetMapping("/manual-basic-auth")
    public String checkAuth(HttpServletRequest request) {
        String authHeader = request.getHeader("Authorization");
        if (authHeader != null && authHeader.startsWith("Basic ")) {
            String base64Credentials = authHeader.substring("Basic ".length());
            String credentials = new String(Base64.getDecoder().decode(base64Credentials), StandardCharsets.UTF_8);

            // credentials = "username:password"
            String[] values = credentials.split(":", 2);
            String username = values[0];
            String password = values[1];

            if ("ithome".equals(username) && "secret".equals(password)) {
                return "Manual auth success!";
            }
        }
        return "Unauthorized";
    }
}
這裡我做了兩個 API:
/hello → 測試 Spring Security 的 Basic Auth 功能。/manual-basic-auth → 手動解析 Authorization Header,展示 Basic Auth 的運作原理。接著我們要在 Spring Security 裡設定 Basic Auth,這樣 Spring Security 會自動幫我們攔截請求並驗證。當我們使用SecurityConfig後,我們就可以簡化程式流程,更加靈活的設定我們的授權與權限。
package com.ansathsean.security.config;

import org.springframework.context.annotation.Bean;
import org.springframework.context.annotation.Configuration;
import org.springframework.security.config.annotation.web.builders.HttpSecurity;
import org.springframework.security.core.userdetails.User;
import org.springframework.security.core.userdetails.UserDetailsService;
import org.springframework.security.provisioning.InMemoryUserDetailsManager;
import org.springframework.security.web.SecurityFilterChain;

import static org.springframework.security.config.Customizer.withDefaults;

@Configuration
public class SecurityConfig {

    @Bean
    public UserDetailsService userDetailsService() {
        return new InMemoryUserDetailsManager(
                User.withUsername("ithome")
                        .password("{noop}secret") // {noop} 表示不加密
                        .roles("USER")
                        .build()
        );
    }

    @Bean
    SecurityFilterChain securityFilterChain(HttpSecurity http) throws Exception {
        http
            .csrf(csrf -> csrf.disable()) // 為了測試方便,先關閉 CSRF
            .authorizeHttpRequests(auth -> auth
                    .anyRequest().authenticated()
            )
            .httpBasic(withDefaults()); // 啟用 Basic Authentication

        return http.build();
    }
}
這段設定做了幾件事:
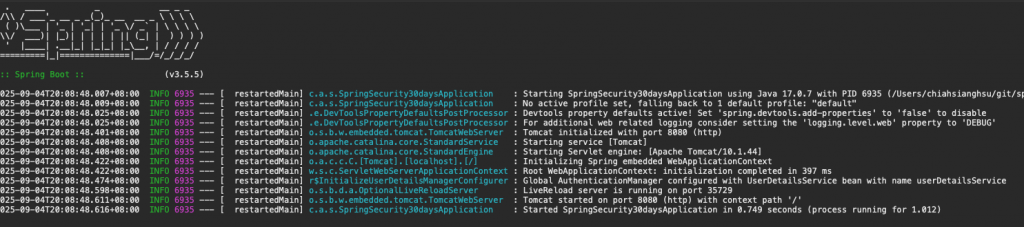
ithome / secret。啟動 Spring Boot 專案。
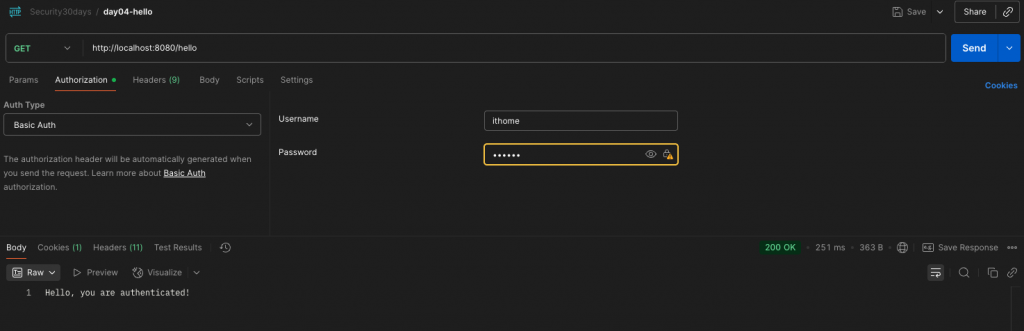
接下來我們可以用 Postman 測試:
GET http://localhost:8080/hello
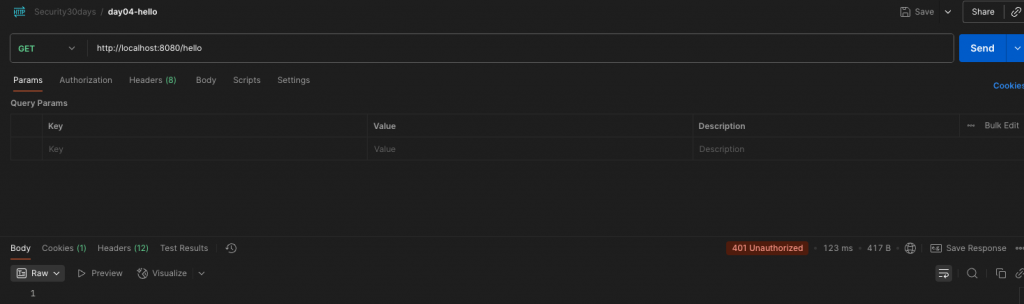
如果輸入 ithome / secret → 會回傳:
  ```
  Hello, you are authenticated!
  ```
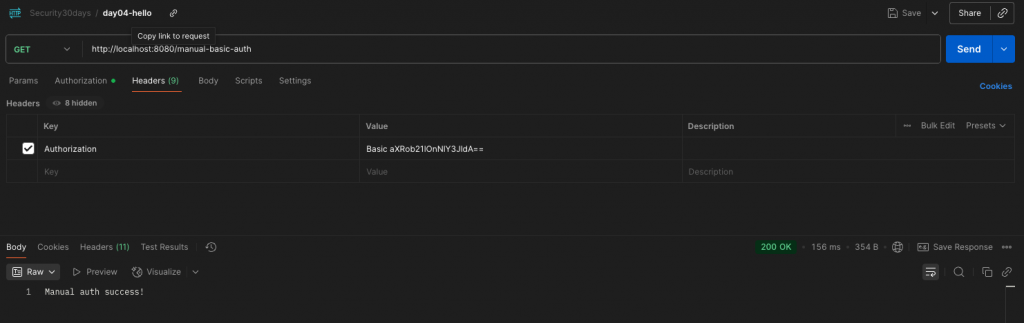
測時成功後,接下來我們可以來測試另一個,不靠Spring boot Security,靠我們自己寫程式來驗證的方式,可以看到我們需要寫得非常長,內容就變得非常多。
請求 GET http://localhost:8080/manual-basic-auth
在 Header 加入:
Authorization: Basic aXRob21lOnNlY3JldA==
(這個Basic後面就是ithome:secret 經過 Base64 編碼)
當我們成功後就能看到回應:
Manual auth success!
恭喜大家在今天成功實作了 Basic Authentication!
但它有幾個致命問題:
因此,Basic Auth 幾乎不會在正式專案中使用,頂多在測試環境、短期驗證 API或是內部系統中使用
今天我們透過 Spring Boot Security 成功實作了 Basic Authentication:
ithome / secret
雖然它運作簡單,但安全性不足,因此我們會在接下來的章節,介紹更安全、更進階的做法:Cookie Based Authentication。
簡單來說,就是不一直給密碼,而是驗證之後給你一張門票,當你重新登入的時候就使用這張門票。
明天我們要進一步學習 Cookie 與 Session 的登入機制,看看伺服器是怎麼「記住」使用者狀態的。
夕陽依舊那麼~美麗,明天還是要po文~
