在昨天比較條件渲染的內容中,透過實作Notes的部分程式碼來更加釐清v-if和v-show寫法的差異,今天內容將探討實作Notes的程式碼撰寫,複習先前學習過的插值表達式 {{ }} 以及v-bind、v-for、v-on、v-model等指令。
以下實作是使用Composition API撰寫,將著重講解<script setup>標籤的程式碼,以及<template>標籤內有使用到Vue語法的地方,HTML和CSS的基礎語法就不再此贅述:
首先要使用 ref 創建響應式資料、定義資料變數
import {ref} from "vue";
const showModal = ref(false)
const newNote = ref("")
const errorMessage = ref("")
const notes = ref([])
透過使用JavaScript的產生隨機顏色語法,可以讓筆記的背景顏色看起來更豐富些,並且設定顏色皆為淺色系,產生 0-360 度的色相值、飽和度為 100%、亮度為 75%。
function getRandomColor() {
  return "hsl(" + Math.random() * 360 + ", 100%, 75%)";
}
首先要限制使用者至少輸入10個字元才能順利新增筆記,否則會顯示出錯誤訊息,接著創建 id、文字內容、日期、背景色的筆記物件,最後還要設定新增筆記後會重置狀態 (關閉新增筆記的彈窗並清空輸入欄位和錯誤訊息)。
const addNote = () => {
    // 限制輸入長度至少為10個字元
    if(newNote.value.length < 10){
      return errorMessage.value = "Note needs to be 10 characters or more"
    }
    // 新增筆記到陣列
    notes.value.push({
      id: Math.floor(Math.random() * 1000000),
      text: newNote.value,
      date: new Date(),
      backgroundColor: getRandomColor()
    });
    // 重置狀態
    showModal.value = false;
    newNote.value = ""
    errorMessage.value=""
}
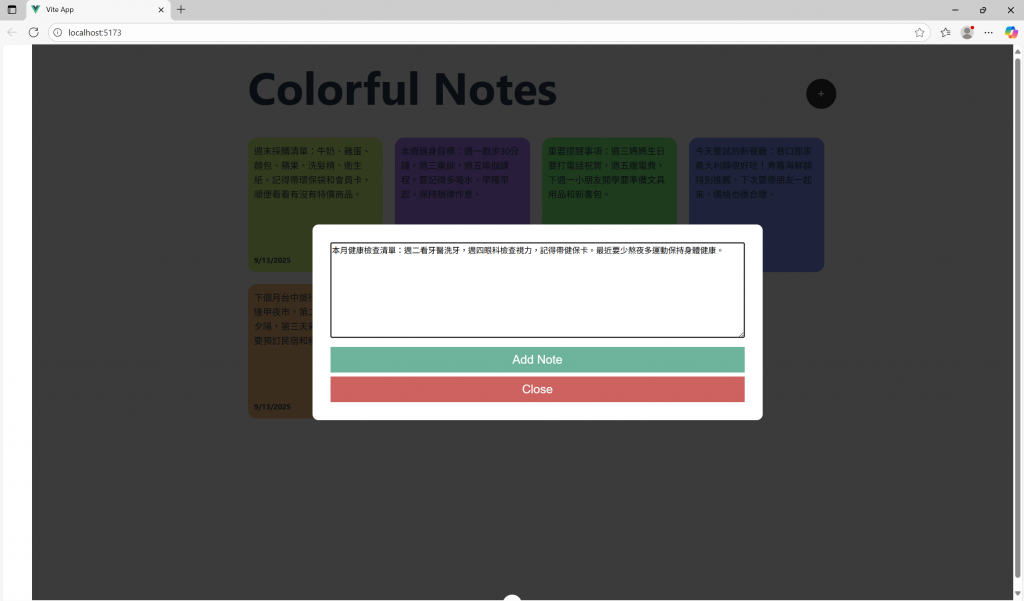
<div v-if="showModal" class="overlay">
      <div class="modal">
        <textarea v-model.trim="newNote" name="note" id="note" cols="30" rows="10">
        </textarea>
        <p v-if="errorMessage">{{ errorMessage }}</p>
        <button @click="addNote">Add Note</button>
        <button class="close" @click="showModal = false">Close</button>
      </div>
</div>
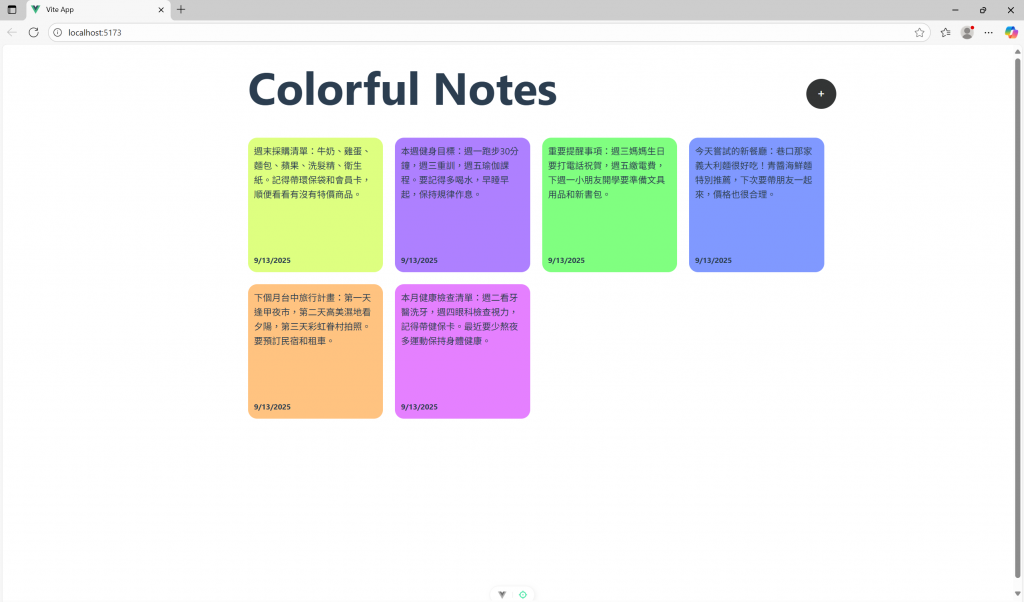
<div class="container">
      <header>
        <h1>Colorful Notes</h1>
        <button @click="showModal = true">+</button>
      </header>
      <div class="cards-container">
        <div v-for="note in notes" :key="note.id" class="card"
             :style="{backgroundColor: note.backgroundColor}">
          <p class="main-text">{{ note.text }}</p>
          <p class="date">{{ note.date.toLocaleDateString("en-US") }}</p>
        </div>
      </div>
</div>
<script setup>
  import {ref} from "vue";
  const showModal = ref(false)
  const newNote = ref("")
  const errorMessage = ref("")
  const notes = ref([])

  //產生隨機顏色的函數
  function getRandomColor() {
  return "hsl(" + Math.random() * 360 + ", 100%, 75%)";
  }

  const addNote = () => {
    // 限制輸入長度至少為10個字元
    if(newNote.value.length < 10){
      return errorMessage.value = "Note needs to be 10 characters or more"
    }
    // 新增筆記到陣列
    notes.value.push({
      id: Math.floor(Math.random() * 1000000),
      text: newNote.value,
      date: new Date(),
      backgroundColor: getRandomColor()
    });
    // 重置狀態
    showModal.value = false;
    newNote.value = ""
    errorMessage.value=""
  }
</script>

<template>
  <main>
    <!-- 新增筆記的彈窗介面 -->
    <div v-if="showModal" class="overlay">
      <div class="modal">
        <textarea v-model.trim="newNote" name="note" id="note" cols="30" rows="10"></textarea>
        <p v-if="errorMessage">{{ errorMessage }}</p>
        <button @click="addNote">Add Note</button>
        <button class="close" @click="showModal = false">Close</button>
      </div>
    </div>
    <!-- 顯示已新增筆記的介面 -->
    <div class="container">
      <header>
        <h1>Colorful Notes</h1>
        <button @click="showModal = true">+</button>
      </header>
      <div class="cards-container">
        <div v-for="note in notes" :key="note.id" class="card" :style="{backgroundColor: note.backgroundColor}">
          <p class="main-text">{{ note.text }}</p>
          <p class="date">{{ note.date.toLocaleDateString("en-US") }}</p>
        </div>
      </div>
    </div>
  </main>
</template>

<style>
  main{
    height: 100vh;
    width: 100vw;
  }
  .container{
    max-width: 1000px;
    padding: 10px;
    margin: 0 auto;
  }
  header{
    display: flex;
    justify-content: space-between;
    align-items: center;
  }
  h1{
    font-weight: bold;
    margin-bottom: 25px;
    font-size: 75px;
  }
  header button{
    border: none;
    padding: 10px;
    width: 50px;
    height: 50px;
    cursor: pointer;
    background-color: rgb(51, 53, 53);
    border-radius: 100%;
    color: white;
    font-size: 20px;
  }
  .main-text {
    word-wrap: break-word;
    word-break: break-word;
    overflow-wrap: break-word;
    hyphens: auto;
    max-height: 220px;
    overflow-y: auto;
  }
  .card{
    width: 225px;
    height: 224px;
    background-color: rgb(150, 168, 217);
    padding: 10px;
    border-radius: 15px;
    display: flex;
    flex-direction: column;
    justify-content: space-between;
    margin-right: 20px;
    margin-bottom: 20px;
  }
  .date{
    font-weight: bold;
    font-size: 12.5px;
  }
  .cards-container{
    display: flex;
    flex-wrap: wrap;
  }
  .overlay{
    position: absolute;
    width: 100%;
    height: 100%;
    background-color: rgba(0,0,0,0.77);
    z-index: 10;
    display: flex;
    align-items: center;
    justify-content: center;
  }
  .modal{
    width: 750px;
    background-color: white;
    border-radius: 10px;
    padding: 30px;
    position: relative;
    display: flex;
    flex-direction: column;
  }
  .modal button{
    padding: 10px 20px;
    font-size: 20px;
    width: 100%;
    background-color: rgb(110, 179, 156);
    border: none;
    color: white;
    cursor: pointer;
    margin-top: 15px;
  }
  .modal .close{
    background-color: rgb(205, 98, 96);
    margin-top: 7px;
  }
  .modal p{
    color: red;
  }
</style>
https://stackoverflow.com/questions/23601792/get-only-light-colors-randomly-using-javascript
https://www.youtube.com/watch?v=I_xLMmNeLDY


 iThome鐵人賽