昨天我們成功做出了一個最簡單的規則型 Agent,用 if/else 來分支決策。
今天要更進一步,讓這個 Agent 走出台灣 CLI 世界,進化成 API 服務!
這麼一來,我們不需要在命令列輸入 input(),而是可以用 HTTP 呼叫,甚至未來能接前端網頁、LINE Bot 或 Discord Bot 🎉
from datetime import datetime
from fastapi import FastAPI
from pydantic import BaseModel

app = FastAPI()

# 設定api要輸入的格式
class UserInput(BaseModel):
    command: str     #命令
    mood: str | None = None   #心情(選填預設為None)

# 決策邏輯函數
def decide_action(user_input: UserInput):
    if user_input.command == "天氣":
        return "今天是晴天哦!"

    elif user_input.command == "時間":
        return f"現在時間是:{datetime.now().strftime('%H:%M')}"

    elif user_input.command == "心情":
        if user_input.mood == "好":
            return "太棒了!保持好心情吧~"
        elif user_input.mood == "不好":
            return "沒關係,明天會更好!"
        else:
            return "我還不太懂這個心情,但希望你一切順利!"

    elif user_input.command == "離開":
        return "掰掰~"

    else:
        return "抱歉,我還不懂這個指令。"

# API endpoint
@app.post("/agent")
def agent_api(user_input: UserInput):
    result = decide_action(user_input)
    return {"response": result}
安裝需要的套件:pip install fastapi uvicorn
啟動伺服器:uvicorn main:app --reload

可以看到裡面有一串網址127.0.0.1:8000,打開網頁在網址後面加上/docs,就可以看到我們寫著這隻api的內容了!127.0.0.1:8000/docs or localhost:8000/docs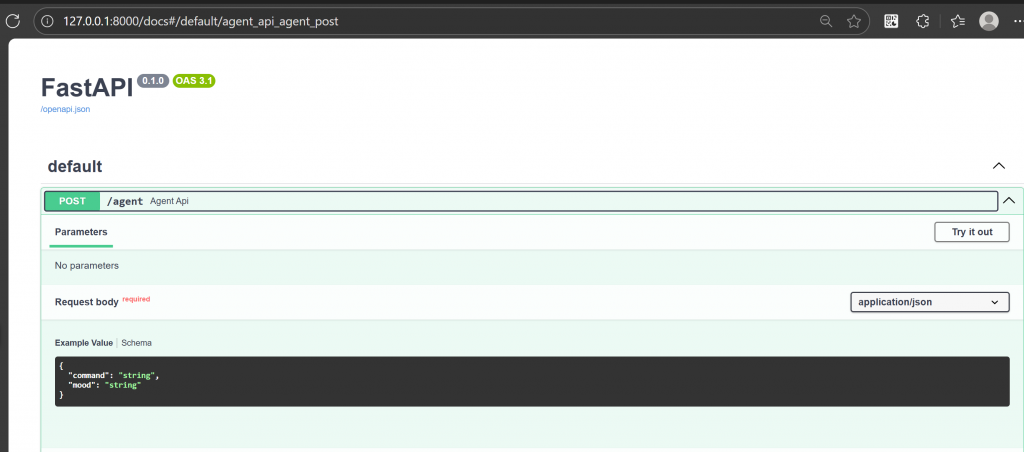
要怎麼啟動這個api呢??
相信大家的畫面右上角也跟我一樣有一個try it out點開就可以輸入內容了!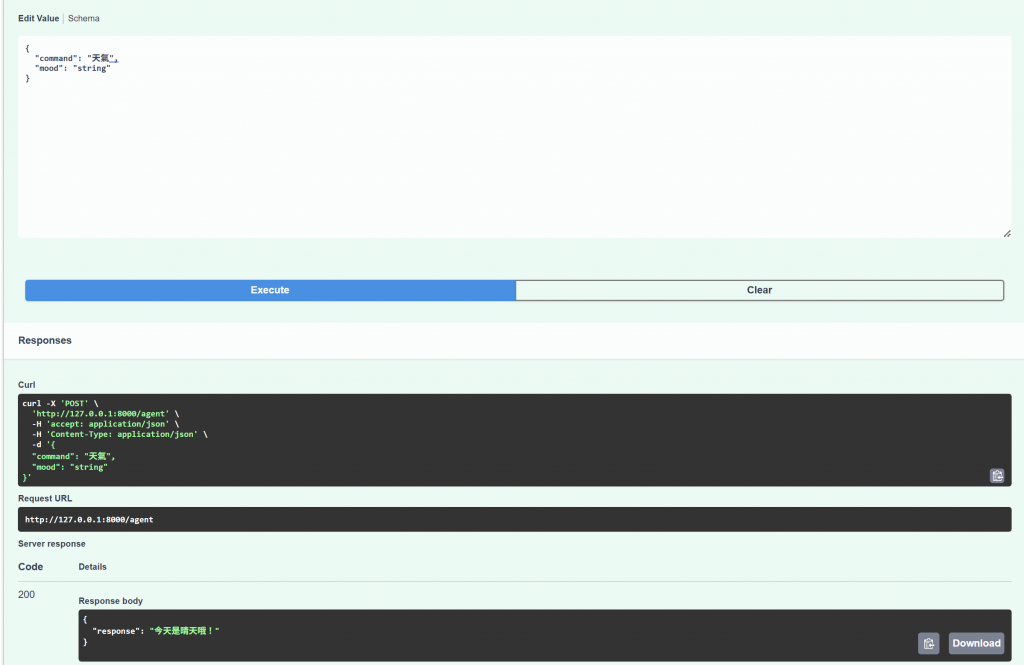

@app.post("/agent")
def agent_api(user_input: UserInput):
    result = decide_action(user_input)
    return {"response": result}
@app.post("/agent")
/agent
.post() 表示 HTTP POST 方法,也就是要用 POST 方式傳送資料才能呼叫def agent_api(user_input: UserInput)
user_input 會自動解析 POST 的 JSON,並轉成 UserInput 物件result = decide_action(user_input)
return {"response": result}
今天我們成功把原本的規則型 Agent 升級成 FastAPI 服務,不僅保留了原本的決策邏輯,還能透過 HTTP POST 被外部程式或前端呼叫。
這意味著,我們的 Agent 不再只是自己在電腦上玩的 CLI 工具,而是一個可以 提供服務的小助手:
你可以把它接到網頁、LINE Bot、Discord Bot
未來也可以加入更多功能,例如查天氣、倒數日、格式化金額等
下一步,我們會嘗試:
將 OpenWeatherMap 的真實天氣功能整合進 API
擴充更多指令與條件分支,讓 Agent 變得更智慧
將這個 FastAPI Agent 部署到雲端,讓其他人也能使用
透過這個練習,我們已經完成了從 單機互動 → API 服務 → 可擴充小幫手 的完整進化流程。
你的 Agent 已經準備好,開始「思考」並協助你處理日常任務了! 🌟


 iThome鐵人賽