成功從後端取得資料後,接著就是要將後端回傳的資料呈現於介面中,本章節我們希望可以達到以下目的:
前端站台的 project 先建立 LoginUserStore.ts,完成呼叫 Backend API,並將回應的資訊存放於 localStorage 中
import { defineStore } from 'pinia';
import { router } from '@/router';
import type { AuthenticationResult } from '@azure/msal-browser';
import msalInstance from '@/stores/msalConfig';
import { fetchWrapper ,type ApiRspMessage } from '@/utils/helpers/fetch-wrapper';// Day 7 天完成的APIwrapper
export interface uerInfo {
    export interface userInfoDto {
      id: string,
      username?:  string,
      deptId: string | null | undefined,
      deptName: string | null | undefined,
      compName: string | null | undefined,
      email :  string | null,
    }
}
export const useLoginUserStore = defineStore({
  id: 'user',
  state: () => ({
    user : JSON.parse(localStorage.getItem('user') || 'null') ,
  }),
  actions: {
    async feachUserInfo() {
    const respData: userInfoDto = await fetchWrapper.get(backendApiUrl) as userInfoDto ; //呼叫 Day9 完成的BackendAPI
        //將資料回寫至 user 中
        this.user.email = respData.userId;
        this.user.ad = respData.userId;
        this.user.username = respData.userName ?? '';
        this.user.deptId = respData.deptId;
        this.user.deptName = respData.deptName;
        this.user.compId = respData.compId;
        this.user.compName = respData.compName;
        localStorage.setItem('user', JSON.stringify(this.user));
    },


  }
});
前端站台找到需要顯示的頁面,這裡直接取用套版的 Profile(圖13-1) 資訊(Profile.vue)進行改寫,再次感受套版的好處是可以直接修改,於開啟畫面時觸發呼叫後端 API 以取得登入者資訊。
圖13-1:套版Profile.vue原始樣貌,預計將使用者資訊放入該畫面中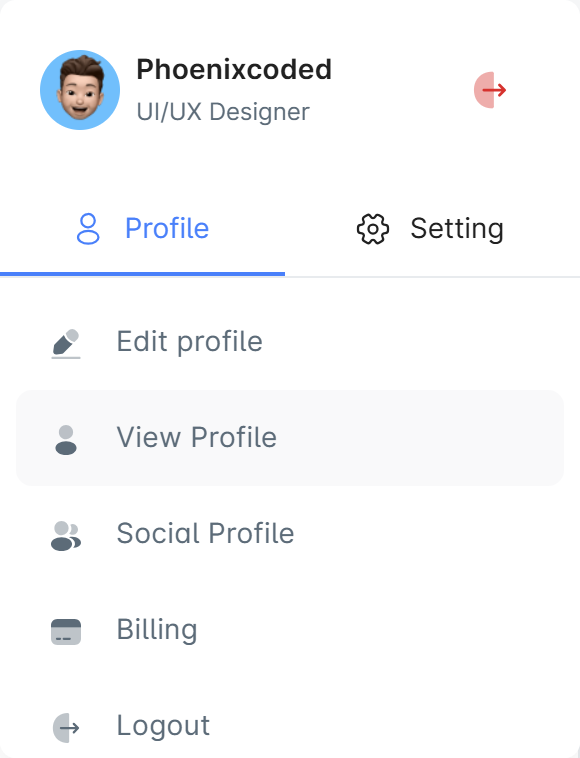
//Profile.vue
<script setup lang="ts">
import { ref, computed } from 'vue';
import SvgSprite from '@/components/shared/SvgSprite.vue';
import { useLoginUserStore } from '@/stores/LoginUserStore';
const tab = ref(null);
const userStore= useLoginUserStore ();
const username = computed(() => userStore.user?.username || 'Guest');
// onMounted 的生命週期去同步登入者的資訊
onMounted(() => {
  await userStore.feachUserInfo()
});

//將profiledata的Array 加入 userStore.user 的資訊並且指定要使用的SVG 圖案
const profiledata1 = ref([
  {
    title: userStore.user?.email || 'Guest',
    icon: 'custom-mail-outline'
  },
  {
    title: userStore.user?.compName || 'compNM',
    icon: 'custom-user-1'
  },
  {
    title: userStore.user?.deptName || 'compNM',
    icon: 'custom-users'
  },
  {
    title: userStore.user?.compId || 'commpID',
    icon: 'custom-users'
  },
]);
</script>
<template>
  <div>
    <div class="d-flex align-center pa-5">
      <v-avatar size="40" class="me-2">
        <img src="@/assets/images/users/group.png" width="40" alt="profile" />
      </v-avatar>
      <div>
        <h6 class="text-subtitle-1 mb-0">{{username}}</h6>
      </div>
      <div class="ms-auto">
        <v-btn variant="text" aria-label="logout" color="error" rounded="sm" icon size="large" @click="">
          <SvgSprite name="custom-logout-1" />
        </v-btn>
      </div>
    </div>
    <v-tabs v-model="tab" color="primary" grow>
      <v-tab value="111">
        <div class="v-icon--start">
          <SvgSprite name="custom-user-outline" style="width: 18px; height: 18px" />
        </div>
        Profile
      </v-tab>
    </v-tabs>
    <v-divider></v-divider>
    <perfect-scrollbar style="height: calc(100vh - 300px); max-height: 300px">
      <v-window v-model="tab">
        <v-window-item value="111">
          <v-list class="px-2" aria-label="profile list" aria-busy="true">
            <v-list-item
              v-for="(item, index) in profiledata1"
              :key="index"
              color="primary"
              base-color="secondary"
              rounded="md"
              :value="item.title"
            >
              <template v-slot:prepend>
                <div class="me-4">
                  <SvgSprite :name="item.icon || ''" style="width: 18px; height: 18px" />
                </div>
              </template>
              <v-list-item-title class="text-h6">{{ item.title }}</v-list-item-title>
            </v-list-item>
            <v-list-item @click="" color="primary" base-color="secondary" rounded="md">
              <template v-slot:prepend>
                <div class="me-4">
                  <SvgSprite name="custom-logout-1" style="width: 18px; height: 18px" />
                </div>
              </template>
              <v-list-item-title class="text-subtitle-2"> Logout</v-list-item-title>
            </v-list-item>
          </v-list>
        </v-window-item>
        <v-window-item value="222">
        </v-window-item>
      </v-window>
    </perfect-scrollbar>
  </div>
</template>
圖13-2:前段可成功收到回應並且顯示資料內容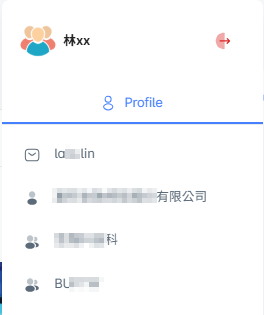
開啟 F12 偵錯工具,確認顯示的結果與 localStorage 一致,簡單提一下,可以安裝 Vite,這對於偵錯相當有幫助,不僅可以即時看到前端站台的修改結果,還能查看 localStorage 的數值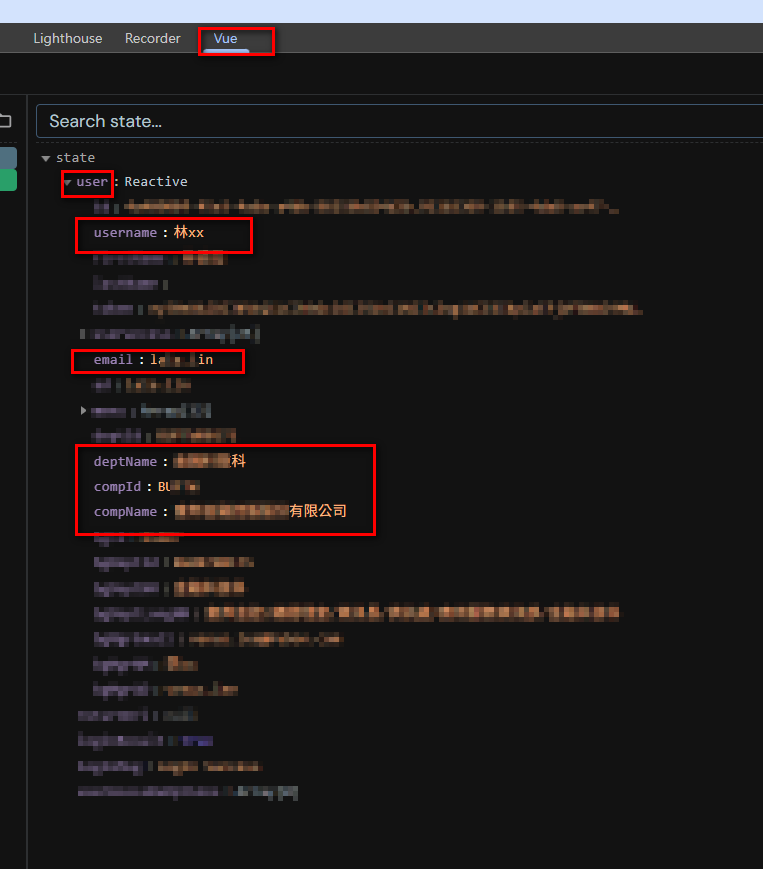
圖13-3:F12 偵錯工具,確認後端回應的資料
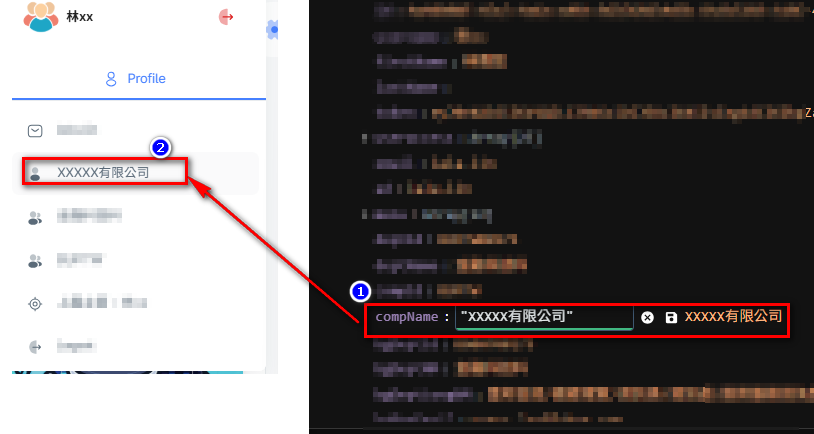
本日前端透過 store 定義物件、method ,於 vue 需要使用時再進行調用,整個流程如下圖: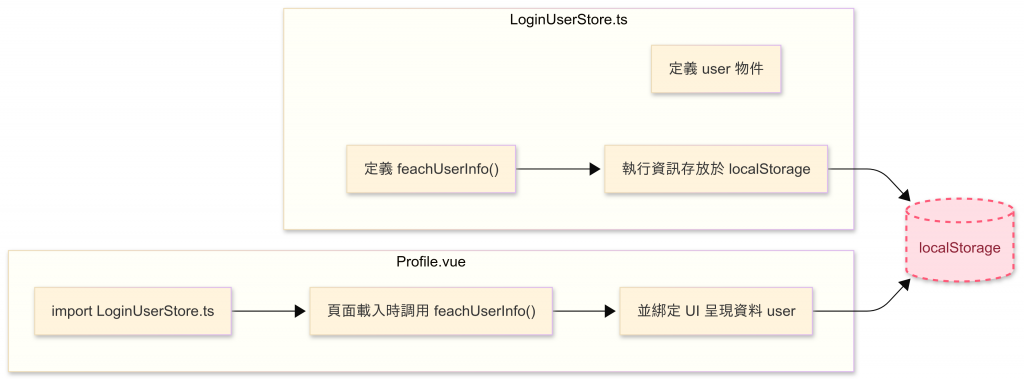
圖13-5:前端登入資料流程 — Store、UI 與 localStorage


 iThome鐵人賽