
2025 iThome鐵人賽
「 Flutter :30天打造念佛App,跨平台從Mobile到VR,讓極樂世界在眼前實現! 」
Day 11
「 Flutter 語音辨識 實戰入門篇 — 生活在地球的勇者啊,你聽過阿彌陀佛嗎(2) 」

昨天我們已經透過官方文件初步認識「speech_to_text」並且完成安裝與權限設置。
今天我們要來 demo 官方的 example code ,並且知道該如何實作它!
Day 11 文章目錄:
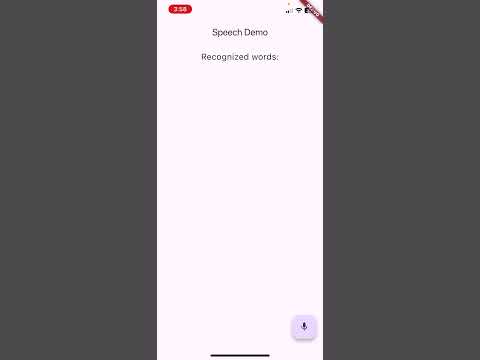
一、Basic Example Demo
二、speech_to_text 實作步驟
三、speech_to_text 細節設置
在官方文件中有提供兩種版本Example:精簡版本、完整版本。
下面錄製的影片是精簡版本的內容,
讓大家可以快速看到 speech_to_text 語音辨識的基礎實作內容。
點擊觀看影片:

先在Info.plist 和 manifest 設置語音辨識及麥克風權限,
就可以在main.dart 貼上官方提供的 Basic Example 跑跑看 。
Basic Example :
import 'package:flutter/material.dart';
import 'package:speech_to_text/speech_recognition_result.dart';
import 'package:speech_to_text/speech_to_text.dart';

void main() {
  runApp(MyApp());
}

class MyApp extends StatelessWidget {
  @override
  Widget build(BuildContext context) {
    return MaterialApp(
      title: 'Flutter Demo',
      home: MyHomePage(),
    );
  }
}

class MyHomePage extends StatefulWidget {
  MyHomePage({Key? key}) : super(key: key);

  @override
  _MyHomePageState createState() => _MyHomePageState();
}

class _MyHomePageState extends State<MyHomePage> {
  SpeechToText _speechToText = SpeechToText();
  bool _speechEnabled = false;
  String _lastWords = '';

  @override
  void initState() {
    super.initState();
    _initSpeech();
  }

  /// This has to happen only once per app
  void _initSpeech() async {
    _speechEnabled = await _speechToText.initialize();
    setState(() {});
  }

  /// Each time to start a speech recognition session
  void _startListening() async {
    await _speechToText.listen(onResult: _onSpeechResult);
    setState(() {});
  }

  /// Manually stop the active speech recognition session
  /// Note that there are also timeouts that each platform enforces
  /// and the SpeechToText plugin supports setting timeouts on the
  /// listen method.
  void _stopListening() async {
    await _speechToText.stop();
    setState(() {});
  }

  /// This is the callback that the SpeechToText plugin calls when
  /// the platform returns recognized words.
  void _onSpeechResult(SpeechRecognitionResult result) {
    setState(() {
      _lastWords = result.recognizedWords;
    });
  }

  @override
  Widget build(BuildContext context) {
    return Scaffold(
      appBar: AppBar(
        title: Text('Speech Demo'),
      ),
      body: Center(
        child: Column(
          mainAxisAlignment: MainAxisAlignment.center,
          children: <Widget>[
            Container(
              padding: EdgeInsets.all(16),
              child: Text(
                'Recognized words:',
                style: TextStyle(fontSize: 20.0),
              ),
            ),
            Expanded(
              child: Container(
                padding: EdgeInsets.all(16),
                child: Text(
                  // If listening is active show the recognized words
                  _speechToText.isListening
                      ? '$_lastWords'
                      // If listening isn't active but could be tell the user
                      // how to start it, otherwise indicate that speech
                      // recognition is not yet ready or not supported on
                      // the target device
                      : _speechEnabled
                          ? 'Tap the microphone to start listening...'
                          : 'Speech not available',
                ),
              ),
            ),
          ],
        ),
      ),
      floatingActionButton: FloatingActionButton(
        onPressed:
            // If not yet listening for speech start, otherwise stop
            _speechToText.isNotListening ? _startListening : _stopListening,
        tooltip: 'Listen',
        child: Icon(_speechToText.isNotListening ? Icons.mic_off : Icons.mic),
      ),
    );
  }
}
1. 匯入
import 'package:speech_to_text/speech_recognition_result.dart';
import 'package:speech_to_text/speech_to_text.dart';
2. 設置動態頁面 與 建立物件
建立 SpeechToText 物件
_speechEnabled :是否已可使用語音辨識 (初始化成功)
_lastWords: 存放最後一次辨識到的文字
class MyHomePage extends StatefulWidget { ... }

class _MyHomePageState extends State<MyHomePage> {
  SpeechToText _speechToText = SpeechToText();
  bool _speechEnabled = false;
  String _lastWords = '';
3. 初始化
App第一次開啟時執行,系統會詢問 麥克風與語音辨識 的授權
@override
void initState() {
  super.initState();
  _initSpeech();
}

void _initSpeech() async {
  _speechEnabled = await _speechToText.initialize();
  setState(() {});
}
4. 開始/停止聆聽
listen 會把辨識結果傳給 _onSpeechResult
void _startListening() async {
  await _speechToText.listen(onResult: _onSpeechResult);
  setState(() {});
}

void _stopListening() async {
  await _speechToText.stop();
  setState(() {});
}
5. 接收辨識結果與更新畫面
void _onSpeechResult(SpeechRecognitionResult result) {
  setState(() {
    _lastWords = result.recognizedWords;
  });
}
6. UI 和麥克風按鈕
@override
Widget build(BuildContext context) {
  return Scaffold(
    appBar: AppBar(title: Text('Speech Demo')),
    body: Center(
      child: Column(
        mainAxisAlignment: MainAxisAlignment.center,
        children: <Widget>[
          # 標題
          Container(padding: EdgeInsets.all(16), child: Text('Recognized words:', style: TextStyle(fontSize: 20.0))),
          Expanded(
            child: Container(
              padding: EdgeInsets.all(16),
              child: Text(
          # 文字:顯示即時結果或提示
                _speechToText.isListening
                  ? '$_lastWords'
                  : _speechEnabled
                      ? 'Tap the microphone to start listening...'
                      : 'Speech not available',
              ),
            ),
          ),
        ],
      ),
    ),
    #右下角麥克風按鈕:切換開始/停止
    floatingActionButton: FloatingActionButton(
      onPressed: _speechToText.isNotListening ? _startListening : _stopListening,
      tooltip: 'Listen',
      child: Icon(_speechToText.isNotListening ? Icons.mic_off : Icons.mic),
    ),
  );
}


例如:
pauseFor 語音暫停多久後就停止語音辨識
listenFor 每一次最多支援多久的語音辨識
localeId 取得預設語系 / 語言清單
class _SpeechSampleAppState extends State<SpeechSampleApp> {
  // ===== 狀態欄位 =====
  bool _hasSpeech = false;      // 是否初始化成功
  double level = 0.0;           // 即時音量
  double minSoundLevel = 50000; // 觀測到的最小音量
  double maxSoundLevel = -50000;// 觀測到的最大音量
  String lastWords = '';        // 最新辨識的文字
  String lastError = '';        // 最新錯誤訊息
  String lastStatus = '';       // 最新狀態字串
  List<LocaleName> _localeNames = []; // 裝置支援的語言清單
  final SpeechToText speech = SpeechToText();   // 創建實例

  // ===== 本次 Session 設定(可在 Demo 的設定面板調整)=====
  SpeechExampleConfig currentOptions = SpeechExampleConfig(
    SpeechListenOptions(
      listenMode: ListenMode.confirmation, // iOS才有效,範本預寫的是短回覆的聆聽模式
      onDevice: false,           // 是否嘗試「裝置端/離線」辨識(不一定支援)
      cancelOnError: true,       // 出錯時是否自動 cancel 本次 session
      partialResults: true,      // 是否回傳「即時片段」
      autoPunctuation: true,     // 支援的平台會自動加標點
      enableHapticFeedback: true,// 觸覺回饋
    ),
    "",    // localeId(初始化若為空字串,會帶入systemLocale)
    3,     // pauseFor 秒數(最後一次說話後,最多等多久自動結束)
    30,    // listenFor 秒數(本次聆聽的最大時長上限)
    false, // logEvents:印出範例事件 log
    false, // debugLogging:印出 speech_to_text 的 debug log
  );
}
如果我們想自訂內容:
(1) 停頓3秒就結束語音辨識
(2) 每次最多支援5分鐘語音辨識
(3) 指定繁體中文辨識
提醒:
pauseFor/listenFor都是上限,不是保證值;
有些裝置/平台可能會更早結束
(特別是 Android 對停頓時間常有自己的短上限)。- 一開始建議先使用系統預設語系
systemLocale,如果有需要讓使用者自行更換語系,可以使用speech.locales()取得裝置支援的語系清單。
步驟1:在 currentOptions 設定參數
SpeechExampleConfig currentOptions = SpeechExampleConfig(
    SpeechListenOptions(
      listenMode: ListenMode.confirmation,
      onDevice: false,
      cancelOnError: true,
      partialResults: true,
      autoPunctuation: true,
      enableHapticFeedback: true,
    ),
    "",    // localeId,如果是在官方Example這邊寫指定語系,初始化時會改回系統語系
    3,     // pauseFor  停頓3秒自動結束
    300,   // listenFor 最長300秒
    false,
    false,
  );
步驟2:將參數帶入 speech.listen()
speech.listen(
  onResult: resultListener,
  listenFor: Duration(seconds: currentOptions.listenFor), // ← 最長300秒
  pauseFor:  Duration(seconds: currentOptions.pauseFor),  // ← 停頓3秒自動結束
  localeId:  "zh_TW", //← 指定語音辨識繁體中文
  onSoundLevelChange: soundLevelListener,
  listenOptions: currentOptions.options,
);
| 重點 | 內容 |
|---|---|
| Basic Example Demo | 語音辨識的實作畫面 |
| speech_to_text 實作步驟 | 建立語音辨識的核心步驟 |
| speech_to_text 細節設置 | speech.listen()帶入參數 |
