嗨咿我是illumi,今天進入到最後一個單元了!
當你想要在網站中加入炫酷的3D元素時,第一個想到的可能是Three.js。但是等等!在你開始深入複雜的3D數學和WebGL之前,讓我們先來聊聊另一個選擇 - Spline。
今天我要和大家分享的是:為什麼在某些情況下,Spline可能是比Three.js更好的選擇,以及如何在Next.js/React專案中使用它。
Three.js 無疑是JavaScript 3D領域的王者,它提供了:
但是,Three.js也有其挑戰:
看似簡單,但要做出真正美觀的3D場景,你需要掌握:
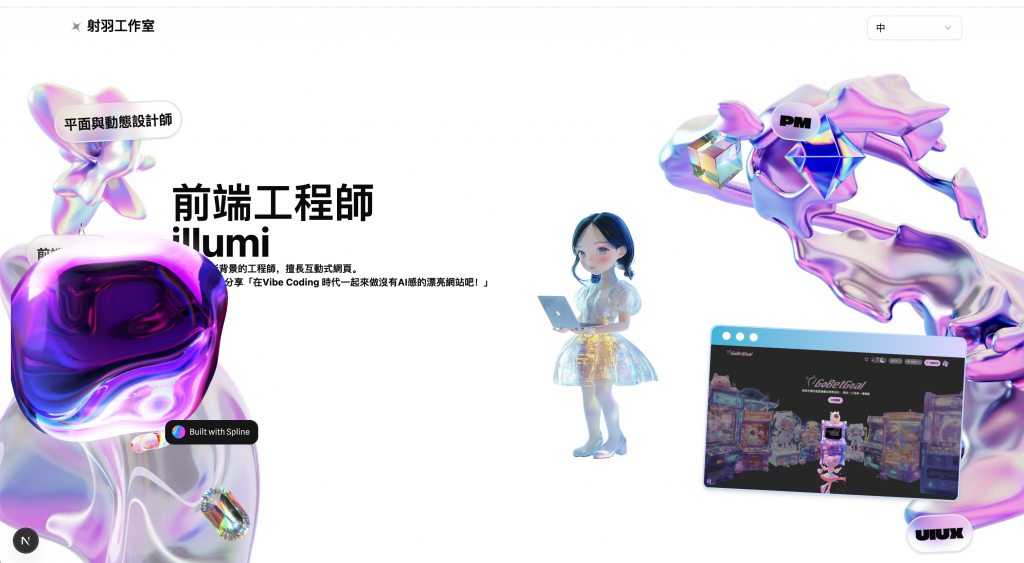
Spline是一個專為網頁設計的3D設計工具,它讓你可以通過視覺化介面創建3D內容,然後輕鬆地嵌入到網站中。
# 安裝Spline React套件
npm install @splinetool/react-spline

# 如果使用TypeScript
npm install --save-dev @types/react @types/react-dom
創建一個簡單的Spline組件:
// components/SplineScene.tsx
'use client';

import Spline from '@splinetool/react-spline/next';

export default function SplineScene() {
  return (
    <div style={{ width: '100%', height: '100vh' }}>
      <Spline
        scene="https://prod.spline.design/你的場景ID/scene.splinecode"
      />
    </div>
  );
}
當你第一次看到 Spline 的官方範例時,可能會覺得:「哇,這也太簡單了吧!」
import Spline from '@splinetool/react-spline/next';

export default function Home() {
  return (
    <main>
      <Spline scene="https://prod.spline.design/你的ID/scene.splinecode" />
    </main>
  );
}
只要三行程式碼,3D 場景就能在你的網站上運行!但當你真正在專案中使用時,卻發現需要寫一大堆複雜的程式碼:
為什麼會這樣?
官方的簡單範例能夠運作,是因為它假設了以下條件:
但實際專案中,這些條件幾乎不可能同時滿足。
在這個情境下,如果你直接使用官方範例,會遇到一連串的問題。
Error: async/await is not yet supported in Client Components
@splinetool/react-spline/next 是一個 async Server Component:
// Spline 原始碼
export default async function SplineNext({ ...props }: SplineProps) {
  const hash = await getPreview(props.scene);
  // ...
}
它會在伺服器端預先獲取場景的預覽圖片,提供更好的載入體驗。
但是,當你的頁面因為 next-intl 或其他原因需要使用 async 時,就會產生衝突:
// ❌ 這樣會報錯
"use client";  // 因為某些原因需要 client component

export default async function Page() {  // async 在 client component 中不支援
  return <Spline scene="..." />
}
import dynamic from 'next/dynamic';

// 使用普通的客戶端版本,不是 /next 版本
const Spline = dynamic(() => import('@splinetool/react-spline'), {
  ssr: false,  // 關鍵:禁用 SSR
});
這個改動看似簡單,但背後有重要的權衡:
| 特性 | /next 版本 |
普通版本 |
|---|---|---|
| 預覽佔位符 | ✅ 自動生成 | ❌ 需自行處理 |
| SSR 支援 | ✅ 完整支援 | ❌ 必須禁用 |
| 載入體驗 | 🌟 更好 | ⚠️ 較差 |
| 彈性 | ⚠️ 受限 | ✅ 更靈活 |
// 你的 GSAP 動畫突然不工作了
useEffect(() => {
  gsap.from('.hero-title', { y: 50, opacity: 0 });
  // 動畫沒有觸發!
}, []);
Spline 組件內部使用 Canvas 元素,並且會監聽大量的滑鼠和觸控事件:
// Spline 內部會做類似這樣的事
canvas.addEventListener('mousedown', handleMouseDown);
canvas.addEventListener('mousemove', handleMouseMove);
canvas.addEventListener('wheel', handleWheel);
// ... 還有很多
這些事件會冒泡到父元素,可能干擾頁面上的其他互動邏輯。
useEffect(() => {
  const container = containerRef.current;
  if (!container) return;

  const stopEvent = (e: Event) => {
    e.stopPropagation();  // 阻止事件冒泡
  };

  // 隔離所有可能造成干擾的事件
  const events = ["mousedown", "mouseup", "mousemove", "wheel", "touchstart"];
  events.forEach((event) => {
    container.addEventListener(event, stopEvent);
  });

  return () => {
    events.forEach((event) => {
      container.removeEventListener(event, stopEvent);
    });
  };
}, []);
這個看似多餘的程式碼,實際上是在保護你的其他功能不被 Spline 意外影響。
// 你的其他元素突然無法點擊或顯示異常
<div className="popup">
  <button>我點不到了!</button>
</div>
Canvas 元素會創建一個新的渲染層級(stacking context),可能會覆蓋或影響頁面上的其他元素。
<div
  style={{
    isolation: "isolate",  // 創建獨立的渲染上下文
    contain: "layout style paint",  // 限制渲染影響範圍
  }}
>
  <Spline scene="..." />
</div>
這兩個 CSS 屬性的作用:
isolation: isolate:創建新的堆疊上下文,防止 z-index 混亂contain: layout style paint:告訴瀏覽器這個容器是獨立的,減少重繪範圍// Spline 場景不顯示或尺寸異常
<div>
<Spline scene="..." /> {/* 看不到任何東西! */}
</div>
根據 Spline 的原始碼,組件使用 ParentSize 來決定 Canvas 尺寸:
// Spline 原始碼
<ParentSize
  parentSizeStyles={{ width: '100%', height: '100%' }}
  // ...
>
如果父容器沒有明確的寬高,Canvas 就無法正確渲染。
<div
  className="w-full h-full relative"
  style={{
    minHeight: "200px",  // 至少要有最小高度
  }}
>
  <Spline scene="..." />
</div>
或者使用明確的像素值:
<div style={{ width: '400px', height: '400px' }}>
  <Spline scene="..." />
</div>
Spline 場景可能因為多種原因載入失敗:
如果沒有處理這些錯誤,整個組件甚至整個頁面都可能崩潰。
const [hasError, setHasError] = useState(false);

const onError = (error: any) => {
  console.error("Spline error:", error);
  setHasError(true);
};

if (hasError) {
  return (
    <div className="w-full h-full flex items-center justify-center">
      <div className="text-center">
        <p className="text-gray-600">3D 場景載入失敗</p>
        <button onClick={() => window.location.reload()}>
          重新載入
        </button>
      </div>
    </div>
  );
}

return (
  <Spline
    scene="..."
    onError={onError}  // 關鍵:捕捉錯誤
  />
);
結合以上所有解決方案,這是一個生產級的 Spline 組件:
"use client";

import { useEffect, useRef, useState } from "react";
import dynamic from "next/dynamic";

// 動態載入,避免 SSR 問題
const Spline = dynamic(() => import("@splinetool/react-spline"), {
  ssr: false,
  loading: () => (
    <div className="w-full h-full flex items-center justify-center">
      <div className="animate-pulse text-gray-500">載入 3D 場景...</div>
    </div>
  ),
});

interface BubbleProps {
  scene: string;
  className?: string;
}

export default function Bubble({ scene, className = "" }: BubbleProps) {
  const containerRef = useRef<HTMLDivElement>(null);
  const [isLoaded, setIsLoaded] = useState(false);
  const [hasError, setHasError] = useState(false);

  // 載入成功的回調
  const onLoad = () => {
    console.log("Spline scene loaded successfully");
    setIsLoaded(true);
  };

  // 錯誤處理
  const onError = (error: any) => {
    console.error("Spline loading error:", error);
    setHasError(true);
  };

  // 事件隔離:防止干擾頁面其他互動
  useEffect(() => {
    const container = containerRef.current;
    if (!container) return;

    const stopEvent = (e: Event) => {
      e.stopPropagation();
      e.stopImmediatePropagation();
    };

    const events = [
      "mousedown", "mouseup", "mousemove",
      "wheel", "touchstart", "touchmove", "touchend"
    ];

    events.forEach((event) => {
      container.addEventListener(event, stopEvent, { passive: false });
    });

    return () => {
      events.forEach((event) => {
        container.removeEventListener(event, stopEvent);
      });
    };
  }, []);

  // 錯誤狀態回退 UI
  if (hasError) {
    return (
      <div className={`w-full h-full flex items-center justify-center bg-gray-50 rounded-lg ${className}`}>
        <div className="text-center p-6">
          <div className="w-16 h-16 mx-auto mb-4 bg-gray-200 rounded-full"></div>
          <p className="text-gray-600 mb-3">無法載入 3D 場景</p>
          <button
            onClick={() => window.location.reload()}
            className="px-4 py-2 bg-blue-500 text-white rounded hover:bg-blue-600"
          >
            重新載入
          </button>
        </div>
      </div>
    );
  }

  return (
    <div
      ref={containerRef}
      className={`relative ${className}`}
      style={{
        isolation: "isolate",           // CSS 隔離
        contain: "layout style paint",  // 限制渲染範圍
        minHeight: "200px",             // 確保容器有高度
        width: "100%",
        height: "100%",
      }}
    >
      {/* 載入中狀態 */}
      {!isLoaded && !hasError && (
        <div className="absolute inset-0 flex items-center justify-center z-10">
          <div className="animate-pulse text-gray-500">載入 3D 場景...</div>
        </div>
      )}

      {/* Spline 場景 */}
      <Spline
        scene={scene}
        onLoad={onLoad}
        onError={onError}
      />
    </div>
  );
}
在你的頁面中:
// app/[locale]/page.tsx
import { getTranslations } from 'next-intl/server';
import Bubble from '@/components/Bubble';

export default async function HomePage() {
  const t = await getTranslations('HomePage');

  return (
    <div>
      <h1>{t('title')}</h1>

      {/* 使用生產級的 Bubble 組件 */}
      <div className="w-96 h-96 my-8">
        <Bubble scene="https://prod.spline.design/你的ID/scene.splinecode" />
      </div>

      {/* 其他內容不會被影響 */}
      <InteractiveSection />
    </div>
  );
}
這樣就成功放上去啦!