開始接觸開發以來,越來越多人會選擇在專案中加入 TypeScript 搭配框架使用(不管是哪一種框架都可以加入 TS),讓變數與函式的型別定義更完善,也可以降低程式出錯的機率。
因為目前公司使用的是 Angular,所以 TypeScript 可以說是必學的技能 ─=≡Σ((( つ•̀ω•́)つ
但當你真正開始使用 TypeScript 後,就會發現它能讓程式的邏輯變得更有條理,也能避免輸入與輸出值出現不一致的問題,因為只要寫錯,IDE 就會即時提示錯誤!
在今天這篇文章並不會深入探討 TypeScript,想要入門可以先參考保哥寫的 TypeScript 新手指南
npm init
npm install typescript --save-dev
npx tsc --init
tsconfig.json 設定檔先使用簡化版如下:
{
  "compilerOptions": {
    "target": "es2022",
    "module": "esnext",       // 保持 ES Module
    "rootDir": "./",          // TS 原始碼位置
    "outDir": "./dist",       // 編譯後輸出位置
    "strict": true,           // 開啟嚴格模式
    "esModuleInterop": true,  // 常見相容性設定
    "skipLibCheck": true      // 跳過型別檢查,加快編譯
  },
  "include": ["input.ts"]
}
input.js 改為 input.ts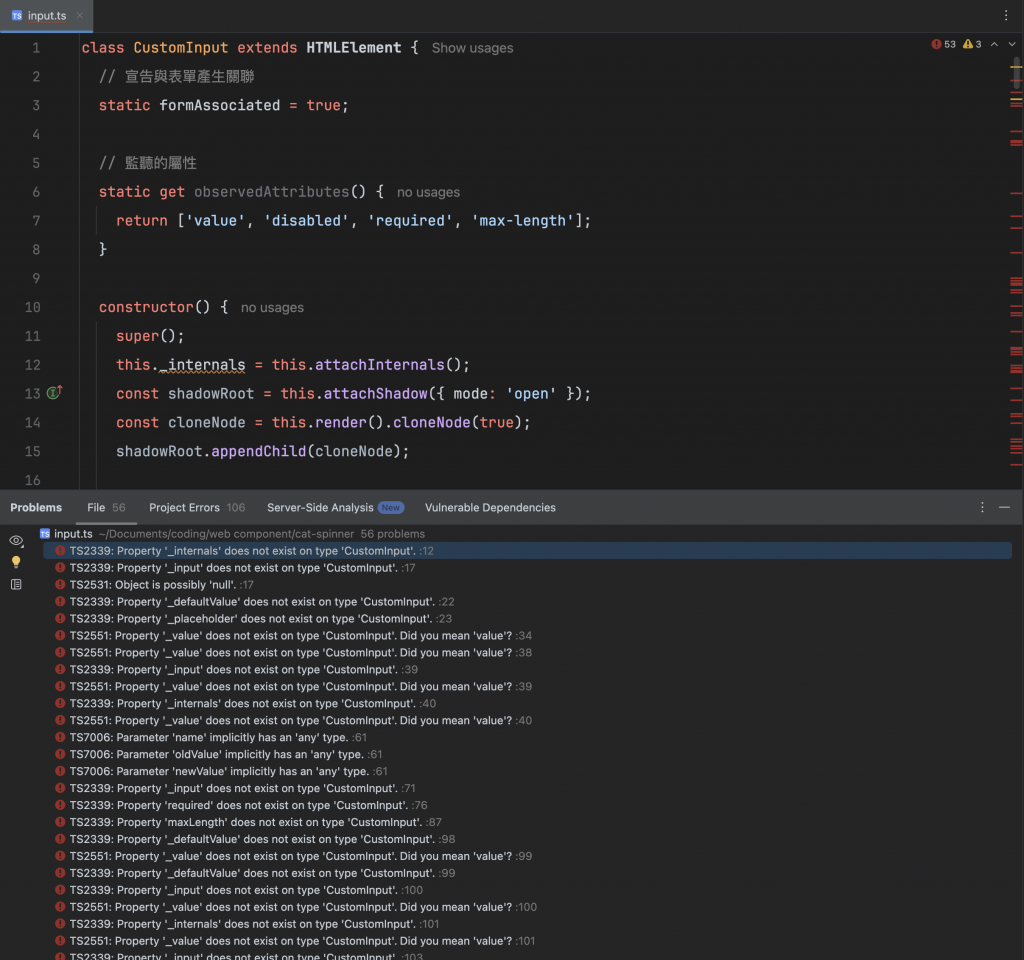
還記得我們之前用 _ 來表示私有變數嗎,像是 _value、_internals、_input。
當我們改為 TypeScript 後,就有提供了 private 可以直接標註成私有屬性。
_,並且加上 readonly 的宣告class CustomInput extends HTMLElement {
// 宣告與表單產生關聯
static formAssociated = true;
// 監聽的屬性
static get observedAttributes() {
return ['value', 'disabled', 'required', 'max-length', 'min-length'];
}
private readonly internals!: ElementInternals;
private readonly input: HTMLDivElement | null = null;
private value: string = '';
private defaultValue: string = '';
private placeholder: string = '請輸入文字...';
private required: boolean = false;
private allowMulti: boolean = false;
private maxLength: number = 0;
private minLength: number = 0;
constructor() {
super();
this.internals = this.attachInternals();
const shadowRoot = this.attachShadow({ mode: 'open' });
const cloneNode = this.render().cloneNode(true);
shadowRoot.appendChild(cloneNode);
this.input = this.shadowRoot!.querySelector('.custom-input');
}
//...以下略
}
記得將變數名稱的 _ 移除後,要把原本有用到 _ 相關的變數的方法或程式碼一起修改唷!
public
// 對外公開 checkValidity()
public checkValidity() {
 return this.internals.checkValidity();
}

// 對外公開 reportValidity()
public reportValidity() {
 return this.internals.reportValidity();
}

// 對外公開 errorMessage
public getErrorMsg() {
 return this.internals.validationMessage;
}

... 以下略
完整程式碼看這裡:https://codepen.io/unlinun/pen/LEGNVYK
我們在這階段加入 TypeScript,是為了後續打包時,能讓其他開發者在使用時更順利。
但如果現在想要先在 html 套用看看,我們該怎麼做呢?
由於 TypeScript 不是瀏覽器原生語言,他其實是只是一種增加了型別檢查、介面、enum、泛型的語法糖。
瀏覽器只能執行原生的 JavaScript,無法直接理解 TypeScript。
所以在給外部使用前,我們需要先將 TS 編譯回原本的 JS。
npx tsc
<script type="module" src="./dist/input.js"></script>
接下來你一樣可以順利使用元件,但是可能 IDE 會跟你說你少了些型別資訊,後續我們會在進階學習關於打包自訂元件與應用相關流程。

