JAR是Java ARchive的簡稱是將一推class組成zip格式的檔案,方便其它程式調用或是部署應用,正因為打包的形式多樣化,故花一些時間來介紹它。
my-app.jar
│
├── META-INF/ (特殊目錄,JAR 設定與簽章相關)
│ ├── MANIFEST.MF (必要,JAR 的描述資訊)
│ ├── *.SF (可選,簽章檔,Signature File)
│ ├── *.RSA / *.DSA / *.EC (可選,數位簽章 Block File)
│ ├── services/ (可選,Service Provider 設定)
│ └── versions/ (可選,Multi-Release JAR 使用)
│
├── module-info.class (可選,若是 modular JAR 必須有)
├── com/example/... (一般 Java class 檔案)
├── resources/... (圖片、設定檔等)
└── ...其他應用程式檔案
我們常見的打包應用場景大致會有以下幾種,依據應用場景而有不同
| Packaging Type | JVM Required | Include Dependency | Size | Scenarios | feature |
|---|---|---|---|---|---|
| Library JAR | ✔ Yes | ✘ No | Small (KB–MB) | 供其他專案引用的共用函式庫 | |
| Executable JAR | ✔ Yes | ✘ No | Small–Medium | 獨立執行的應用程式 | |
| Uber / Fat JAR | ✔ Yes | ✔ Yes | Large (10s MB) | 將所有依賴打包,方便分發與部署 | |
| Distribution JAR | ✔ Yes | ✔ Yes | Varies | 包含資源、腳本,完整發佈套件 | |
| Native Executable | ✘ No | ✔ Yes | Medium (MB–100s MB) | 雲端無伺服器(Serverless)、容器化、高效能應用 | 執行快速 |
註:以上由ChatGPT-5整理
*實際案例-Distribution JAR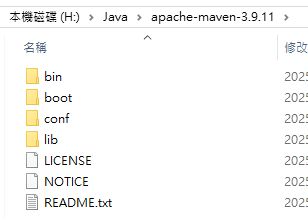
Manifest 是 JAR 的「metadata」。作用在於讓JVM能夠知道這個JAR的相關資訊,可供執行程式特定目的的達成。組成包含main-section與individual section中間需要以空白列分隔,以下是常見欄位說明
| 欄位 | 說明 |
|---|---|
| Manifest-Version | 固定 1.0 |
| Main-Class | 可執行 JAR 程式進入點EntryPoint |
| Class-Path | 透過相對路徑引用外部 JAR |
| Implementation-Version | 版本資訊(常搭配 ${project.version}) |
| Implementation-Title / Vendor | 人類可讀描述 |
實際案例
這是maven-model-builder-3.9.11.jar中的mainfest檔案,有注意到最下方有一行空白列嗎!!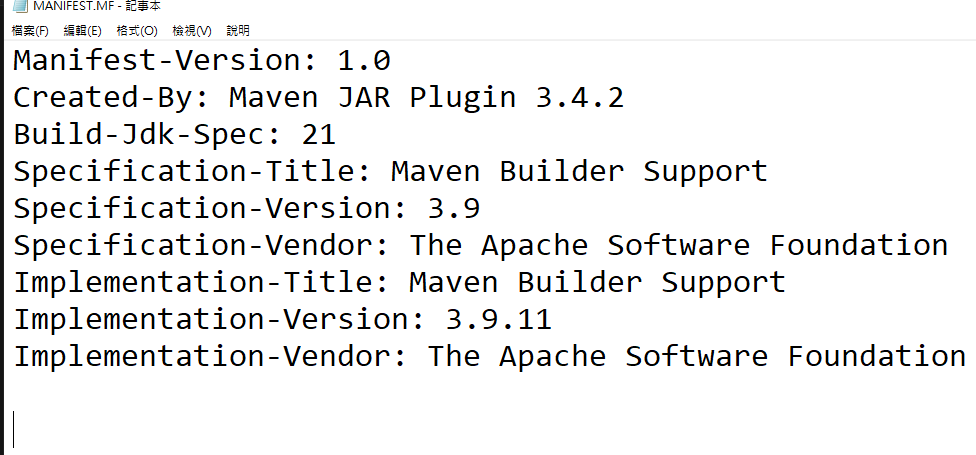
我們能透過java -jar xxx.jar一行命令就可以執行世界是不是就太美好了呢?讓我們來透過Maven建構一個可執行的JAR
實驗1
創建一個Maven專案
mvn archetype:generate -DarchetypeGroupId=org.apache.maven.archetypes -DarchetypeArtifactId=maven-archetype-quickstart -DarchetypeVersion=1.5
pom.xml加入以下資訊
<build>
  <!-- 其它設定略 -->
  <plugins>
      <!-- 為jar plugin 配置manifest資訊 -->
      <plugin>
        <groupId>org.apache.maven.plugins</groupId>
        <artifactId>maven-jar-plugin</artifactId>
        <configuration>
          <archive>
            <manifest>
              <addClasspath>true</addClasspath>
              <mainClass>com.mycompany.App</mainClass>
            </manifest>
          </archive>
        </configuration>
      </plugin>
      <!-- 配置這個plugin就可以透過mvn執行java程式 -->
      <plugin>
        <groupId>org.codehaus.mojo</groupId>
        <artifactId>exec-maven-plugin</artifactId>
        <version>3.6.0</version>
        <configuration>
          <mainClass>com.mycompany.App</mainClass>
        </configuration>
      </plugin>
    </plugins>
</build>
mvn執行
mvn compile exec:java
執行結果ok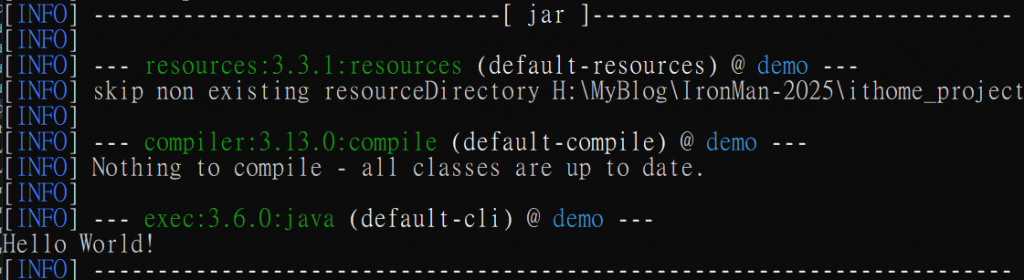
打包後直接執行產生的jar
實驗2
引入第三方JAR並修改一下程式與pom.xml
  <dependencies>
    <!-- 其它略 -->
    <dependency>
        <groupId>org.apache.commons</groupId>
        <artifactId>commons-lang3</artifactId>
        <version>3.19.0</version>
    </dependency>
  </dependencies>
public class App {
    public static void main(String[] args) {
        String str = StringUtils.trim("  Hello World! USE Apache Commons  ");
        System.out.println(str);
    }
}
mvn執行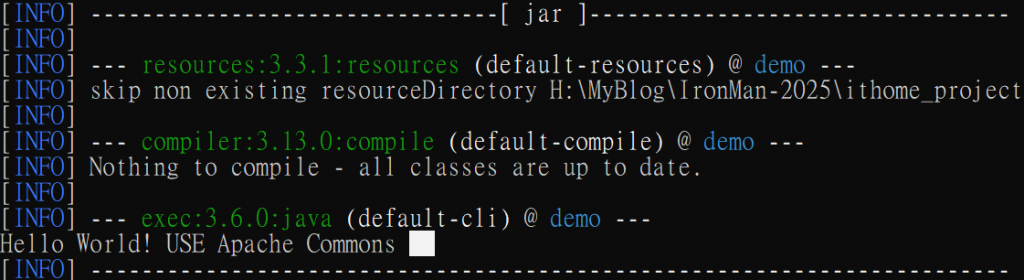
打包後直接執行產生的jar
為什麼會這樣呢
解決方案
java -jar會執行失敗是因為套件commons-lang3未包含在JAR本身當中,而且要使用-cp參數會失效,如果要執行成功只能使用java指令並將第三方套件放入classpath中與指定執行的classjava -cp "demo-1.0-SNAPSHOT.jar;lib\*" com.mycompany.App

3. 若要透過java -jar執行需要設定該jar檔的classpath路徑於manifest檔案中
<plugin>
  <groupId>org.apache.maven.plugins</groupId>
  <artifactId>maven-jar-plugin</artifactId>
  <configuration>
    <archive>
      <manifest>
        <addClasspath>true</addClasspath> <!-- add -->
        <classpathPrefix>lib/</classpathPrefix> <!-- add -->
        <mainClass>com.mycompany.App</mainClass>
      </manifest>
    </archive>
  </configuration>
</plugin>

<plugin>
  <groupId>org.apache.maven.plugins</groupId>
  <artifactId>maven-dependency-plugin</artifactId>
  <version>3.8.0</version>
  <executions>
    <execution>
      <id>copy-dependencies</id>
      <phase>package</phase>
      <!-- 透過這個goal把用到的lib搬到target目錄下方便測試 -->
      <goals>
        <goal>copy-dependencies</goal>
      </goals>
      <configuration>
        <outputDirectory>${project.build.directory}/lib</outputDirectory>
        <overWriteReleases>false</overWriteReleases>
        <overWriteSnapshots>false</overWriteSnapshots>
        <overWriteIfNewer>true</overWriteIfNewer>
      </configuration>
    </execution>
  </executions>
</plugin>
重新執行mvn clean package與java -jar demo-1.0-SNAPSHOT.jar會發現執行成功了,我們來看看mainfest檔的內容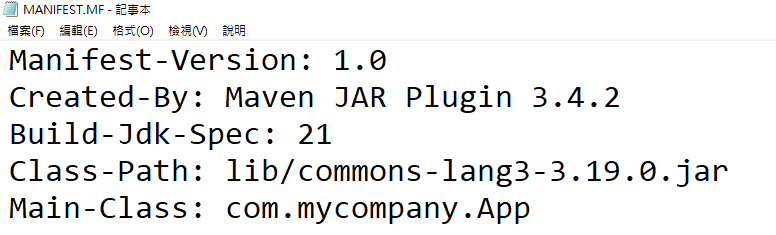
我們今天講述了JAR檔的架構與manifest檔案的組成,同時說明透過指令java -jar執行JAR檔時需要在mainfest檔案中加入Main-Class屬性,如有相依的套件則須加入Class-Path屬性,因為-cp參數會失效,不然只能透過java指令執行


 iThome鐵人賽