今天的重點是:
/health 測試端點。/recommend 推薦 API。在前 20 天,我們完成了 MLflow 模型的:
但這些模型目前只存在於 MLflow server 裡。
要讓「應用層」或「前端 UI」使用推薦模型,
我們需要一個穩定、乾淨、可擴充的 API 層 ——
這正是 FastAPI 的任務。
FastAPI 是 Python 最快的 Web Framework 之一,
使用 Pydantic 驗證輸入,並自動生成 Swagger UI。
它的角色是:
Client (使用者 / Streamlit)
        │
        ▼
   [FastAPI Server]
        │
        └── /recommend → 呼叫 MLflow 模型
後續我們會做到:
在你的 docker-compose.yml 中新增以下段落:
  fastapi:
    build:
      context: .
      dockerfile: docker/Dockerfile.fastapi
    container_name: fastapi
    ports:
      - "8000:8000"
    volumes:
      - ./src/api:/usr/mlflow/src/api
    working_dir: /usr/mlflow/src/api
    command: uvicorn main:app --host 0.0.0.0 --port 8000 --reload
    networks:
      - mlops-net
📂 docker/Dockerfile.fastapi
FROM python:3.10-slim

WORKDIR /usr/mlflow

COPY docker/requirements-dev.txt .
RUN pip install --no-cache-dir -r requirements-dev.txt

# 安裝 FastAPI 與 Uvicorn
RUN pip install fastapi==0.111.0 uvicorn==0.30.1

EXPOSE 8000
CMD ["uvicorn", "main:app", "--host", "0.0.0.0", "--port", "8000"]
📂 src/api/main.py
from fastapi import FastAPI

app = FastAPI(
    title="Anime Recommender API",
    description="FastAPI + MLflow 推薦系統",
    version="1.0.0"
)

@app.get("/health")
def health_check():
    return {"status": "ok", "message": "FastAPI is running 🚀"}
執行:
docker compose up -d fastapi
查看容器:
docker ps
確認有一個 fastapi container 在跑。
接著打開瀏覽器:
👉 http://127.0.0.1:8000/docs
你會看到自動產生的 Swagger UI: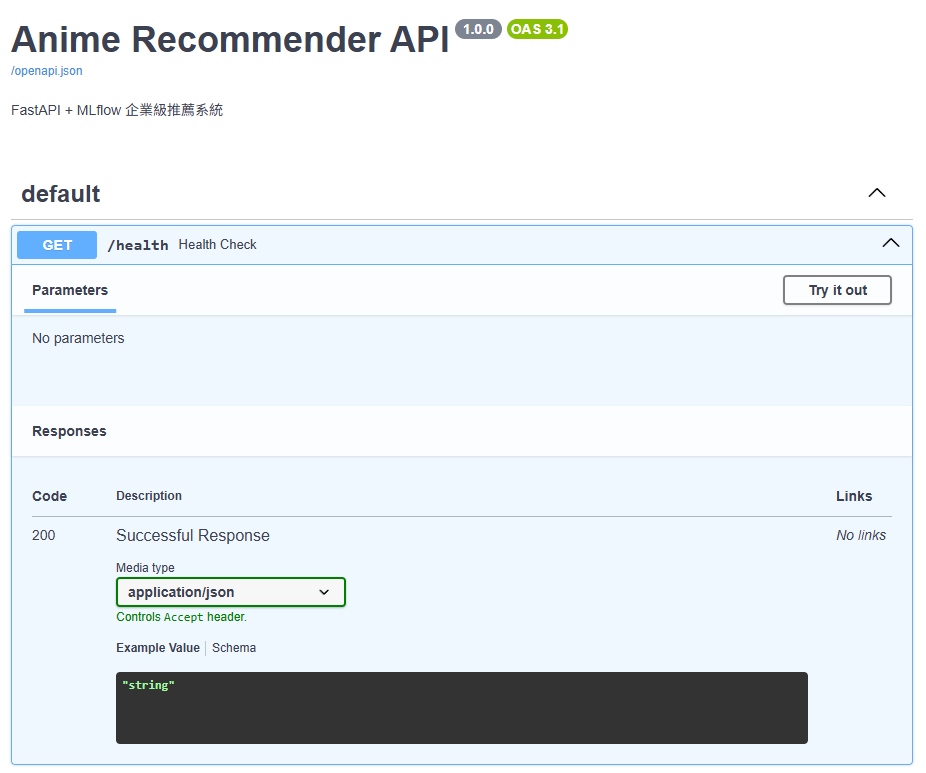
在內部網路中,我們可以使用以下語法確認API,於是我們可以回到jupyter環境執行:
curl http://fastapi:8000/health
回傳:
{
  "status": "ok",
  "message": "FastAPI is running 🚀"
}
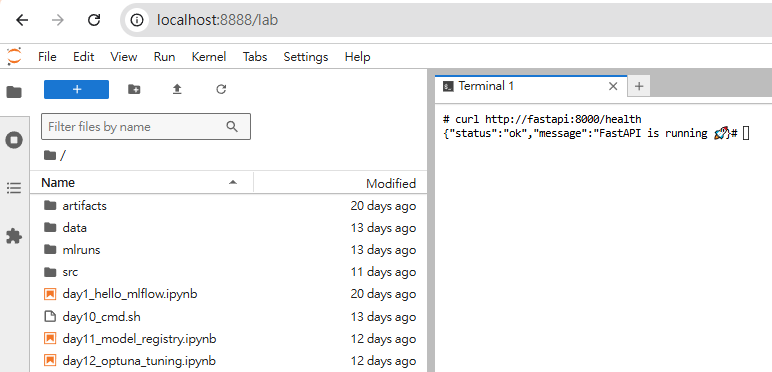
代表你的 FastAPI 環境架構成功!
Docker Compose
│
├── mlflow       → 模型管理與註冊
├── postgres     → MLflow backend
├── python-dev   → Notebook 開發環境
└── fastapi      → 模型服務層 (API)
FastAPI 是整個系統的「應用層」,
之後會與 MLflow registry 的模型互動。
/health 端點,驗證 API 架構。/recommend,在企業實作中,FastAPI 通常還會:
但在這個 30 天系列中,我們保持「最小可行」策略,
讓你先能跑通完整 MLOps + API 流程,再逐步進階。

