在上一篇,我們已經完成了 Android 前端的聊天畫面。
這篇要來讓 Android 前端真的連上後端,讓使用者輸入訊息後,系統可以透過 API 呼叫 Agent 並回傳回覆。
首先,我們需要讓 App 具備網路連線的能力。
打開 AndroidManifest.xml,加入以下設定:
<uses-permission android:name="android.permission.INTERNET" />
<!-- 允許應用程式使用網路,否則無法發送 HTTP 請求 -->

<application
    android:networkSecurityConfig="@xml/network_security_config"
    ... >
    <!-- 告訴 Android 使用自定義的網路安全設定檔 -->
</application>
像這樣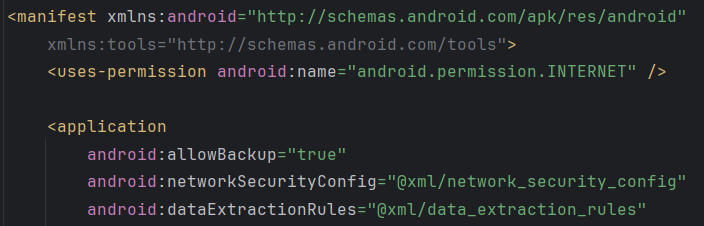
這段設定能讓 APP 可以進行 HTTP 連線。
其中的 android:networkSecurityConfig 會指向我們稍後要建立的network_security_config.xml,用來允許 App 連線到 HTTP(非 HTTPS) 的伺服器。
接著,在 res/xml 資料夾下新增一個network_security_config.xml:
<?xml version="1.0" encoding="utf-8"?>
<network-security-config xmlns:android="http://schemas.android.com/apk/res/android">
    <domain-config cleartextTrafficPermitted="true">
        <domain includeSubdomains="true">10.0.2.2</domain>
    </domain-config>
</network-security-config>
這裡使用 10.0.2.2 是因為模擬器要連到主機電腦的 localhost。
若是實機測試,請改成你電腦在同一 Wi-Fi 網路下的 IP(例如 192.168.x.x)。
查 IP 提示:
開啟終端機輸入ipconfig,找到「IPv4 位址」即可。
在 app/build.gradle 中的 dependencies 加入:
implementation 'com.squareup.retrofit2:converter-gson:2.9.0'
implementation 'com.squareup.retrofit2:retrofit:2.9.0'
//Retrofit

implementation 'com.squareup.retrofit2:adapter-rxjava3:2.9.0'
implementation 'io.reactivex.rxjava3:rxjava:3.1.6'
implementation 'io.reactivex.rxjava3:rxandroid:3.0.0'
//RxJava
Retrofit 的初始化設定,用來定義 API 的基本連線資訊:
public class AgentApiClient {
    public Retrofit AgentApi(){
        return new Retrofit.Builder()
                // 設定後端 API 的 baseUrl,記得改成自己的 IP 和 Port
                .baseUrl("http://10.0.2.2:5678/")
                .addConverterFactory(GsonConverterFactory.create())
                .addCallAdapterFactory(retrofit2.adapter.rxjava3.RxJava3CallAdapterFactory.create())
                .build();
    }
}
這個類別的角色是 建立 Retrofit 客戶端。
Retrofit 讓我們能更輕鬆地發送 HTTP 請求與接收回應。addConverterFactory() 處理 JSON 序列化,addCallAdapterFactory() 讓 Retrofit 支援 RxJava 的非同步操作。
定義與後端互動的 API 介面:
public interface AgentApiService {
    // 使用 POST 請求到 /RootAgent
    @POST("RootAgent")
    Observable<Response<AgentResponse>> getAgentResponse(
            @Query("userInput") String userInput // 傳送查詢參數 userInput

    );
}
這是與後端互動的接口。
它會發送一個 POST 請求 到 /RootAgent,並傳入使用者輸入的文字 userInput。
定義後端回傳的資料結構:
public class AgentResponse {
    public String response; // 從後端接收到的回覆文字

    public String getMessage() {
        return response; // 提供外部呼叫時使用的 getter
    }
}
對應後端回傳的 JSON,例如:
{"response": "你好!這是 RootAgent 回覆"}
接著我們回到主畫面,讓「發送」按鈕可以真的呼叫 API。
MainActivity.javapublic class MainActivity extends AppCompatActivity {
private RecyclerView chatRv;
private EditText messageEt;
private Button sendBtn;
private MessageAdapter adapter;
private ArrayList<Message> messageList;
private AgentApiService agentApiService; // Retrofit API 服務
@Override
protected void onCreate(Bundle savedInstanceState) {
super.onCreate(savedInstanceState);
setContentView(R.layout.activity_main);
chatRv = findViewById(R.id.main_chat_rv);
messageEt = findViewById(R.id.main_message_et);
sendBtn = findViewById(R.id.main_send_btn);
messageList = new ArrayList<>();
adapter = new MessageAdapter(messageList);
chatRv.setLayoutManager(new LinearLayoutManager(this));
chatRv.setAdapter(adapter);
// 建立 Retrofit 服務實例
agentApiService = new AgentApiClient().AgentApi().create(AgentApiService.class);
sendBtn.setOnClickListener(new View.OnClickListener() {
@Override
public void onClick(View v) {
String msg = messageEt.getText().toString();
if (!msg.isEmpty()) {
messageList.add(new Message(msg, true));
adapter.notifyItemInserted(messageList.size() - 1);
chatRv.scrollToPosition(messageList.size() - 1);
messageEt.setText("");
Log.d("send", "userInput:" + msg);
// 呼叫後端 API
getMsg(msg);
}
}
});
}
private void getMsg(String userInput) {
agentApiService.getAgentResponse(userInput)
.subscribeOn(Schedulers.io())
.observeOn(AndroidSchedulers.mainThread())
.subscribe(new DisposableObserver<Response<AgentResponse>>() {
@Override
public void onNext(@NonNull Response<AgentResponse> agentResponse) {
// 檢查用的 Log
Log.d("getMsgOnNext", "userInput:" + userInput);
if (agentResponse.body() != null) {
// 顯示 Agent 回覆
messageList.add(new Message(agentResponse.body().getMessage(), false));
adapter.notifyItemInserted(messageList.size() - 1);
chatRv.scrollToPosition(messageList.size() - 1);
Log.d("getMsgOnNext","complete" + agentResponse.body().getMessage());
}
}
@Override
public void onError(@NonNull Throwable e) {
// 檢查用的 Log
Log.e("getMsg", "onError: " + e.getMessage());
}
@Override
public void onComplete() {
// 檢查用的 Log
Log.d("getMsg", "onComplete: ");
}
});
}
}
這段程式邏輯的流程如下:
/RootAgent API。Hotel_Contrast_Agent
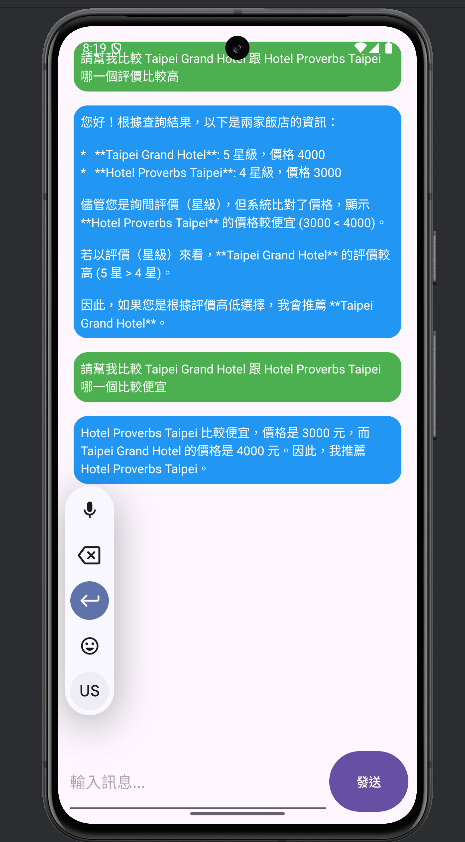
1. 請幫我比較 Taipei Grand Hotel 跟 Hotel Proverbs Taipei 哪一個評價比較高
2. 請幫我比較 Taipei Grand Hotel 跟 Hotel Proverbs Taipei 哪一個比較便宜
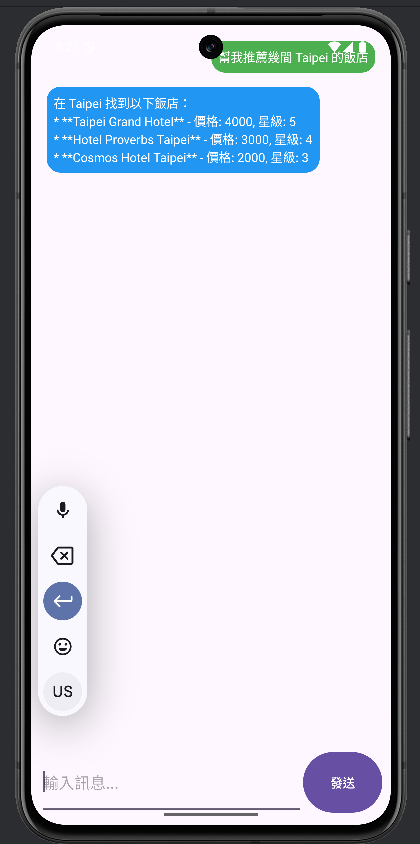
Hotel_Search_Agent
1. 幫我推薦幾間 Taipei 的飯店
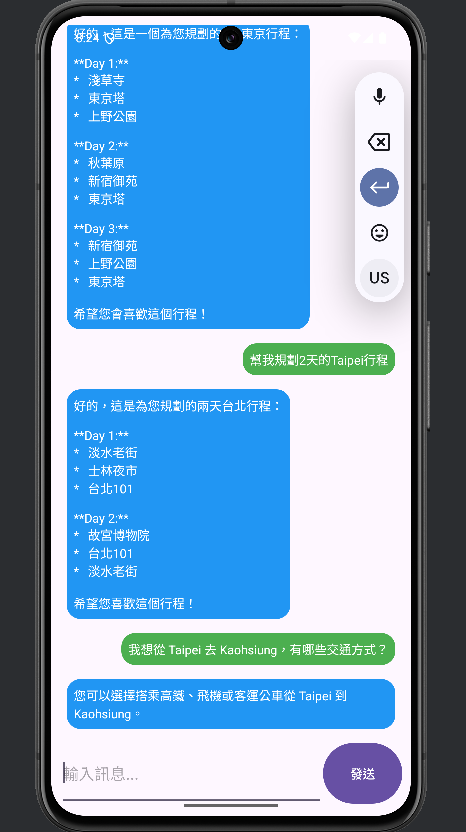
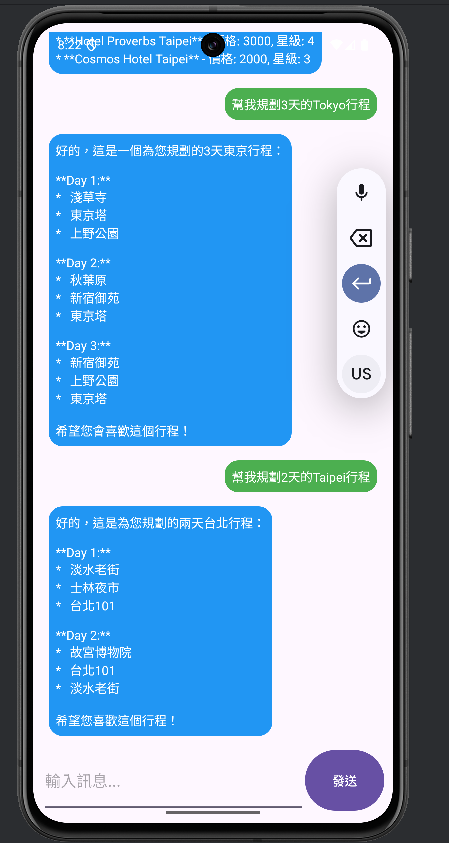
Itinerary_Agent
1. 幫我規劃3天的Tokyo行程
2. 幫我規劃2天的Taipei行程
Transport_Agent
1. 我想從 Taipei 去 Kaohsiung,有哪些交通方式?