iT邦幫忙

2017 iT 邦幫忙鐵人賽
DAY 23
0
DevOps

實作 ASP.NET Core 持續整合/交付系列 第 23

Microsoft Bot Framework

前言

在後續的三篇文章,我們將嘗試使用 Microsoft Bot Framework 與 TeamCity 進行互動。一般正常持續整合流程其實比較少見透過機器人程式幫助我們進行工作,但若是機器人的程式部分做的不錯,將更簡化我們的操作流程,像列出進行某項持續整合工作、顯示說明、回傳建置結果與列出log...等工作,甚至你完全不需要了解持續整合如何運作,您只需要與之溝通即可完成你想要的工作,相當方便。本篇文章將簡單介紹如何透過 Microsoft Bot Framework,建置您專屬的管家,若有錯誤或任何建議,請各位先進不吝提出,謝謝。

註:Microsoft Bot Framework 目前於 preview 版本,網站與操作方式可能因為改版而與本篇文章有所差異。


介紹

建立您的機器人程式

Step 1.首先開啟 Microsoft Bot Framework doc 網頁 -> 展開Bot Builder for .NET -> 點選 Connector Service
http://ithelp.ithome.com.tw/upload/images/20161224/20091494YYKk0kFUbM.png

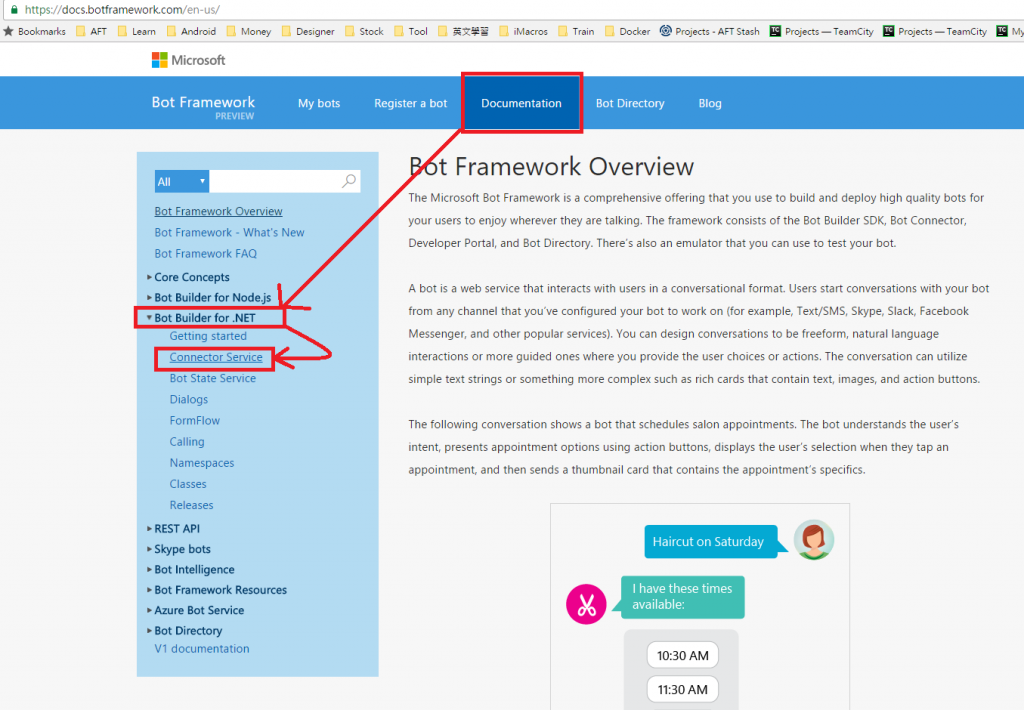
Step 2.點選 Getting started with the Connector
http://ithelp.ithome.com.tw/upload/images/20161224/20091494tf4LKezVZ4.png

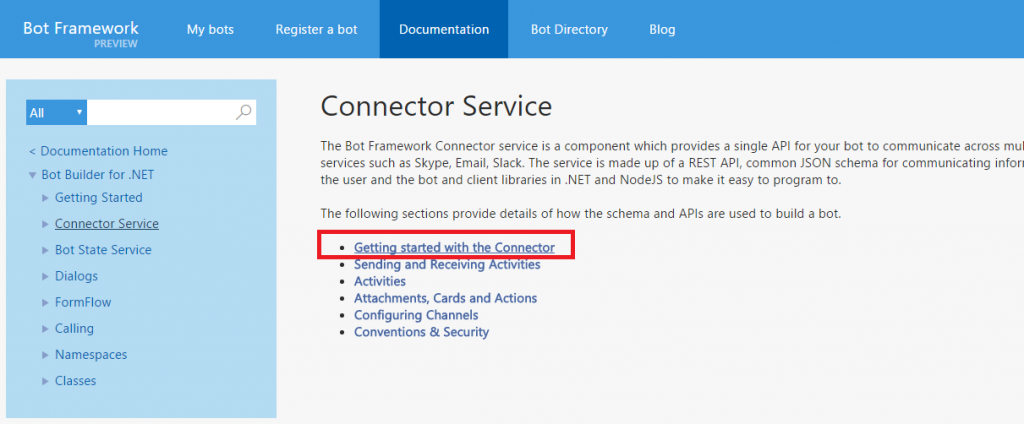
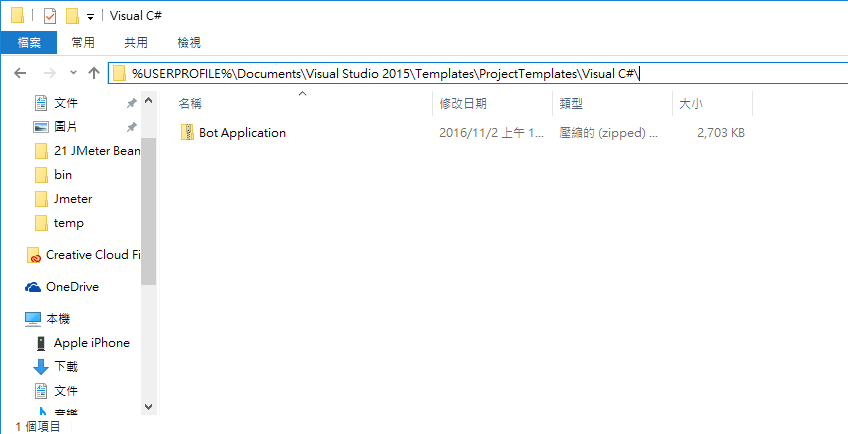
Step 3.這裡有兩種方式讓您的 visual studio 2015 有 Bot Framework Connector SDK .NET template 可以使用:

  1. 下載最新版本的 visual studio 2015,或者透過 Tools->Extensions and Updates->Updates 升級到最新版本
  2. 透過此連結下載新版template,並解壓縮後放置 "%USERPROFILE%\Documents\Visual Studio 2015\Templates\ProjectTemplates\Visual C#" 目錄下(如下圖所示)
    http://ithelp.ithome.com.tw/upload/images/20161224/20091494HO1BmoHadi.png

Step 4.開啟您的 visual studio 2015,開新專案搜尋bot,即可找到樣板,建立您第一個 bot 程式
http://ithelp.ithome.com.tw/upload/images/20161224/200914944KLNwS2daQ.png

Step 5.起動您的程式,您會看到有連結請您註冊您的bot,並提醒你的endpoint格式
http://ithelp.ithome.com.tw/upload/images/20161224/20091494xQXwHLP6Es.png

註冊您的 Bot

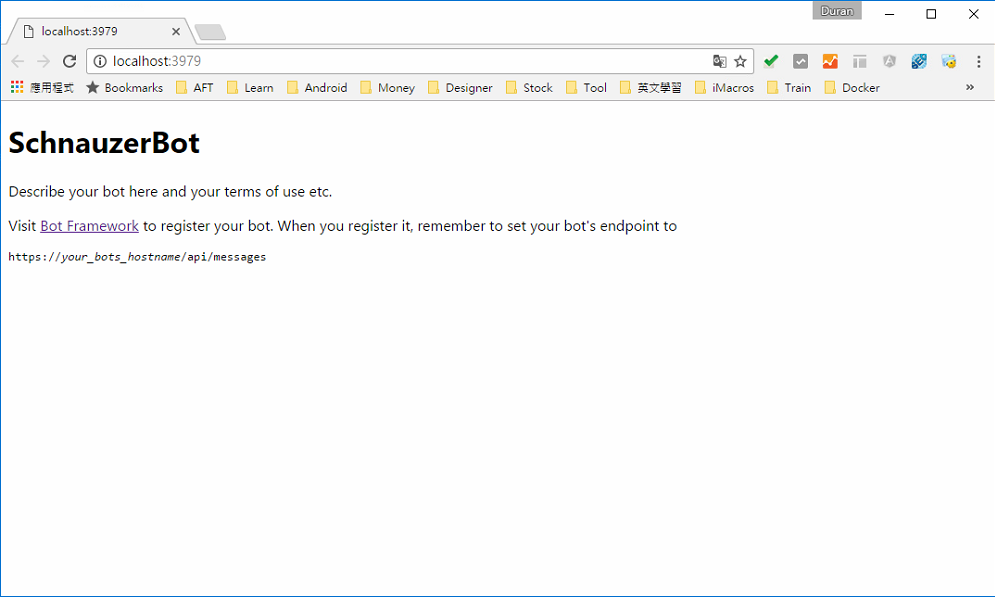
Step 1.開啟註冊bot網頁,依序輸入Name、Bot handle、Description(endpoint可以先不輸入,待你的程式上傳Azure app再輸入):
http://ithelp.ithome.com.tw/upload/images/20161224/20091494NsedmpYA9z.png

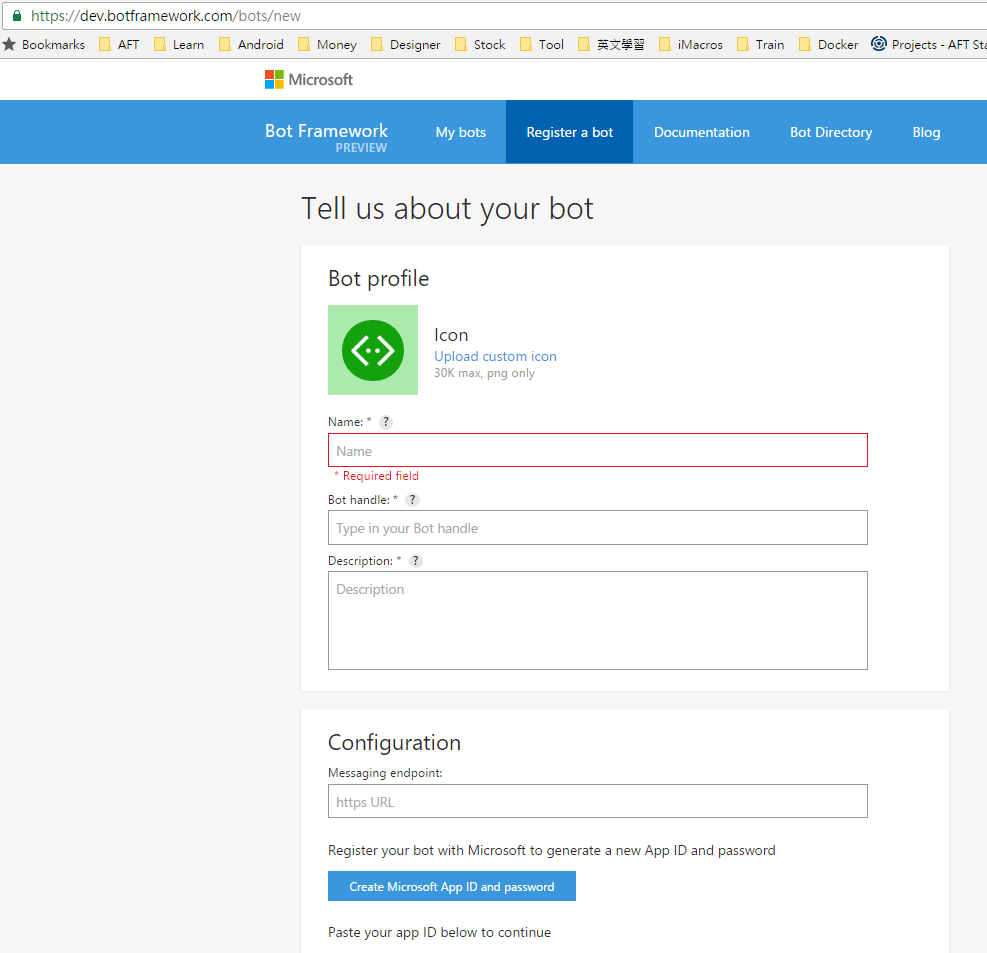
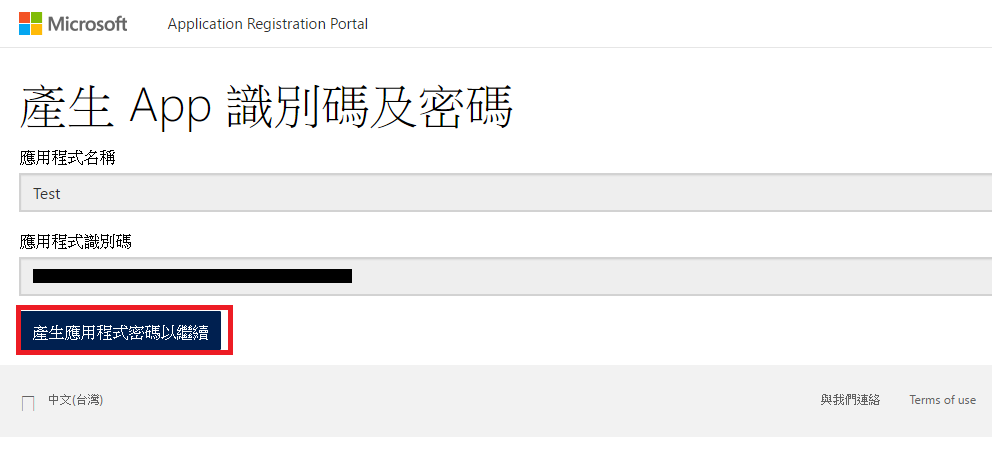
Step 2.點選 Create Microsoft App ID and password 開啟另一個頁面產生ID與密碼
**註:請記下你的ID與密碼,晚一點你在模擬器與程式內需要用到,因為只有這個畫面會出現,若沒有記錄下來您必須再次重新產生密碼 **
http://ithelp.ithome.com.tw/upload/images/20161224/20091494GVji4AdPWK.png

http://ithelp.ithome.com.tw/upload/images/20161224/2009149425BGMUIb1y.png

Step 3.完成後點選register
http://ithelp.ithome.com.tw/upload/images/20161224/200914940PX8AABwtQ.png

http://ithelp.ithome.com.tw/upload/images/20161224/200914949iCo5LjCYb.png

`

下載模擬器

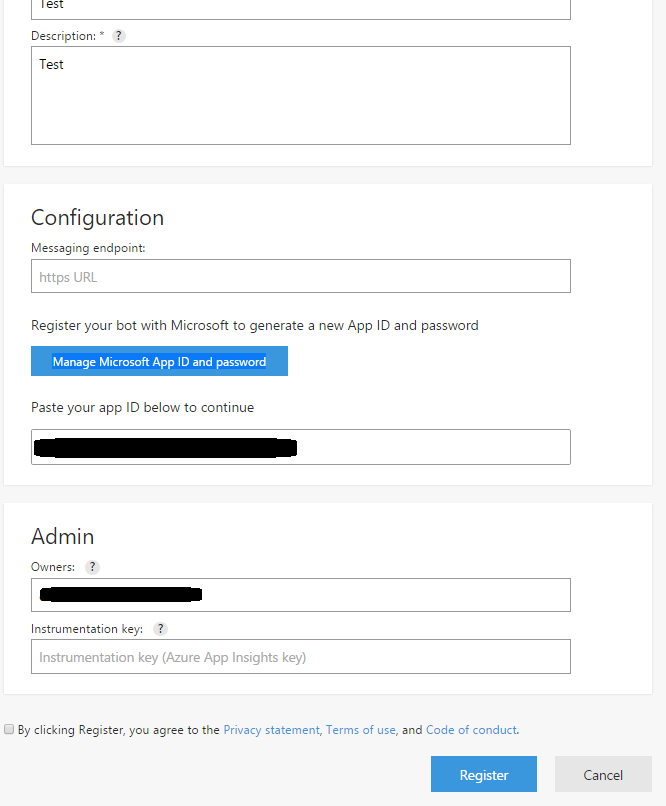
當你在開發機器人程式過程中,會需要進行測試流程,您可以透過這個模擬器與您的機器人溝通。
Step 1.點選連結到模擬器的 Github位址,您可以往下拉,** 下方downlord section內**點選進行下載(連結)。
http://ithelp.ithome.com.tw/upload/images/20161224/20091494DLrLxD2IjY.png

Step 2.將帳號密碼放置到web.config內(格式如下),重新啟動程式:

<add key="MicrosoftAppId" value="1111111-1111-1111-1111-111111111111" />
<add key="MicrosoftAppPassword" value="11111111111111111111111" />

http://ithelp.ithome.com.tw/upload/images/20161225/20091494LgAInONPsW.png

Step 3.下載完成後,直接執行,會看到下列畫面:你需要輸入endpoint、app id 與 password
** 註:此時您的endpoint可以輸入 visual studio 2015 啟動的網址(例如:http://localhost:3979/)**
http://ithelp.ithome.com.tw/upload/images/20161224/20091494RtpxWSAAaI.png

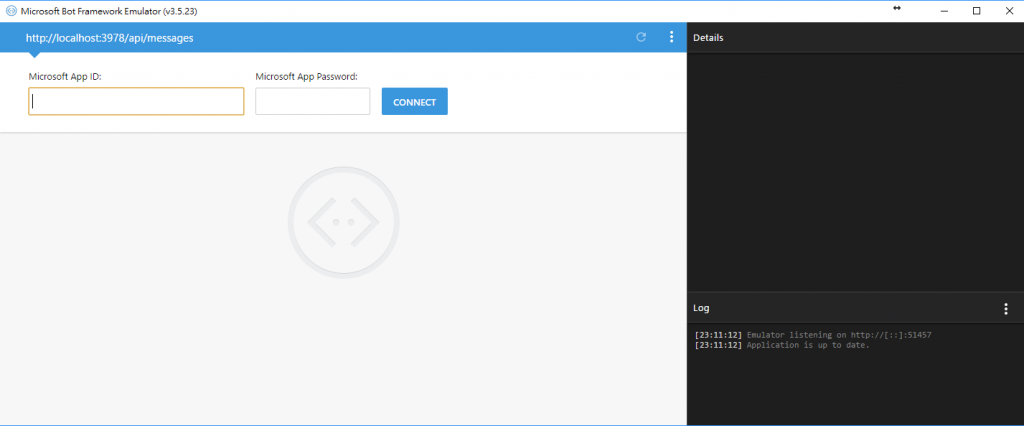
Step 4.在模擬器內與您的機器人打個招呼:
http://ithelp.ithome.com.tw/upload/images/20161225/20091494ltkLdvUsVQ.png

`

上傳您的程式至 Azure App

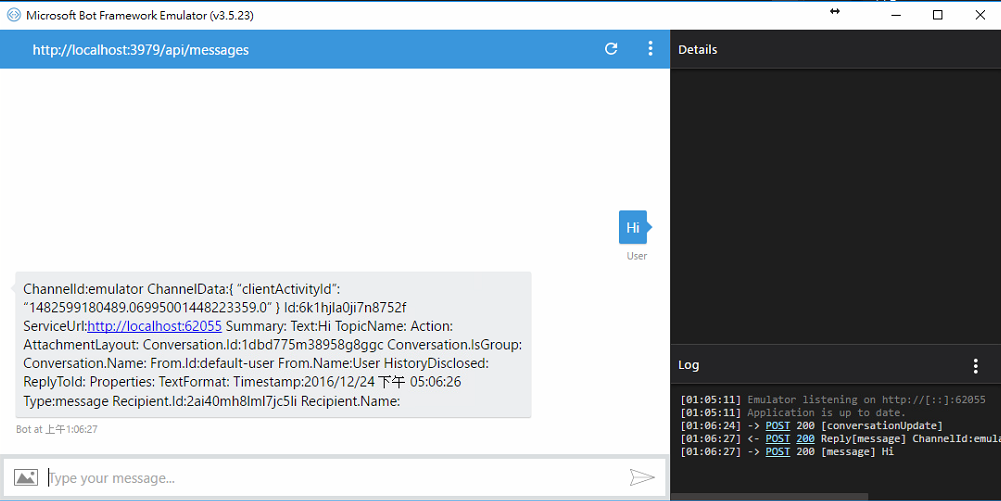
Step 1.對你的專案點選右鍵,選擇 publish
http://ithelp.ithome.com.tw/upload/images/20161225/20091494mmnvKHak1m.png

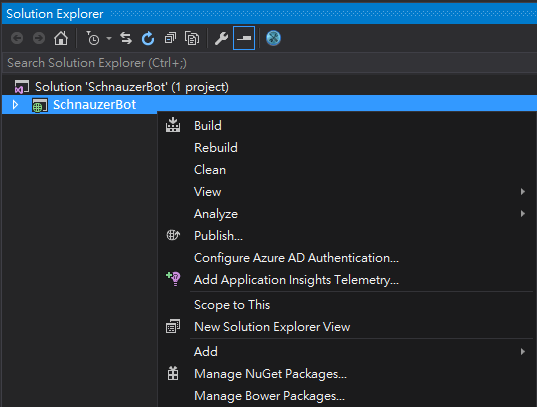
Step 2.選擇microsoft Azure App service
http://ithelp.ithome.com.tw/upload/images/20161225/20091494oWCwHGLDH8.png

Step 3.登入您的Azure帳號,選擇您的訂閱方式;選擇右邊new 按鈕新增web app service方案
http://ithelp.ithome.com.tw/upload/images/20161225/20091494H6d3B2Mi17.png

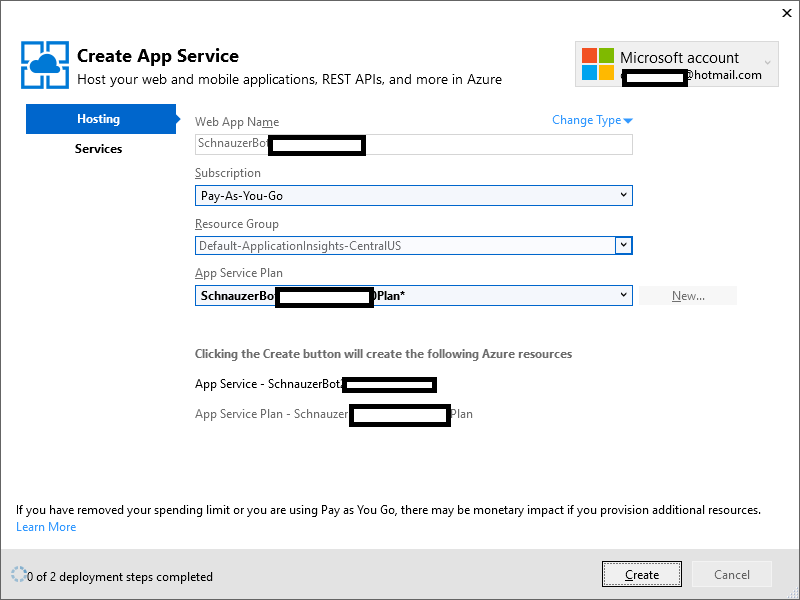
Step 4.輸入您web App相關資訊(名稱、位置、使用計畫...等)。完成後按下create
http://ithelp.ithome.com.tw/upload/images/20161225/20091494PkM1v0xcQ4.png

http://ithelp.ithome.com.tw/upload/images/20161225/20091494pNpxC1XG7W.png

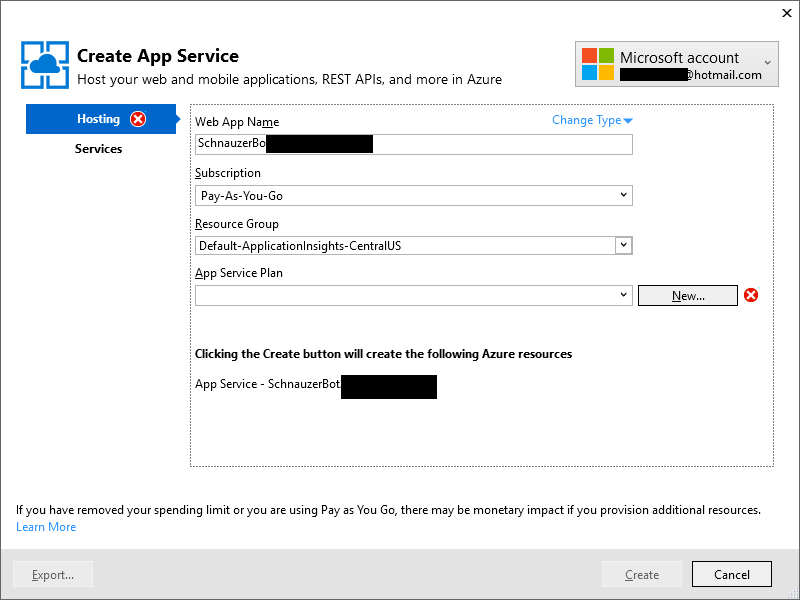
Step 5.點選publish後,將您的bot程式佈署於azure web app
http://ithelp.ithome.com.tw/upload/images/20161225/20091494jclmSutTHM.png

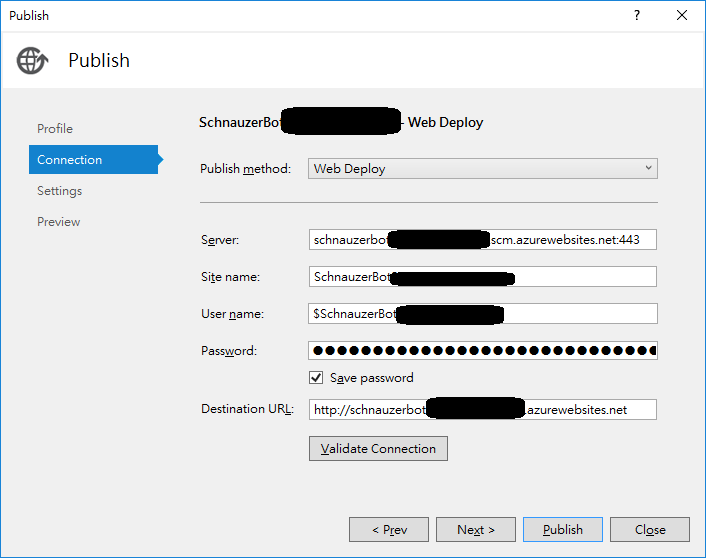
step 6.記得返回 microsoft bot framework 內輸入您azure web app url 至 endpoint
http://ithelp.ithome.com.tw/upload/images/20161225/20091494oYxEeI6iSG.png


上一篇:JMeter 與 TeamCity 整合
下一篇:Skype Bot C# 基本教學
返回目錄

參考資料

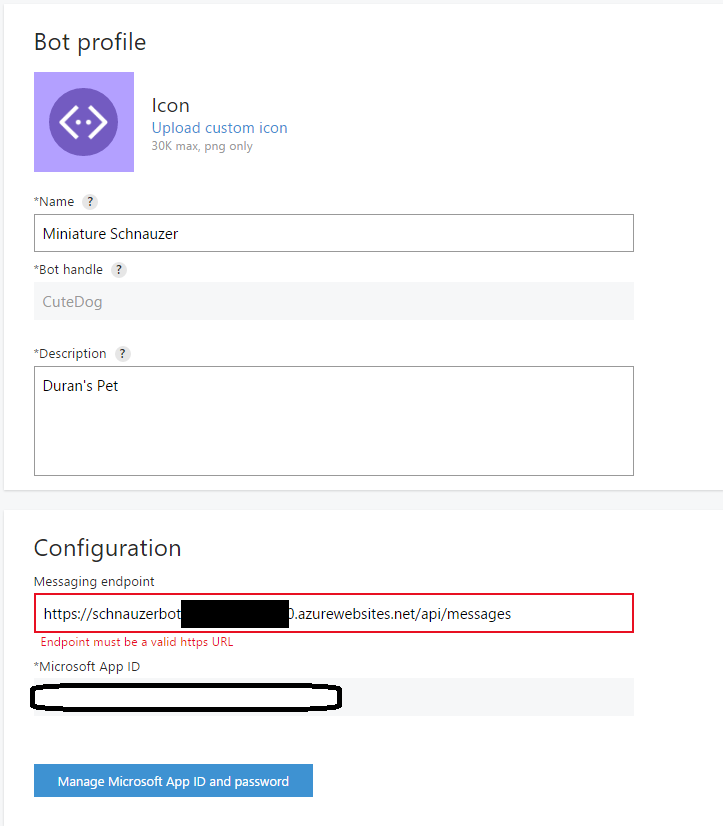
註:本系列文章將於2016 IT邦幫忙鐵人賽進行同時,一併發佈於個人blogger與dotblog。


上一篇
JMeter 與 TeamCity 整合
下一篇
Skype Bot C# 基本教學
系列文
實作 ASP.NET Core 持續整合/交付30
圖片
  直播研討會
圖片
{{ item.channelVendor }} {{ item.webinarstarted }} |
{{ formatDate(item.duration) }}
直播中

尚未有邦友留言

立即登入留言