經過前兩篇的介紹,希望對於Servlet有點基礎概念了,在這一篇,我們會實作一個簡單的把你輸入東西顯示在畫面上的一個Hello world網站。
(和我部落格同時發佈:http://www.dotblogs.com.tw/alantsai/archive/2013/09/28/120970.aspx)
基本流程
基本上來說,我們要建立這個範例會牽扯到以下幾個步奏:
1.開啟Eclipse建立一個Dynamic Web Project
2.增加一個Servlet
3.增加get顯示頁面
4.增加post顯示頁面
Eclipse建立一個Dynamic Web Project
就和VS裡面一樣,要開始Web開發的時候我們需要建立一個Project。而Servlet網站的Project類型就是Dynamic Web Project。
我們可以透過在Project Explorer裡面點右鍵新建一個Project:
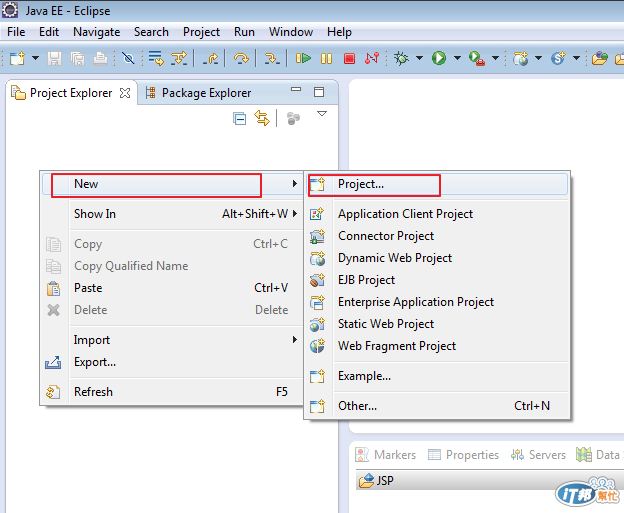
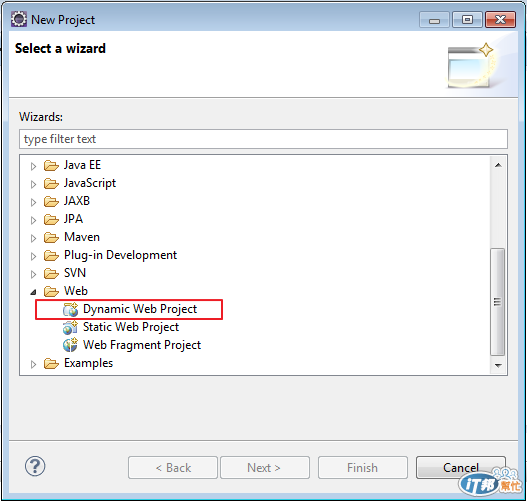
這個時候可以在輸入框輸入"Dynamic Web Project"來過濾,或者往下卷在“Web”下面:
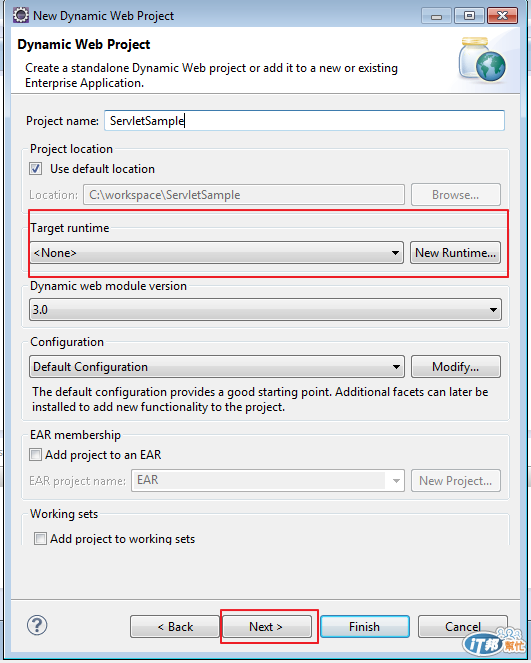
輸入專案名稱,這邊需要選取你的Target Runtime(看到的時候感覺Target Runtime不應該就是JRE嗎?還記得之前提到對於Servlet來說Container就是他的Runtime,因此這邊設定就是有實作Servlet API的Container路徑。),我們使用Tomcat 7 因此這邊設定使用是Tomcat 7。
(這邊設定畫面我先跳過,在之後從另一邊設定,畫面是一樣的,這樣做主要爲了如果有些人忘記在這邊設定還能夠找到地方去設定。)
還記得在上一篇提到可以在Web.xml裡面設定Servlet對應路徑等,這邊勾選的"Generate web.xml deployment descriptor"講的就是那個xml(也叫做Deployment Descriptor)
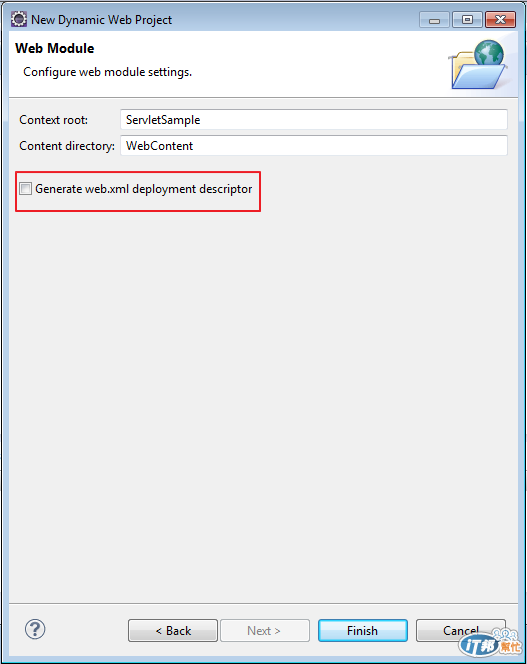
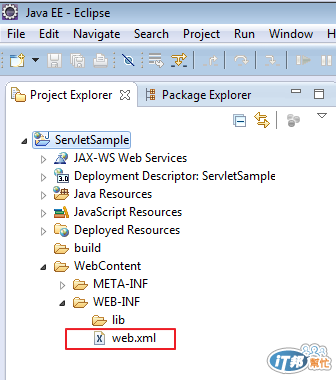
按下Finish就創建完成。可以看到web.xml在WebContet/WEB-INF/web.xml:
增加一個Servlet
現在要開始增加一個Servlet。
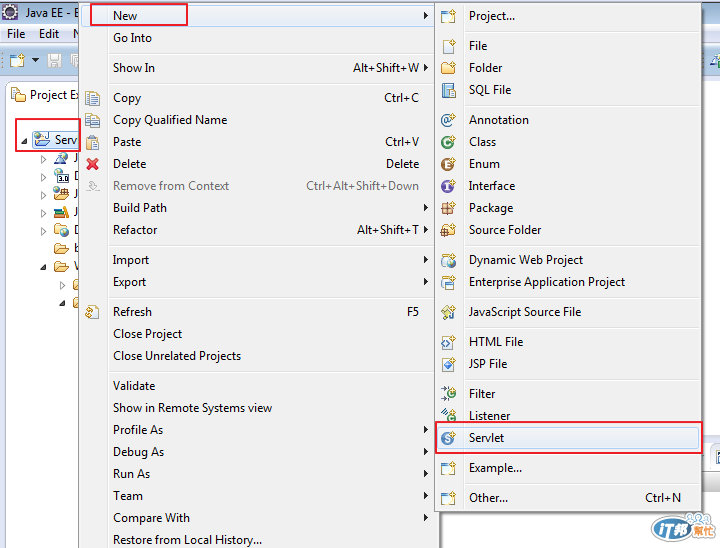
對新建的project點右鍵選New->Servlet:
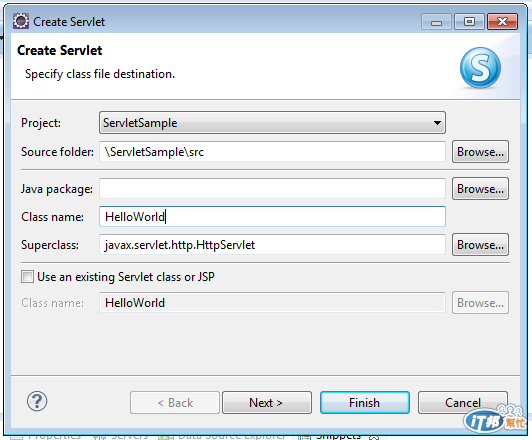
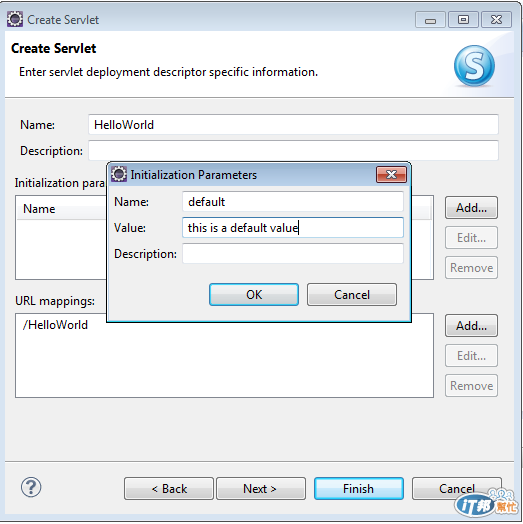
這邊可以看到一些設定:
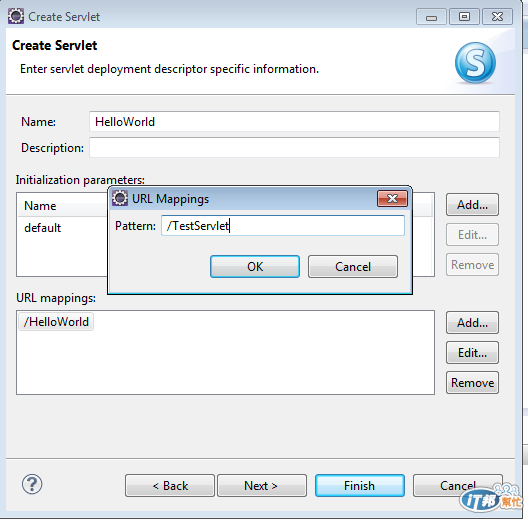
接下來設定上一篇提到的web.xml裡面Servlet的對應:
預設URL Mapping是對應到和這個Servlet名稱一樣(這個例子是HelloWorld),我們可以修改Pattern:
接下來就完成了。
題外話 - 關於新建Servlet web.xml設定
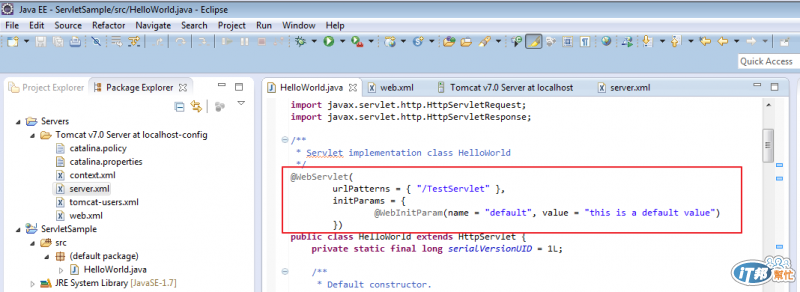
如果建立完Servlet去看web.xml會發現他沒有像上一篇提到那樣建立Servlet設定,主要原因是在Servlet 3.0(在新建project設定名稱裡面的“Dynamic Web Module version”,如果選2.5會直接加到web.xml)以後預設建立會以Annotation(有點像C#的Attribute)的方式來設定Url mapping等。
這種好處是,如果你在web.xml又設定以後,會以web.xml的為主,等於annotation只是一個預設值。
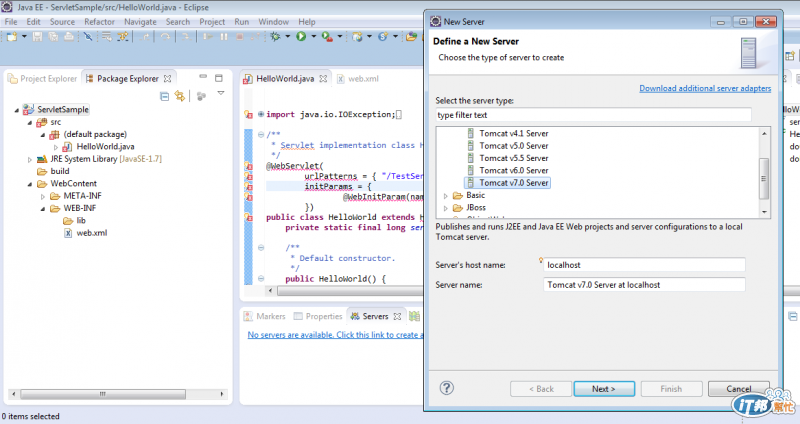
題外話 - 設定Target Runtime
記得在設定Project的時候沒有設定Target Runtime。如果沒有設定Target Runtime這個時候Servlet是沒有辦法Build的。因為會需要Servlet相關物件,因此需要加入對應的實作class。以我們例子我們使用Tomcat,所以要先把他加入才可以。
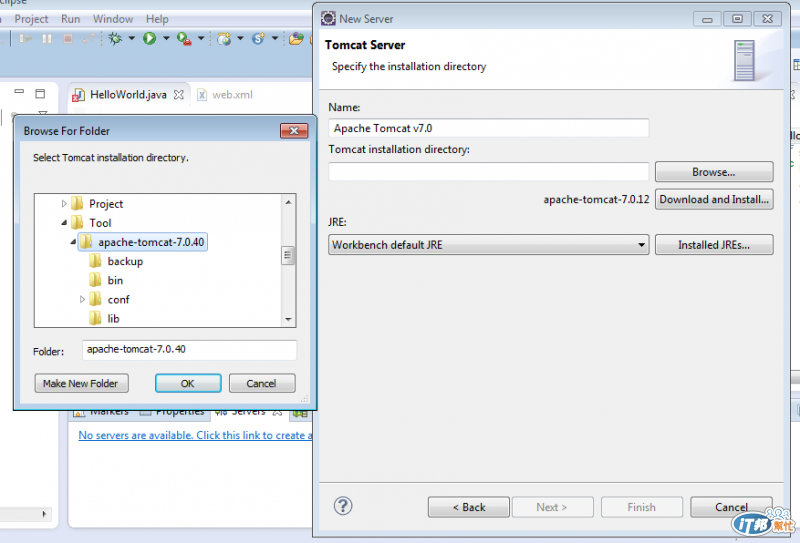
首先,我們需要先加一個Tomcat的Server。在View “Servers”裡面選擇新增,並且選Tomcat 7:
選取解壓Tomcat的位置:
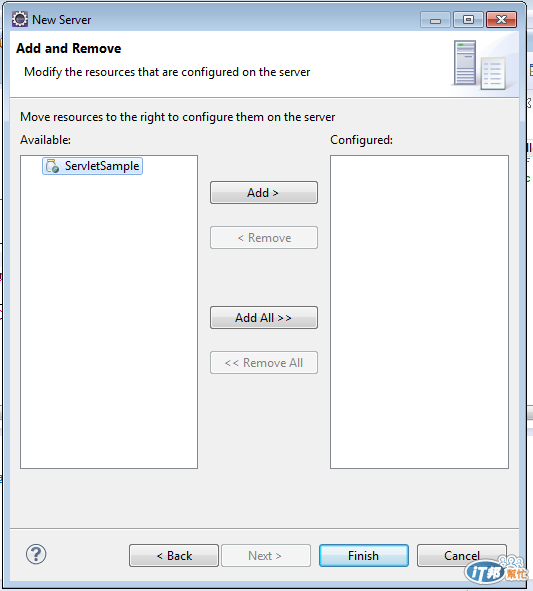
把我們的Dynamic Project加入成為Module:
完成之後,我們有了等一下會跑的Server。最後需要把那個Server的class加進去。
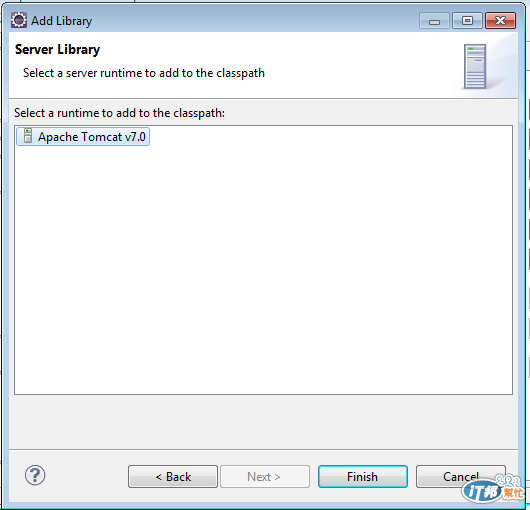
我們先對Project點右鍵“Properties”找到"Java Build Path"選擇"Add Library"選"Server Runtime"

選擇Tomcat就完成了:
增加get顯示頁面
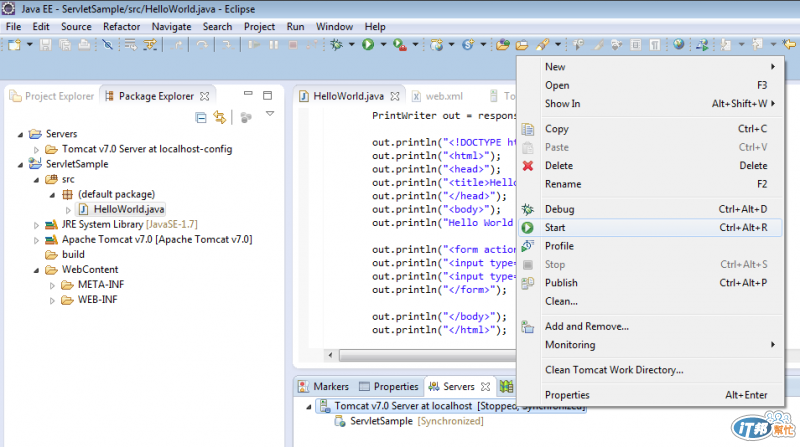
回到“HelloWorld.java”,我們先來設定doGet()的內容:
protected void doGet(HttpServletRequest request, HttpServletResponse response) throws ServletException, IOException { // TODO Auto-generated method stub response.setCharacterEncoding("UTF-8"); request.setCharacterEncoding("UTF-8");
String requestUri = request.getRequestURI(); response.setContentType("text/html");
PrintWriter out = response.getWriter(); out.println("");
out.println("");
out.println("");
out.println("<title>Hello world</title>");
out.println("");
out.println("");
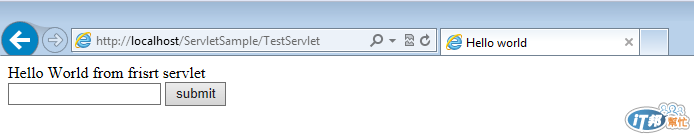
out.println("Hello World from frisrt servlet");
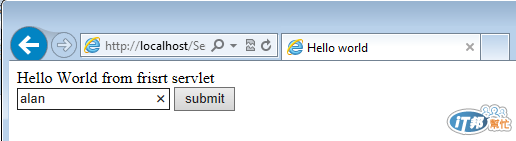
out.println("<form action='" + requestUri + "' method='post'>");
out.println("<input type='text' name='name' />");
out.println("<input type='submit' value='submit' />");
out.println("</form>");
out.println("");
out.println("");
out.flush();
out.close(); }
注意 line 3 的PrintWriter 需要先在上面加上“import java.io.PrintWriter;”
把Server Start起來以後,可以再IE直接輸入: http://localhost/ServletSample/TestServlet
增加post顯示頁面
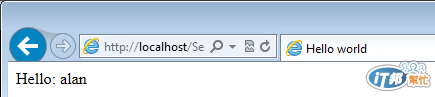
這邊是把輸入的東西在顯示出來:
protected void doPost(HttpServletRequest request, HttpServletResponse response) throws ServletException, IOException {         // TODO Auto-generated method stub         response.setCharacterEncoding("UTF-8");         request.setCharacterEncoding("UTF-8");
 String name = request.getParameter("name");                         response.setContentType("text/html");
PrintWriter out = response.getWriter();
out.println("");
		out.println("");
		out.println("");
		out.println("<title>Hello world</title>");
		out.println("");
		out.println("");

		out.println("Hello: " + name);

		out.println("");
		out.println("");
                  out.flush();
out.close();     }
可以看到getParameter()能夠取得post回來的資料。
結果:
結語
這一邊簡單介紹如何開發一個Hello World的Servlet網站,希望給大家一點開發Servlet的感覺。
接下來會在進一步介紹Servlet、Eclipse和Tomcat相關。
http://localhost/ServletSample/TestServlet 顯示無法連上這個網站怎辦...?
 Alan Tsai
