雖然說如果你的網頁設計有符合960grid或其他grid system的話,
做網頁就相對方便許多,
但如果美術設計對grid system觀念不是很熟,
或者不習慣這樣設計網頁時,
也就只能收到版後,再自己手刻版型欄寬,
所以這裡就分享一個我自己設計的Sass @mixin,
在一般電子商務上面,
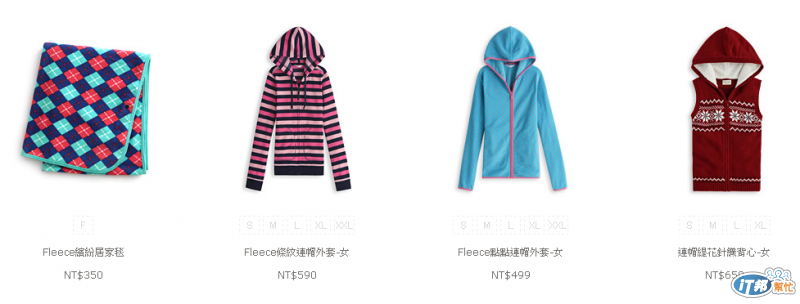
常常會看到一些商品排排陳列在網頁上,
像譬如誠品書局:

又或者是Lativ,

我們特別來看Lative的設計,
她在li上面設了margin-right:40px讓產品都有間距,
但你可能會想說,
這樣不就變成最後一個也會有margin-right的留白,
這樣感覺不就不一致了嗎?
實際上並不是這樣子的,
他在li上面又設置了這樣的語法:
li:nth-child(4n){
  margin-right:0px;
}
這是CSS3的選擇器的寫法,
意思是當我li每到第四的倍數時,
就將該li的margin-right變成0px,
這樣就可以做到左右對齊的排版出來了,
那如果是用Sass的話,
我自己會這樣子去撰寫:
$width:960px
.wrap
  width:$width
  margin: 0 auto
           //  欄位數量    ,   欄位間距
@mixin grid($cloum_number,$cloum_gutter)
        //總寬度 -    欄位間距  *    (欄位數量-1)      /   欄位數量
  width: ($width - $cloum_gutter*($cloum_number - 1) ) / $cloum_number
  margin-right: $cloum_gutter
  -webkit-box-sizing: border-box
  -moz-box-sizing: border-box
  box-sizing: border-box
              //   欄位數量
  &:nth-child(#{$cloum_number}n)
    margin-right: 0

.product li
  +grid(3,30px)
而產生出來的CSS code,
就會長成這樣:
.wrap{
  width: 960px;
  margin: 0 auo;
}
.product li {
  width: 300px;
  margin-right: 30px;
  -webkit-box-sizing: border-box;
  -moz-box-sizing: border-box;
  box-sizing: border-box;
  height: auto;
  margin-bottom: 30px;
  border: 3px solid gray;
  float: left;
  padding: 30px;
}
.product li:nth-child(3n) {
  margin-right: 0;
}
由於欄位間距的數量會比欄位數量少一,
所以先將總寬度扣掉所有欄位間距加總起來後,
再除以欄位數量,就會是一個li的寬度了。
box-sizing:border-box則是為了該li不會為了padding與border影響整體寬度,
所以才設置此語法,
有興趣了解此知識的可以瀏覽下述連結:
http://blog.darkthread.net/post-2013-08-11-css-boxsizing.aspx
http://rettamkrad.blogspot.tw/2012/11/setting-correct-width-and-height-for.html
最後面加上了 &:nth-child,
&就會自動繼承前面的class來去延伸,
綜合出來就可以做出一個不管欄位數量與欄位間距px數是多少,
都能友善處理的Sass @Mixin了,
以後你要用到的地方就寫個 +grid(欄位數量,欄位間距),
就可以輕輕鬆鬆加上欄位數量與間距像素就可以一鍵產生出來,
是不是很方便呢?
多善用Sass @Mixin,讓你遠離計算機的算數地獄XDD
這裡也提供影片流程讓各位參考學習:

