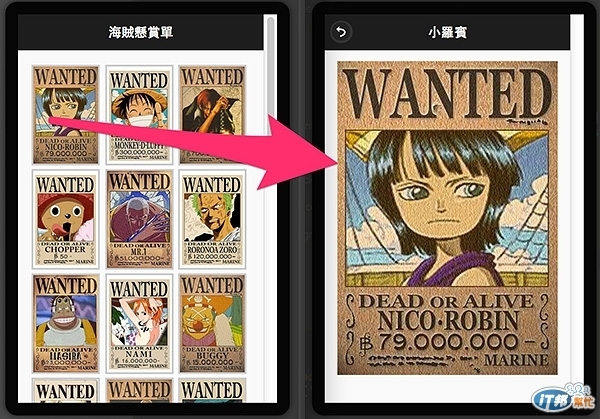
這篇想要來製作海賊王的「海賊懸賞單」App,一方面是每次看海賊王都要一一找圖有點麻煩,一方面是看完串接蘋果日報新聞與串接 yahoo weather 的文章,意外的發現這個 EZoApp RSS 元件實在是很好用,只要服務端提供了 RSS,就能夠直接使用 EZoApp 把資料串起來。( 不過最好還是提供 json 啦!只是因為 json 或 xml 在開發的時候需要跨域比較麻煩,但還是要強調一點,變成 App 到手機上,就完全沒有跨域的問題,所以不用擔心噢!)
完成範例,點選 preview 預覽:http://jqmdesigner.appspot.com/designer.html#&ref=6250996460158976
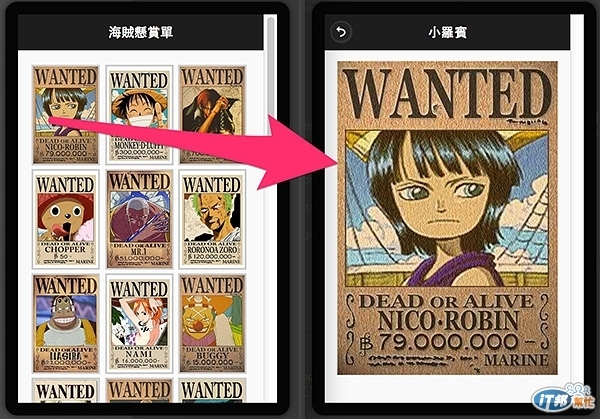
製作的方法很簡單,只要把相片放在 picasa 相簿,然後利用之前介紹過的 RSS 元件方式 ( 取部分程式碼來用 ),最後將相片放在 EZoApp imggallery 元件裡頭使用即可 ( 使用的方法很多,不過因為主要介紹 EZoApp,所以當然是使用 EZoApp 的元件囉~ )
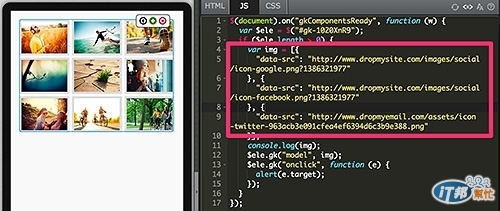
開始之前,我們把 imggallery 給拖拉到畫面中,可以發現它是吃一段 json 的檔案,但畢竟寫在裡頭就是死的,有新增的話就沒辦法自動增加,所以待會串入 google picasa 的 RSS,讓這些相片網址自動產生。
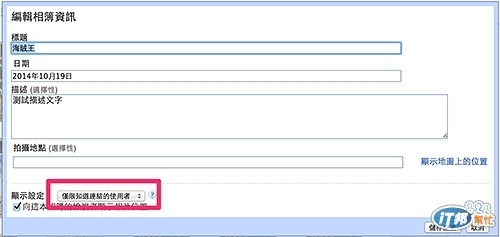
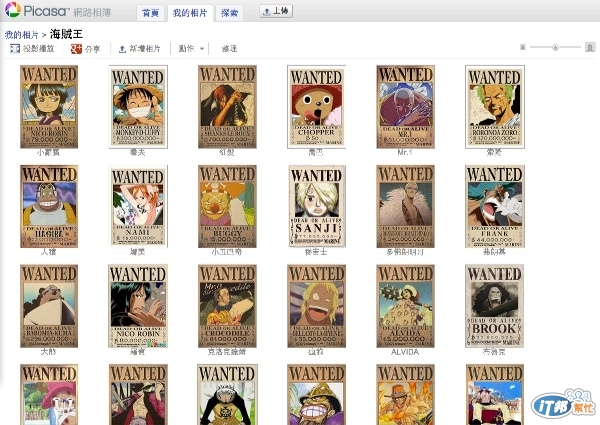
要串 picasa,就得先去 picasa 瞧瞧,但由於近年來 google 整合 picasa 與 google+,導致要連往 picasa 都會被轉導至 google+,不過其實也是很方便換過來的,例如說你的 google+ 相簿網址如果是:『https://plus.google.com/u/0/photos/一串數字』,就換成:『https://picasaweb.google.com/一串數字?noredirect=1』,就可以連到你的 picasa 相簿,然後記得在相簿內容選擇「僅限知道連結的使用者」,這樣就可以連到這本相簿的相片。
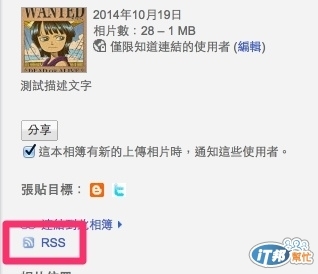
然後在最右邊可以看到 RSS 的選項,點下去之後就可以看到 RSS 內容,就先把這串網址複製起來吧。
有了 RSS 之後,就要開始來寫 code 了,首先先把 imggallery 的 HTML 做些修改,目的在於有些原本橫向圖片的樣式,我這邊要改直向的,然後每張圖片都加入 a 的連結,點選後可以連到放大圖片的頁面,而且還可以獲取描述。
<div id="home" data-role="page">
  <div data-role="header" data-position="fixed" data-theme="b">
    <h3>海賊懸賞單</h3>
  </div>
  <div role="main" class="ui-content">
    <div id="ccc" is="imggallery" style="background-color:#fafafa;width:100%;margin:0 auto;">
      <div style="width:80px; height:120px; overflow:hidden; border:3px solid #ccc; display:inline-block;margin:1px;">
        <a href="#imgpage" data-transition="slide">
          <img data-src="{{data-src}}" style="width:100%; height:100%;">
        </a>
      </div>
    </div>
  </div>
</div>
home 的頁面程式就是上面這樣,緊接著新增一個 imgpage 的頁面,主要是點選之後要把圖片在這邊百分百呈現,HTML 如下:
<div id="imgpage" data-role="page" is="page">
  <div data-role="header" data-position="fixed" data-theme="b">
    <h3>懸賞單</h3>
    <a class="ui-btn ui-btn-left ui-icon-back ui-btn-icon-notext ui-corner-all" data-rel="back">Button</a>
  </div>
  <div role="main" class="ui-content" is="content"></div>
</div>
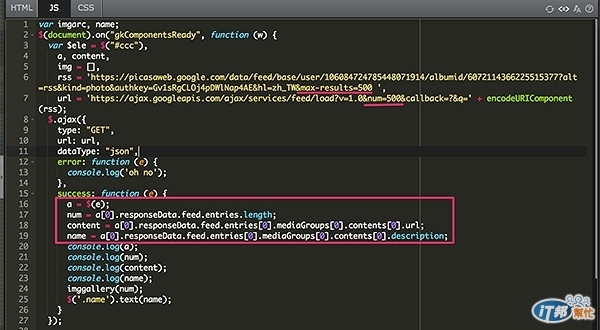
HTML 都寫好之後,就開始寫 JS 了,先來把 RSS 元件和 imggallery 元件合體一下,利用 google feed 來吃 RSS,這邊有個要注意的,RSS 內必須要加上 max-results=500 ( 500 是顯示圖片的最大值,不然可能只會顯示 20 張圖的預設值 ),然後 google feed 的這一串裡頭也加上 num=500,完成後可以利用。
裡頭也加了一個 imggallery 的 function,把 RSS 每張圖片的描述和網址存入陣列中,方便後續讀取,同時也寫了兩個全域變數,目的讓 home 的資訊可以傳給 imgpage。
var imgarc, name;
$(document).on("gkComponentsReady", function (w) {
  var $ele = $("#ccc"),
    a, content,
    img = [],
    rss = 'https://picasaweb.google.com/data/feed/base/user/106084724785448071914/albumid/6072114366225515377?alt=rss&kind=photo&authkey=Gv1sRgCLOj4pDWlNap4AE&hl=zh_TW&max-results=500 ',
    url = 'https://ajax.googleapis.com/ajax/services/feed/load?v=1.0&num=500&callback=?&q=' + encodeURIComponent(rss);
  $.ajax({
    type: "GET",
    url: url,
    dataType: "json",
    error: function (e) {
      console.log('oh no');
    },
    success: function (e) {
      a = $(e);
      num = a[0].responseData.feed.entries.length;    //圖片總數
      content = a[0].responseData.feed.entries[0].mediaGroups[0].contents[0].url;   //圖片網址
      name = a[0].responseData.feed.entries[0].mediaGroups[0].contents[0].description;  //圖片描述
      console.log(a);
      console.log(num);
      console.log(content);
      console.log(name);
      imggallery(num);
      $('.name').text(name);
    }
  });

  function imggallery(num) {
    for (var i = 0; i < num; i++) {
      img.push({     // 寫入陣列
        "data-src": a[0].responseData.feed.entries[i].mediaGroups[0].contents[0].url,
        "name": a[0].responseData.feed.entries[i].mediaGroups[0].contents[0].description
      });
    }
    if (img.length >= num) {
      console.log(img);
      $ele.gk("model", img);
    }
    $ele.find('a').on('click', function () {
      var aIndex = $(this).parent('div').index();
      imgsrc = $(this).find('img').attr('src');
      name = img[aIndex].name;
      console.log(name);
      console.log(imgsrc);
    });
  }
});
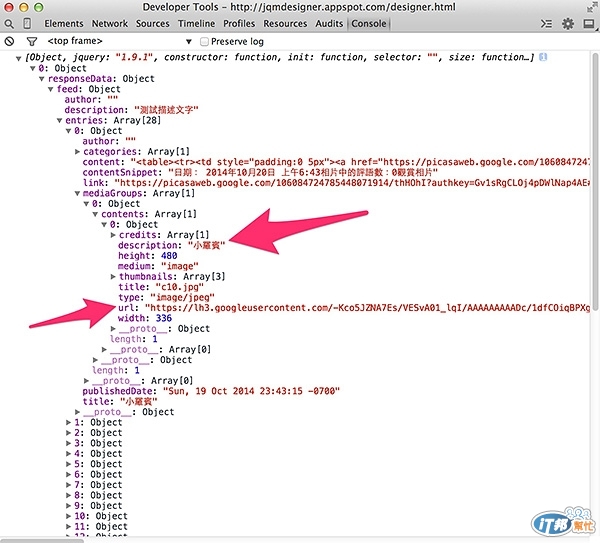
補充說明一下,剛剛裡頭有看到『a[0].responseData.feed.entries[0].mediaGroups[0].contents[0].url』這麼長一串程式,最主要是 picasa 相簿的 RSS 解析出來之後,是由物件和陣列交互組成,因此才必須這樣一層層挖進去,這也是為什麼裡頭要寫很多 console.log 來看詳細資訊的原因囉~
最後就是再加入 imgpage 的程式,只是單純做 pageshow 要做什麼事情而已,同樣的再 home 也加個 pageshow 的事件,目的只是在於切回 home 時會清空 imgpage。
(function () {
  $(document).on('pageshow', '#imgpage', function () {
    $('#imgpage .ui-content').html('<img src="' + imgsrc + '" style="width:100%;"/>');
    $('#imgpage h3').text(name);
  });
})();
(function () {
  $(document).on('pageshow', '#home', function () {
    $('#imgpage .ui-content').find('img').remove();
    $('#imgpage h3').text('');
  });
})();
就這樣,就已經完成了由 picasa 自動產生相簿,而且描述還會自動呈現在詳細的頁面。( 範例:http://jqmdesigner.appspot.com/designer.html#&ref=5662674255872000 )
