上篇說完我覺得最簡單的做法後,今天要說加入檢查機制的做法,若想了解簡單的方便可以到 [Day 25] 動手篇 - I have a Line Bot,I have a Koa Webhooks (1) 觀看
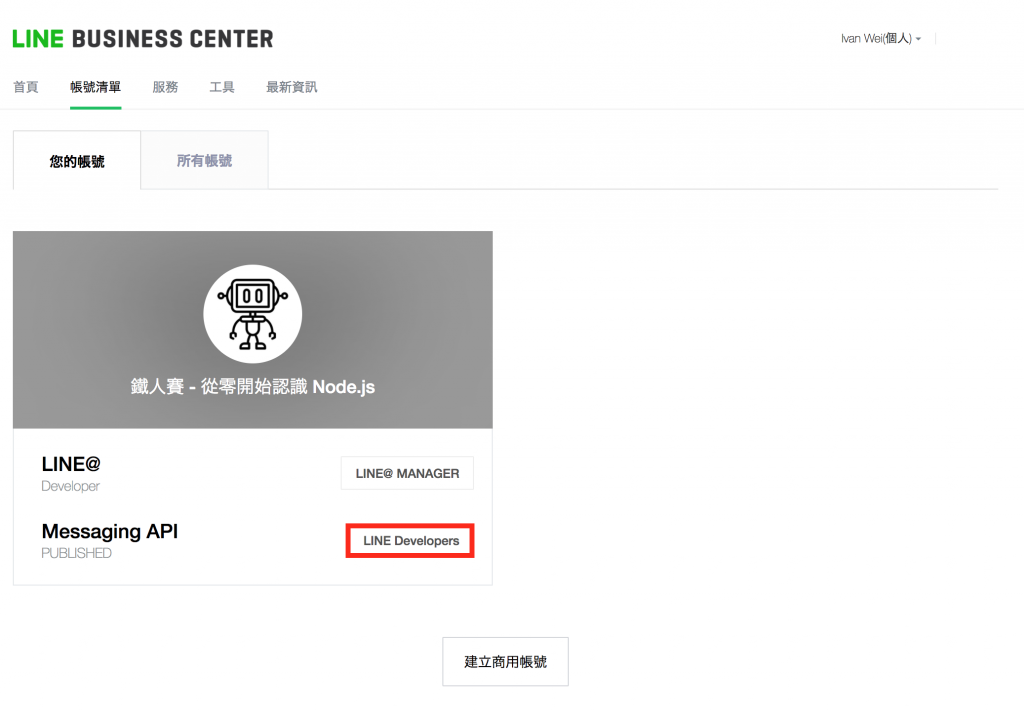
到 Line Business 登入
帳號清單中選擇一個 Line Bot 並點擊 Line Developers
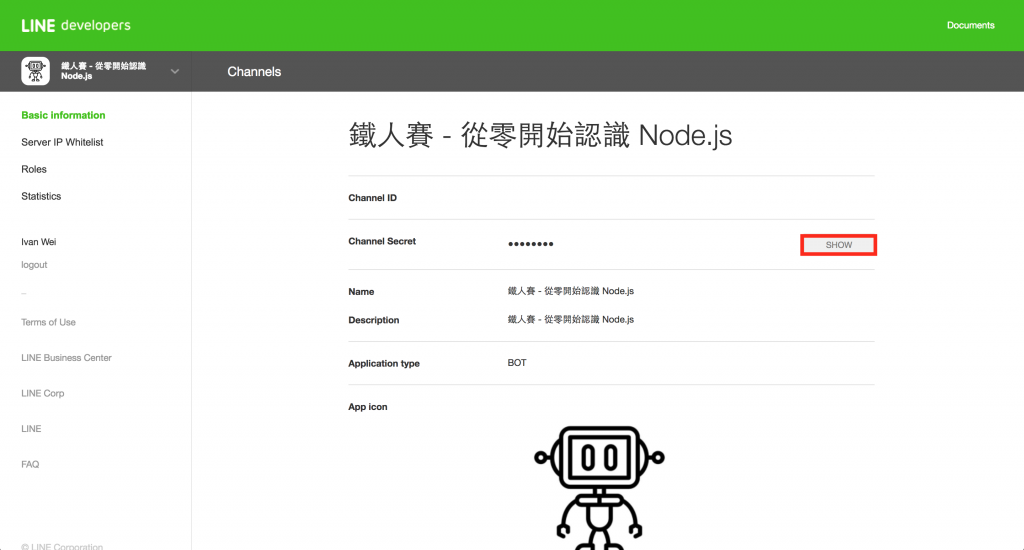
點擊 Show ,若有提示訊息按 OK ,並將密碼複製下來
這組密碼之後會與 Request 裡 Header 的 X-Line-Signature 比對
直接看 Example Code 比較看 ( 內容以上篇簡單版當作基底 )
const koa = require('koa');
const app = koa();
// 載入 crypto ,等下要加密
const crypto = require('crypto');

const router = require('koa-router');
router.post('/webhooks', function *(ctx, next) {
  // 取 User 傳送得資料
  ctx.req.body
})
app
  .use(router())
  // 自訂 middleware
  .use(function *(ctx, next){
    // 一開始複製的密碼
    const channelSecret = '...';

    // 取 User 送來的訊息 Object
    const koaRequest = ctx.request;

    // 按 Line 的規定設定加密 ( [[Day 23] 動手篇 - 等等!什麼是 Webhooks?](http://ithelp.ithome.com.tw/articles/10184987) 有提到 )
    const hash = crypto.createHmac('sha256', channelSecret)
              .update(Buffer.from(JSON.stringify(koaRequest.body), 'utf8'))
              .digest('base64');

    // 和 Request 送來做比對 ( Status Code 這階段會有 200 / 401 )
    if ( koaRequest.headers['x-line-signature'] === hash ) {
      ctx.status = 200;

    } else {
      ctx.body = 'Unauthorized! Channel Serect and Request header aren\'t the same.';
      ctx.status = 401;
    }

    yield next();
  });

app.listen(3000, function () {
  console.log('Example app listening on port 3000!')
});
做完這裡就可以放上 Server 當 Line Bot 的 Webhooks !記得要使用 HTTPS ,不然 Line 在加 Webhooks 時就會提示錯誤!
