今天我們就開始來實作一點東西囉,先從介面開始,目標是了解基本的XML介面檔,並新增一個輸入框和一個按鈕。
然而在開始之前,我們先介紹兩個簡單的設定「改變字體大小」和「顯示行數」,因為我覺得預設字體實在很小,若您也有同樣困擾的話可以先設定一下
字體大小
左上角 File -> Setting 會開出設定視窗(快速鍵Ctrl+Alt+S),並至 Editor -> Colors&Fonts -> Font ,而Default的值是不能改的,請選Save As輸入一個名字,底下的size那些就可以更改囉
顯示行數
一樣在Settings ,左邊選擇 Editor -> General -> Appearance ,在右邊找到show line numbers並勾選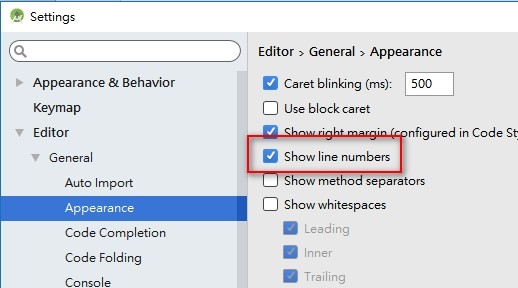
我們開啟activity_main.xml檔案,中間會看到XML程式碼,下面可以切換Design或Text檢視,右邊有Preview可以即時預覽修改的結果。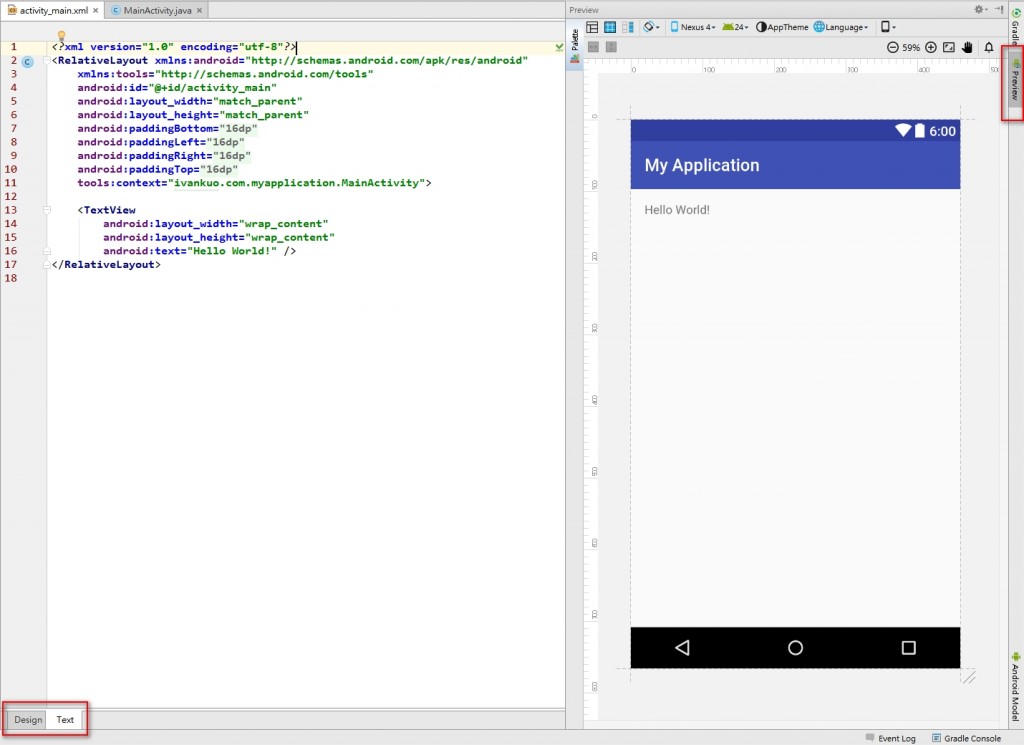
上面圖太小了,另外貼個code
1  <?xml version="1.0" encoding="utf-8"?>
2  <RelativeLayout xmlns:android="http://schemas.android.com/apk/res/android"
3      xmlns:tools="http://schemas.android.com/tools"
4      android:id="@+id/activity_main"
5      android:layout_width="match_parent"
6      android:layout_height="match_parent"
7      android:paddingBottom="@dimen/activity_vertical_margin"
8      android:paddingLeft="@dimen/activity_horizontal_margin"
9      android:paddingRight="@dimen/activity_horizontal_margin"
10     android:paddingTop="@dimen/activity_vertical_margin"
11     tools:context="ivankuo.com.myapplication.MainActivity">
12
13     <TextView
14         android:layout_width="wrap_content"
15         android:layout_height="wrap_content"
16         android:text="Hello World!" />
17 </RelativeLayout>
檔案裡有兩個標籤為第2行的RelativeLayout和第13行的TextView,RelativeLayout可以想成是一個容器,讓我們把各個元件放在裡面排版,目前放了一個TextView(第13~16行),我們透過這個TextView了解元件的XML寫法:
TextView
android:layout_width是元件的寬度,這邊用wrap_content表示依照元件的內容來動態決定寬度,如目前的寬度就是Hello World!這幾個字的總和android:layout_height是元件的高度,以上三項(名稱、寬度、高度)是元件必須要有的屬性android:text是要顯示的文字,後面的 /> 表示結尾這樣就完成一個元件了,很簡單吧!您可以嘗試把第13行的TextView改成Button,就會看到文字區變成按鈕囉
接著我們看看第2行的RelativeLayout,通常一個介面的最外層都會是個Layout,並對畫面做一些基本設定
RelativeLayout,後面的xmlns:android和xmlns:tools是Android須用到的XML屬性android:id是元件的id,後面會提到它的用途android:padding,分為上下左右,而padding的用途是讓內容往內縮,所以您可以嘗試把第8行刪除,就會看到Layout的內容跟螢幕左邊的間距消失了。另外這邊的@dimen/activity_vertical_margin是資源檔的運用,將要內縮的維度寫在資源檔裡,您可以在專案資料夾res/values/dimens/dimens.xml看到這個值為16dp,而佈局就用@dimen/來取得值,這樣的好處是將維度統一管理,將來如果有多個頁面要同時改維度,只要改dimens裡的值就可以了tools:context將介面檔和程式檔做連結RelativeLayout的尾標籤,表示在尾標籤之前(12~16行)都是要放在這個Layout裡的內容以上是我們現有XML的說明
今天的目標是要新增輸入框(EditText)和按鈕(Button),我們先加入一個Button如下圖,但此時會發現他怎麼把原來的文字蓋掉了勒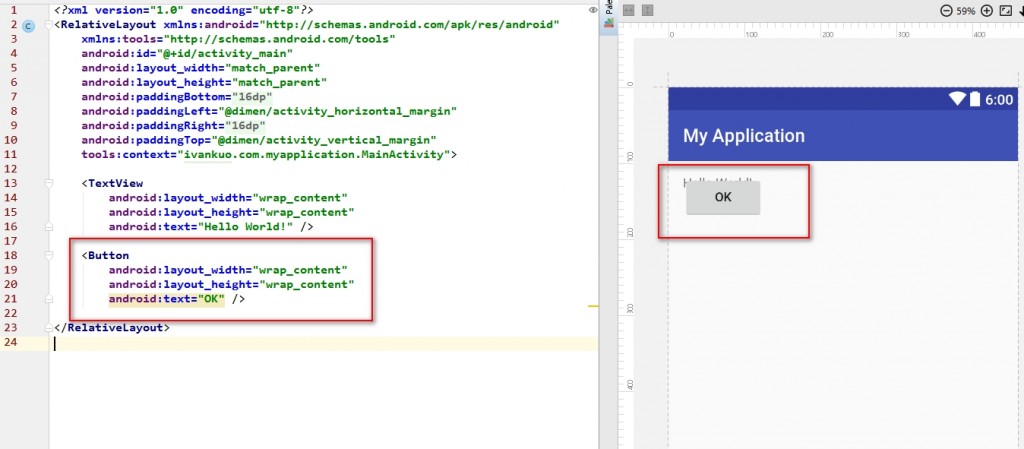
這邊我們就要講到RelativeLayout(相對布局)的性質,他是用相對位置來擺放各個元件,若不指定則一律出現在左上,像我們目前的TextView和Button這樣,於是我們改一下內容: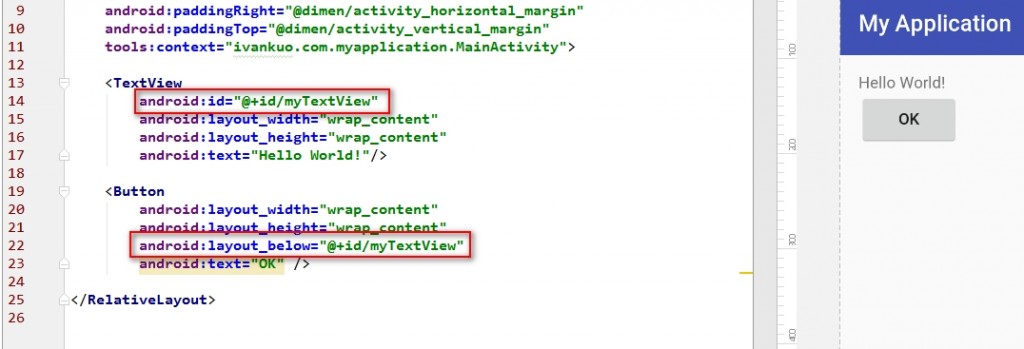
我們幫TextView加上了id,並在Button加上一行android:layout_below指定他要位於TextView下方,這樣就可以把兩個元件分開囉。除了below之外還有above, toLeftOf, toRightOf等等,可以看官方文件列出共有哪些屬性可用
這樣我們知道RelativeLayout的性質,也知道新增元件的方式了,我們就來完成今天的目標吧,將內容改成這樣: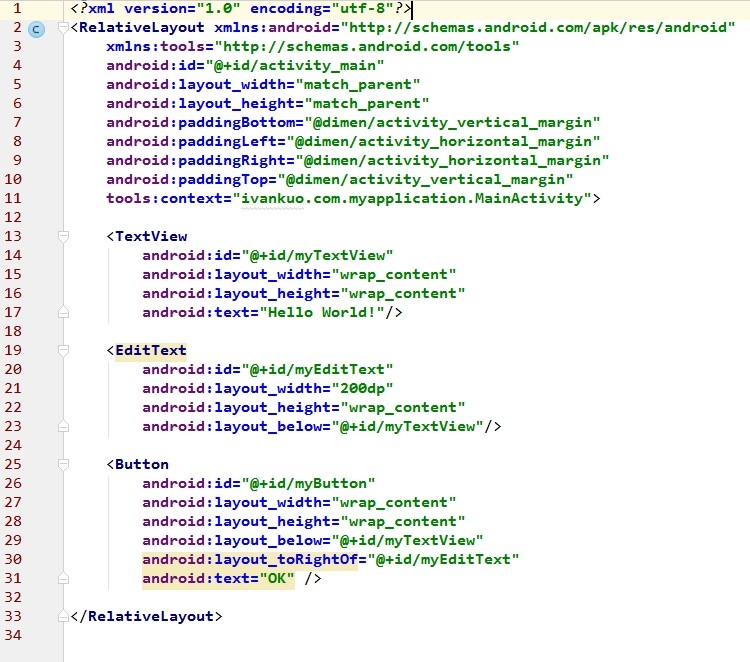
我們新增了一個EditText寬度為200dp,位置在myTextView下面(第23行),再新增一個Button設置在myTextView下面(第29行)及myEditText右邊(第30行)
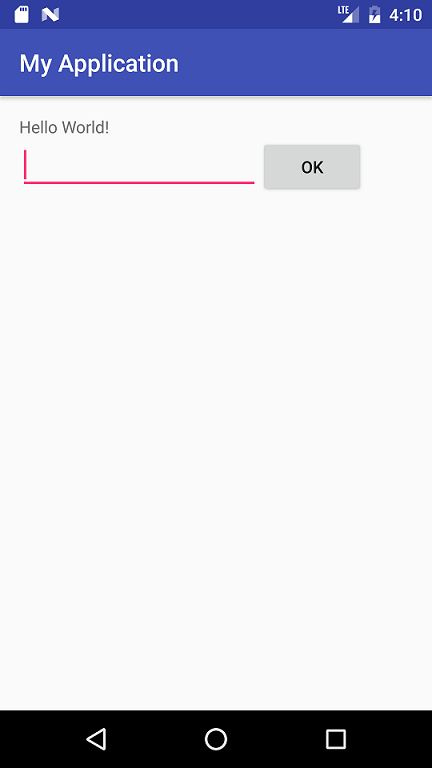
這樣就完成今天的目標囉,我們有一個TextView顯示文字,一個EditText讓使用者輸入,以及一個按鈕。而目前點了都沒反應,明天我們就來練習用Java程式控制這些元件,讓使用者輸入的內容透過按鈕更新到畫面上
補個code方便大家取用,這裡沒有行數,因為本來貼code就沒有,上面那是我手動打上去的
<?xml version="1.0" encoding="utf-8"?>
<RelativeLayout xmlns:android="http://schemas.android.com/apk/res/android"
    xmlns:tools="http://schemas.android.com/tools"
    android:id="@+id/activity_main"
    android:layout_width="match_parent"
    android:layout_height="match_parent"
    android:paddingBottom="@dimen/activity_vertical_margin"
    android:paddingLeft="@dimen/activity_horizontal_margin"
    android:paddingRight="@dimen/activity_horizontal_margin"
    android:paddingTop="@dimen/activity_vertical_margin"
    tools:context="ivankuo.com.myapplication.MainActivity">

    <TextView
        android:id="@+id/myTextView"
        android:layout_width="wrap_content"
        android:layout_height="wrap_content"
        android:text="Hello World!" />

    <EditText
        android:id="@+id/myEditText"
        android:layout_width="200dp"
        android:layout_height="wrap_content"
        android:layout_below="@+id/myTextView" />

    <Button
        android:id="@+id/myButton"
        android:layout_width="wrap_content"
        android:layout_height="wrap_content"
        android:layout_below="@+id/myTextView"
        android:layout_toRightOf="@+id/myEditText"
        android:text="OK" />

</RelativeLayout>


 iThome鐵人賽