經過前面那篇廢話之後,相信應該能夠Build好自己一版的OpenOCD了吧!?
如果不行的話,那..... 後面也不用看了 (誤
本篇是第一篇的Lab,應該算蠻淺顯易懂的,簡單的介紹一下OpenOCD的使用!
如圖所示,將STM32F429I-DISCOVERY開發版接到電腦上就行了!
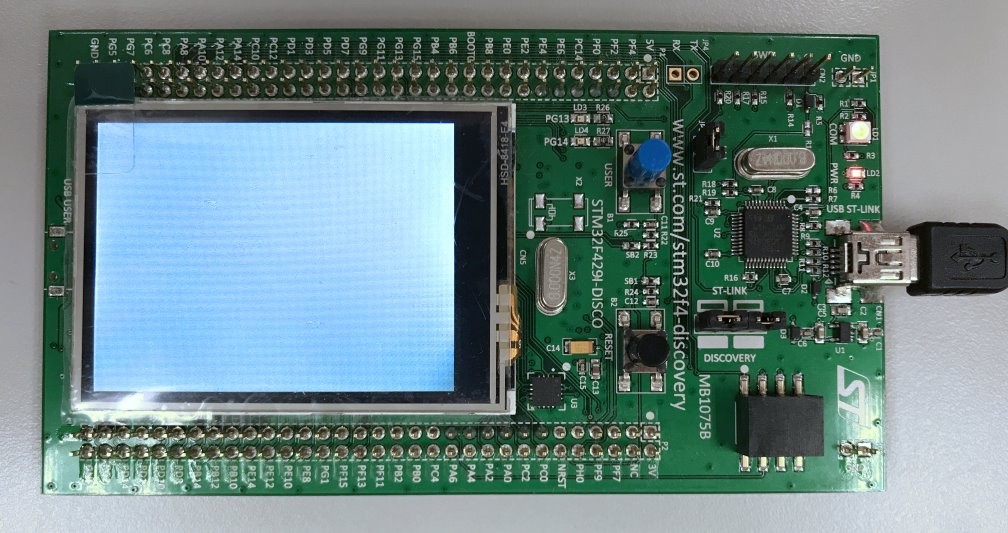
連線好之後,開發版會上電,LD2正常亮起燈才對!
一般而言,官方的Source Code中已經針對部分平台,預先寫好一些常用的config file,
而裡面會將相關設定做好初始化,那當然,我們就是直接把他拿來用啦XD
通常這些config都是放在\tcl中,下圖展示了相關的目錄結構
|-- board
|-- chip
|   |-- atmel
|   |   `-- at91
|   |-- st
|   |   |-- spear
|   |   `-- stm32
|   `-- ti
|       `-- lm3s
|-- cpld
|-- cpu
|   `-- arm
|-- fpga
|-- interface
|   `-- ftdi
|-- target
|-- test
`-- tools
比較常用的目錄主要有三個: board、interface、target
OpenOCD Config所使用的語法為TCL,我們可以簡單的建立openocd.cfg,
來將所需要的Commands寫入!!
例如我們要透過ST-Link連到STM32-F4的板子上,可在openocd.cfg中放入以下內容:
source [find interface/stlink-v2.cfg]
source [find target/stm32f4x.cfg]
reset_config srst_only srst_nogate

init
reset
halt
為了方便起見,先將\tcl中的target、interface這兩個資料夾、OpenOCD的執行檔openocd,放入同一目錄中!
然後就是執行
./openocd -f openocd.cfg
常用的參數如下
openocd.cfg
成功執行OpenOCD後應該會出現以下類似的提示:
Open On-Chip Debugger 0.10.0+dev-00131-gb8db82f-dirty (2017-12-19-13:14)
Licensed under GNU GPL v2
For bug reports, read
    http://openocd.org/doc/doxygen/bugs.html
Info : auto-selecting first available session transport "hla_swd". To override use 'transport select <transport>'.
Info : The selected transport took over low-level target control. The results might differ compared to plain JTAG/SWD
adapter speed: 950 kHz
adapter_nsrst_delay: 100
srst_only separate srst_nogate srst_open_drain connect_deassert_srst
srst_only separate srst_nogate srst_open_drain connect_deassert_srst
Info : clock speed 950 kHz
Info : STLINK v2 JTAG v27 API v2 SWIM v0 VID 0x0483 PID 0x3748
Info : using stlink api v2
Info : Target voltage: 2.892163
Info : stm32f4x.cpu: hardware has 6 breakpoints, 4 watchpoints
**Info : Listening on port 3333 for gdb connections**
adapter speed: 950 kHz
target halted due to breakpoint, current mode: Thread
xPSR: 0x21000000 pc: 0x08000460 msp: 0x20000720
Info : Listening on port 6666 for tcl connections
**Info : Listening on port 4444 for telnet connections**
其中可以看出目前Telent的Port在4444,而GDB的Port在3333,
接下來就可以試著連線,以下分成Telnet連線和GDB連線介紹
重於進入重頭戲--操作的部分,本節將先會介紹Telnet連線的方式和簡單的操作,
後半段將介紹GDB連線的方式和簡單的操作,其他詳細Commands將會在日後的文章中介紹!
在Linux中,telnet連線的方式很簡單:
telnet <host> <port>
例如上節所提到的部分,Telnet的Port為4444,
因此可以輸入以下指令來連線:
telnet localhost 4444
連上之後會出現類似下面的這個畫面
Trying 127.0.0.1...
Connected to localhost.
Escape character is '^]'.
Open On-Chip Debugger
>
就表示已經正常連線上去,可以開始進行一些操作!
比方說我們可以輸入targets這個指令來看目前連線上各個target的狀況:
> targets
    TargetName         Type       Endian TapName            State
--  ------------------ ---------- ------ ------------------ ------------
 0* stm32f4x.cpu       hla_target little stm32f4x.cpu       halted
從這邊可以做一些簡單的分析,比方說目前連線的Target名稱為stm32f4x,屬於little endian的CPU,另外就是目前狀態是halted!
然後可以輸入help來看OpenOCD所支援的Commands:
...太多了,不想節錄。

全部省略XD
如果要結束連線的話,就簡單地輸入exit就行了!
> exit
Connection closed by foreign host.
那Telnet的介紹就到這邊!好短啊XD
這部分跟往後學習有關,可以先建立一些基礎的環境和概念,
當然,不會太詳細的講有關ARM設定的部分,這不是本文的重點,
網路上也有更多優秀的文件可以參考!
ARM的Toolchain在網路上都可以免費下載,請從GNU Arm Embedded Toolchain取得所需的工具,
這邊簡單的選擇gcc-arm-none-eabi-5_4-2016q3-20160926-linux作為Lab的學習工具!
下載下來把他解壓縮就行了,
然後在$PATH中把<gcc-arm-none-eabi-5_4-2016q3的PATH>/bin加入,就可以直接使用!
GDB操作的教學很多,這邊推薦一個當初學習的時候,常參考的文件!
將<gcc-arm-none-eabi-5_4-2016q3的PATH>/bin加入$PATH後,可以利用以下Commmand來叫起GDB
$ arm-none-eabi-gdb
GNU gdb (GNU Tools for ARM Embedded Processors) 7.10.1.20160923-cvs
Copyright (C) 2015 Free Software Foundation, Inc.
License GPLv3+: GNU GPL version 3 or later <http://gnu.org/licenses/gpl.html>
This is free software: you are free to change and redistribute it.
There is NO WARRANTY, to the extent permitted by law.  Type "show copying"
and "show warranty" for details.
This GDB was configured as "--host=i686-linux-gnu --target=arm-none-eabi".
Type "show configuration" for configuration details.
For bug reporting instructions, please see:
<http://www.gnu.org/software/gdb/bugs/>.
Find the GDB manual and other documentation resources online at:
<http://www.gnu.org/software/gdb/documentation/>.
For help, type "help".
Type "apropos word" to search for commands related to "word".
(gdb)
然後在上節另外有提到GDB目前可使用的Port在3333,因此我們輸入以下Command來進行連接!
(gdb) target remote :3333
Remote debugging using :3333
0x08000460 in ?? ()
(gdb)
接上之後,就可以看到目前$PC所在的位置為0x08000460,並等待使用者進一步的操作!
同上節Telnet操作的範例,我們也用targets這個Command來熱身一下!
注意的是,在GDB中要使用OpenOCD所支援的Command的時候,必須要使用以下方式:
monitor <Commands>
以這個例子來說:
(gdb) monitor targets
    TargetName         Type       Endian TapName            State
--  ------------------ ---------- ------ ------------------ ------------
 0* stm32f4x.cpu       hla_target little stm32f4x.cpu       halted
這邊出現的訊息同Telnet的解釋,不在另行敘述!
然後我們也可以使用help來看看OpenOCD所支援的Commands
(gdb) monitor help
adapter_khz [khz]
      With an argument, change to the specified maximum jtag speed.  For
      JTAG, 0 KHz signifies adaptive  clocking. With or without argument,
      display current setting. (command valid any time)
adapter_name
      Returns the name of the currently selected adapter (driver) (command
      valid any time)

.......太多了,不詳細寫!
最後是介紹離開的方式,簡單地輸入quit就行了!
(gdb) quit
A debugging session is active.

    Inferior 1 [Remote target] will be detached.

Quit anyway? (y or n) y
Detaching from program: , Remote target
Ending remote debugging.
好! 以上就是GDB的介紹,相信應該學會GDB的操作了 (誤!還是一樣的簡短
第一篇Lab,稍微淺顯一點的介紹,主要還是在熟悉環境和操作上,
還是沒有正式進入Source Code的世界中XD
在之後文章介紹到GDB/GDB Server的部分時,還會在更加詳細的說明GDB <--> OpenOCD之間的關聯!