
Be strong, believe in who you are; be strong, believe in what you fele.
在昨天我們已經知道如何取得list資料,
firebase取得資料有兩種方式list、object,分別是取得陣列、與物件
我們先看程式碼
import { Component } from '@angular/core';
import { AngularFireDatabase } from 'angularfire2/database';
import { Observable } from 'rxjs/Observable';

@Component({
  selector: 'app-root',
  templateUrl: './app.component.html',
  styleUrls: ['./app.component.scss']
})
export class AppComponent {
  items$: Observable<any[]>;
  item$: Observable<any>;
  constructor(private _db: AngularFireDatabase) {
    this.items$ = this._db.list('items').valueChanges();
    // 加入item$並且用object去取得items下面1的這個物件
    this.item$ = this._db.object('items/1').valueChanges();
  }
}
items:
{{items$ | async | json}}
item:
{{item$ | async | json}}
沒錯在firebase取得資料物件就是這麼簡單,資料可以用/階層式的取出來。
很簡單沒錯,但是好像多寫了不少程式,有更好的方式嗎?
    "lib": [
      "es2017",
      "dom"
    ],
    "baseUrl": "src",
    "paths": {
      "@env": ["environments/environment"],
      "@shared/*": ["app/shared/*"],
      "@core/*": ["app/core/*"],
      "@common/*": ["app/common/*"]
    }
import { CoreModule } from '@core/core.module';
ng g m core
ng g s core/service/base.http
在內部實做db資料的取得
import { Injectable } from '@angular/core';
import { AngularFireDatabase } from 'angularfire2/database';
import { AngularFirestore } from 'angularfire2/firestore';
import { Observable } from 'rxjs/Observable';

// 建立一個config interface藉此來實做未來要傳的參數名稱型態
export interface BaseHttpConfig {
  isKey: boolean;
}
@Injectable()
export class BaseHttpService {

  constructor(private _db: AngularFireDatabase) { }

  // 重新時做取得object的方法,並且給config預設值為true,因為大多時候我們都需要key值
  object<T>(url: string, config: BaseHttpConfig = { isKey: true }): Observable<T> | Observable<any> {
    const req = this._db.object(url);
    return config.isKey ?
      req.snapshotChanges().map(action => ({ key: action.key, ...action.payload.val() })) :
      req.valueChanges();
  }

  // 重新時做取得list的方法,同樣給key為true
  list<T>(url: string, config: BaseHttpConfig = { isKey: true }): Observable<T> | Observable<any> {
    const req = this._db.list(url);
    return config.isKey ?
      req.snapshotChanges()
        .map(actions => actions.map(action => ({ key: action.key, ...action.payload.val() }))) :
      req.valueChanges();
  }
}
import { CommonModule } from '@angular/common';
import { NgModule, Optional, SkipSelf } from '@angular/core';

import { BaseHttpService } from './service/base.http.service';


@NgModule({
  imports: [
    CommonModule
  ],
  declarations: [],
  providers: [
    BaseHttpService,
  ]
})
export class CoreModule {
  constructor( @Optional() @SkipSelf() parentModule: CoreModule) {
    if (parentModule) {
      throw new Error(`CoreModule has already been loaded. Import Core modules in the AppModule only.`);
    }
    /// 可將這段拉出去建立一個ts檔案,未來需要指注入一次的module都可以使用
  }
}
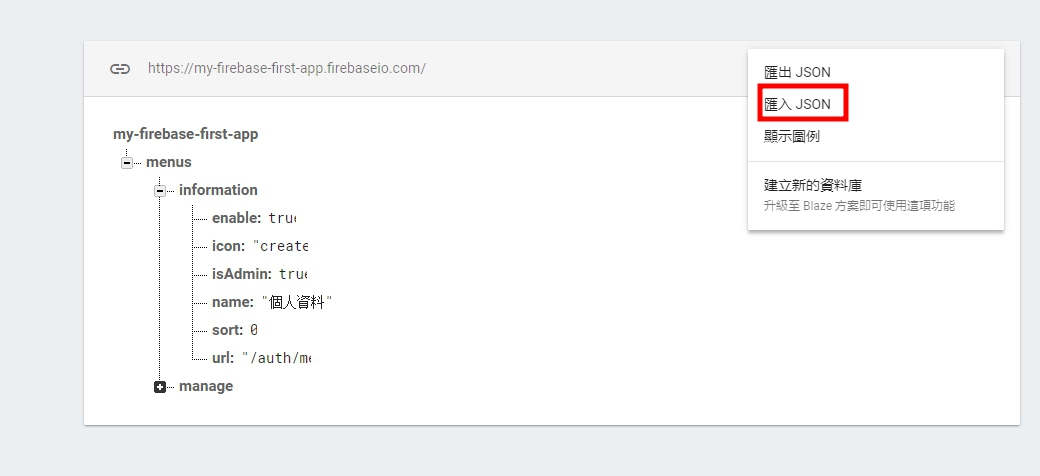
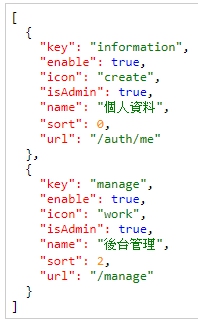
下載後點擊右上角匯入就可以把json匯入進來了
import { Component } from '@angular/core';
import { BaseHttpService } from '@core/service/base.http.service';
import { Observable } from 'rxjs/Observable';

@Component({
  selector: 'app-root',
  templateUrl: './app.component.html',
  styleUrls: ['./app.component.scss']
})
export class AppComponent {
  items$: Observable<any[]>;
  item$: Observable<any>;
  constructor(private _http: BaseHttpService) {
    this.items$ = this._http.list('menus');
    this.item$ = this._http.object('menus/information');
  }
}
儲存!資料一樣顯示出來了,有沒有覺得更加優雅了呢?
有,但是JSON很醜,很難閱讀!
angular2-prettyjson
它可以讓json在畫面上變得更加美觀就像這樣↓
在安裝前,說一下我們專案功用的module、component、directive、pipe擺放的方式
一樣用cli建立module ng g m shared
import { CommonModule, JsonPipe } from '@angular/common';
import { ModuleWithProviders, NgModule } from '@angular/core';
import { PrettyJsonModule, SafeJsonPipe } from 'angular2-prettyjson';

@NgModule({
  imports: [
    CommonModule,
  ],
  declarations: [
  ],
  exports: [
    PrettyJsonModule // 把prettyJsonModule export出來,這樣一來在外不就都能使用這個module了
  ]
})
export class SharedModule {
  // 加入forRoot,這裡未來會放一些只會在app.module建立的service,因為我們這個module會多次注入,如果你直接在上面寫providers(注入service),會產生多個service實體,這不是我們要的,因此我們會把service包裝在forRoot方法中
  static forRoot(): ModuleWithProviders {
    return <ModuleWithProviders>{
      ngModule: SharedModule,
      providers: [
        // 放service
      ]
    };
  }
}
在app.module.ts注入sharedModule並且記得forRoot()
items:
<prettyjson [obj]="items$ | async"></prettyjson>
item:
<prettyjson [obj]="item$ | async"></prettyjson>
你會發現json在畫面上變得很容易閱讀了,angular2-prettyjson它也是使用pipe來實做的,若大家有興趣可以去看它的原始碼,angular的pipe可以讓我們優雅的轉換顯示資料的樣貌,真的很好用。
今天我們了解了專案初步建立的結構,並且時做了base.http.service來統整所有的http方法,還使用了prettyjson來讓我們在觀看json時更加便利,明天我們會更進一步介紹Realtime DB Read的其他power之處,今天是冬至!祝大家冬至吃湯圓愉快=ˇ=
Angular: Understanding Modules and Services

