iT邦幫忙

2018 iT 邦幫忙鐵人賽
DAY 11
0
AI & Machine Learning

ChatBot&Chatbase系列 第 11

Day11[Line ChatBot]設定webhook

  • 分享至 

  • xImage
  •  

LineBot設定Webhook的方式跟MessengerBot的方法很類似
目前我都是用ngrok來製作
1.打開app.py
( 參考程式碼網址 : https://github.com/LukeHong/line_bot_echo )
如下圖一 要使用此程式需要先安裝line-bot-sdk
可以使用cmd $pip install line-bot-sdk
接著需要填入自己申請的Bot的Channel access token 和 Channel secret
圖中
line_bot_api = LineBotApi('填入Channel access token')
handler = WebhookHandler('填入Channel secret')
https://ithelp.ithome.com.tw/upload/images/20171231/20107144QkHQbW52Yy.png
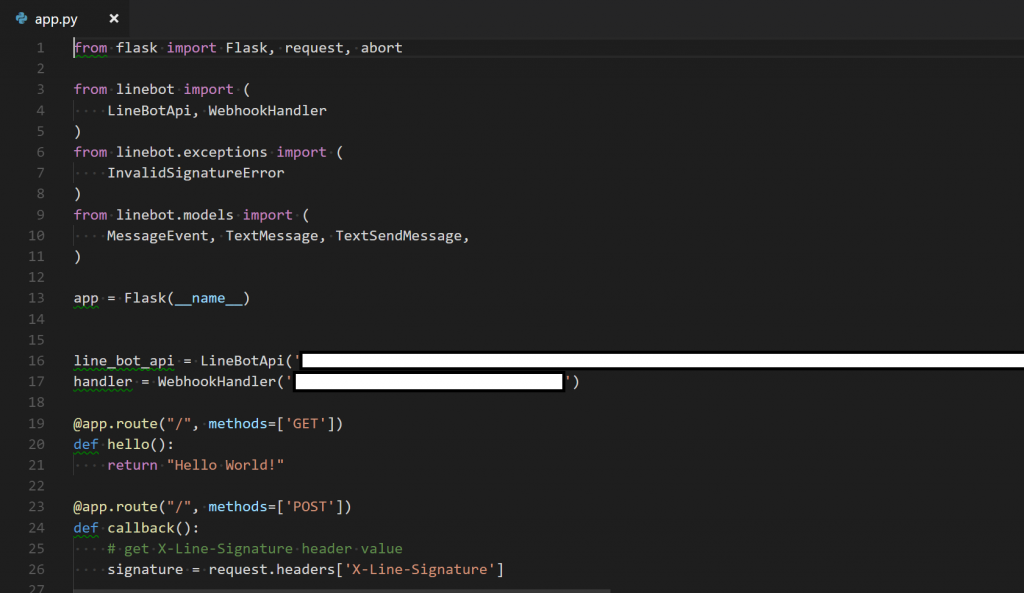
而Channel secret和Channel access token是在 Line developers 裡
下圖二是callback的部分
https://ithelp.ithome.com.tw/upload/images/20171231/20107144L444Rh0sI1.png
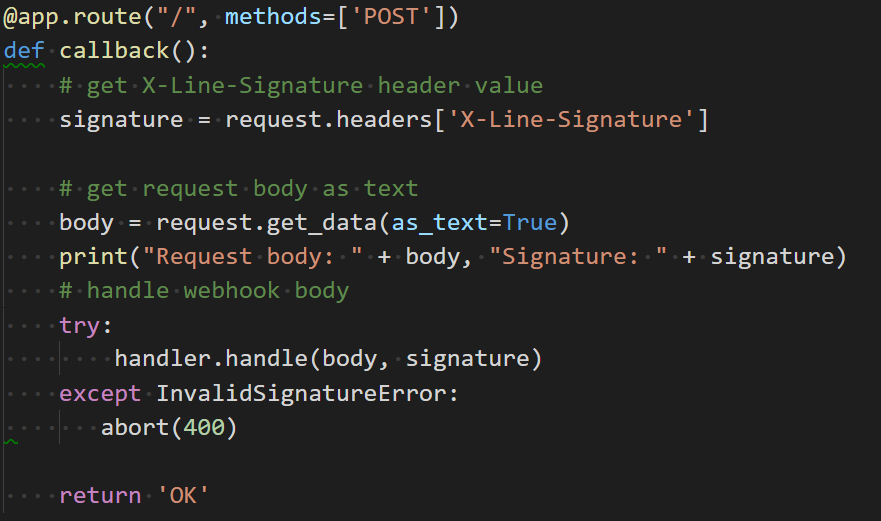
下圖三需要注意的是port需要跟開啟ngrok的一樣
https://ithelp.ithome.com.tw/upload/images/20171231/20107144Bk7zIfIqdg.png

2.打開自己申請好的Bot資訊
點選channel setting (紅框的部分) 即可看到Bot的詳細資訊
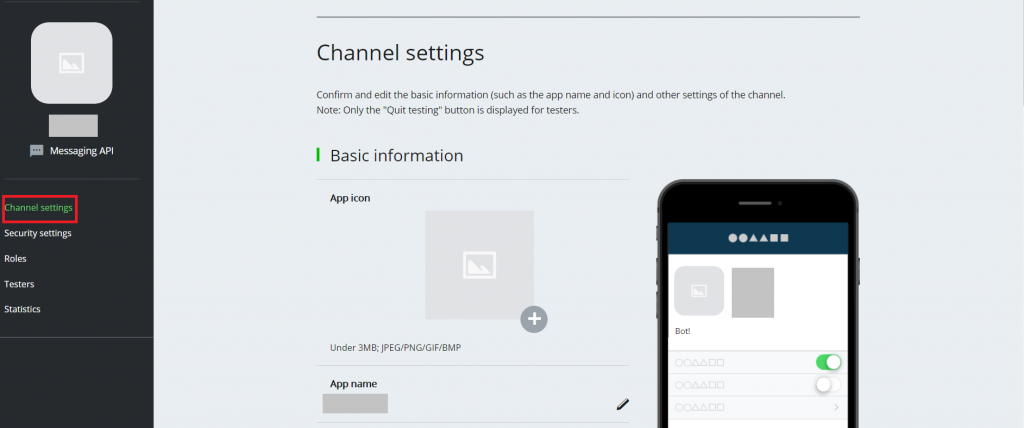
https://ithelp.ithome.com.tw/upload/images/20171231/20107144ManL0MnCb9.png
Channel secret
https://ithelp.ithome.com.tw/upload/images/20171231/20107144pviE9M7pPo.png
Channel access token
一開始是沒有內容的,點選ISSUE後即可產生。
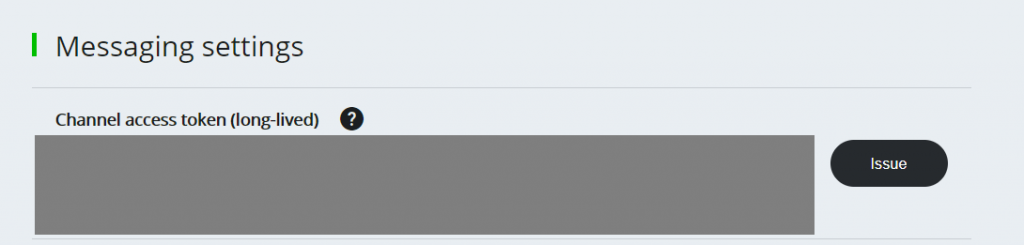
https://ithelp.ithome.com.tw/upload/images/20171231/20107144A9JWnvj9yu.png

3.用cmd開啟程式檔案
$cd 程式檔案位置
$python 程式檔名.py
https://ithelp.ithome.com.tw/upload/images/20171231/20107144wndYuezvgC.png

4.打開ngrok.exe進入cmd
$ngrok.exe http 80
!!!這邊的80要和步驟一圖三程式所寫的port一樣!!!
成功執行後會得到
https://ithelp.ithome.com.tw/upload/images/20171231/20107144VxG3O0qQiu.png

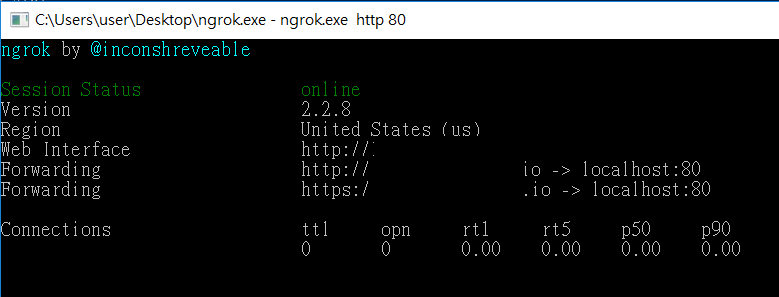
5.把https的網址貼到 Line developers > Webhook URL Requires SSL 的地方
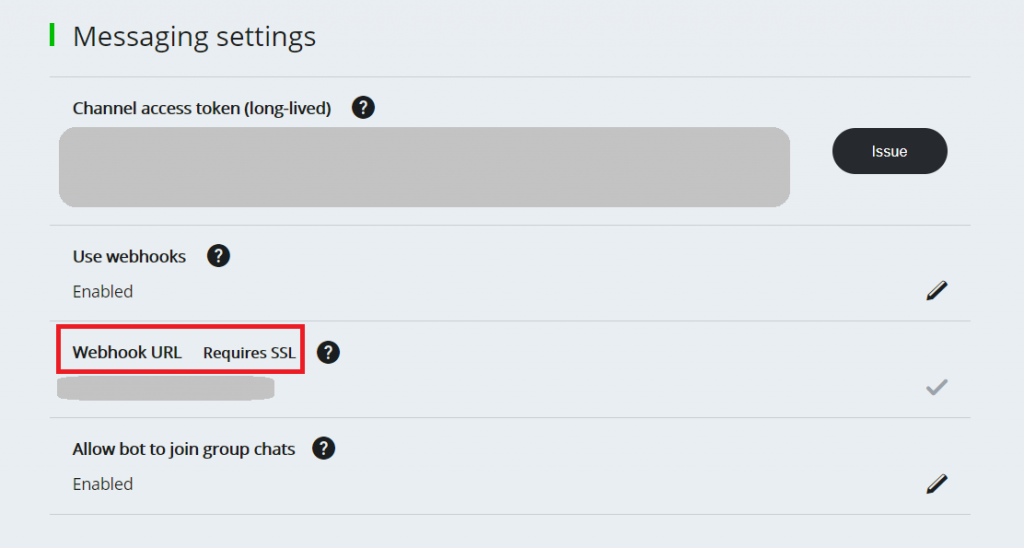
https://ithelp.ithome.com.tw/upload/images/20171231/201071443e3iX0yM1z.png

設定就完成了!!!


上一篇
Day10[Line ChatBot]準備工作
下一篇
Day12[Line ChatBot]收發訊息
系列文
ChatBot&Chatbase30
圖片
  直播研討會
圖片
{{ item.channelVendor }} {{ item.webinarstarted }} |
{{ formatDate(item.duration) }}
直播中

尚未有邦友留言

立即登入留言