Swagger 也算是行之有年的 API 文件產生器,只要在 API 上使用 C# 的 <summary /> 文件註解標籤,就可以產生精美的線上文件,並且對 RESTful API 有良好的支援。不僅支援產生文件,還支援模擬調用的互動功能,連 Postman 都不用打開就能測 API。
本篇將介紹如何透過 Swagger 產生 ASP.NET Core 的 RESTful API 文件。
同步發佈至個人部落格:
John Wu's Blog - [鐵人賽 Day13] ASP.NET Core 2 系列 - Web API 文件產生器 (Swagger)
要在 ASP.NET Core 使用 Swagger 需要安裝 Swashbuckle.AspNetCore 套件。
透過 .NET Core CLI 在專案資料夾執行安裝指令:
dotnet add package Swashbuckle.AspNetCore
在 Startup.cs 的 ConfigureServices 加入 Swagger 的服務及 Middleware。如下:
Startup.cs
using Swashbuckle.AspNetCore.Swagger;
// ...
public class Startup
{
    public void ConfigureServices(IServiceCollection services)
    {
        services.AddMvc()
                .AddJsonOptions(options => {
                    options.SerializerSettings.NullValueHandling = Newtonsoft.Json.NullValueHandling.Ignore;
                });

        services.AddSwaggerGen(c =>
        {
            c.SwaggerDoc(
                // name: 攸關 SwaggerDocument 的 URL 位置。
                name: "v1",
                // info: 是用於 SwaggerDocument 版本資訊的顯示(內容非必填)。
                info: new Info
                {
                    Title = "RESTful API",
                    Version = "1.0.0",
                    Description = "This is ASP.NET Core RESTful API Sample.",
                    TermsOfService = "None",
                    Contact = new Contact {
                        Name = "John Wu",
                        Url = "https://blog.johnwu.cc"
                    },
                    License = new License {
                        Name = "CC BY-NC-SA 4.0",
                        Url = "https://creativecommons.org/licenses/by-nc-sa/4.0/"
                    }
                }
            );
        });
    }

    public void Configure(IApplicationBuilder app)
    {
        app.UseSwagger();
        app.UseSwaggerUI(c =>
        {
            c.SwaggerEndpoint(
                // url: 需配合 SwaggerDoc 的 name。 "/swagger/{SwaggerDoc name}/swagger.json"
                url: "/swagger/v1/swagger.json",
                // description: 用於 Swagger UI 右上角選擇不同版本的 SwaggerDocument 顯示名稱使用。
                description: "RESTful API v1.0.0"
            );
        });

        app.UseMvc();
    }
}
SwaggerDocument 物件。SwaggerDocument 物件。SwaggerDocument 物件。http://localhost:5000/swagger/v1/swagger.json
SwaggerDocument 物件變成漂亮的介面。http://localhost:5000/swagger
API 沿用 [Day12] ASP.NET Core 2 系列 - RESTful API 的範例程式。
設定完成後,啟動網站就能開啟 Swagger UI 了。下面如下:
![[鐵人賽 Day13] ASP.NET Core 2 系列 - Swagger UI](https://blog.johnwu.cc/images/i13-1.png)
在 API 加入 <summary /> 文件註解標籤。如下:
// ...
[Route("api/[controller]s")]
public class UserController : Controller
{
    /// <summary>
    /// 查詢使用者清單
    /// </summary>
    /// <param name="q">查詢使用者名稱</param>
    /// <returns>使用者清單</returns>
    [HttpGet]
    public ResultModel Get(string q) {
        // ...
    }
}
再次打開 Swagger,會發現沒有顯示說明,因為沒有設定 .NET 的 XML 文件檔案,所以 Swagger 抓不到說明是正常的。
打開 *.csproj,在 <Project /> 區塊中插入以下程式碼:
<PropertyGroup Condition="'$(Configuration)|$(Platform)'=='Debug|AnyCPU'">
    <DocumentationFile>bin\Debug\netcoreapp2.0\Api.xml</DocumentationFile>
    <NoWarn>1591</NoWarn>
</PropertyGroup>
以我範例的 *.csproj 內容如下:
<Project Sdk="Microsoft.NET.Sdk.Web">

  <PropertyGroup>
    <TargetFramework>netcoreapp2.0</TargetFramework>
  </PropertyGroup>

  <PropertyGroup Condition="'$(Configuration)|$(Platform)'=='Debug|AnyCPU'">
    <DocumentationFile>bin\Debug\netcoreapp2.0\Api.xml</DocumentationFile>
    <NoWarn>1591</NoWarn>
  </PropertyGroup>

  <ItemGroup>
    <Folder Include="wwwroot\" />
  </ItemGroup>

  <ItemGroup>
    <PackageReference Include="Microsoft.AspNetCore.All" Version="2.0.3" />
    <PackageReference Include="Swashbuckle.AspNetCore" Version="1.1.0" />
  </ItemGroup>

</Project>
然後在 Swagger 產生器設定讀取 <DocumentationFile> 指定的 XML 文件檔案位置:
Startup.cs
// ...
public class Startup
{
    public void ConfigureServices(IServiceCollection services)
    {
        // ...
        services.AddSwaggerGen(c =>
        {
            // ...
            var filePath = Path.Combine(PlatformServices.Default.Application.ApplicationBasePath, "Api.xml");
            c.IncludeXmlComments(filePath);
        });
    }
}
以 RESTful API 的例子來看,回傳的格式都是 JSON,所以可以直接在 Controller 加上 [Produces("application/json")] 表示回傳的型別都是 JSON,在 Swagger 的 Response Content Type 選項就會被鎖定只有 application/json 可以使用。如下:
// ...
[Route("api/[controller]s")]
[Produces("application/json")]
public class UserController : Controller
{
    // ...
}
若有預期 API 在不同的 HTTP Status Code 時,會回傳不同的物件,可以透過 [ProducesResponseType(type)] 定義回傳的物件。在 Swagger 中就可以清楚看到該 API 可能會發生的 HTTP Status Code 及回傳物件。例如:
// ...
[Route("api/[controller]s")]
[Produces("application/json")]
public class UserController : Controller
{
    /// <summary>
    /// 查詢使用者清單
    /// </summary>
    /// <param name="q">查詢使用者名稱</param>
    /// <returns>使用者清單</returns>
    [HttpGet]
    [ProducesResponseType(typeof(ResultModel<IEnumerable<UserModel>>), 200)]
    [ProducesResponseType(typeof(ResultModel<string>), 500)]
    public ResultModel<IEnumerable<UserModel>> Get(string q)
    {
        // ...
    }
}
![[鐵人賽 Day13] ASP.NET Core 2 系列 - Swagger - 執行結果](https://blog.johnwu.cc/images/i13-2.png)
ASP.NET Core Web API Help Pages using Swagger
Swagger tools for documenting API's built on ASP.NET Core
我用Swagger3.0發現SwaggerEndpoint裡面的參數改名稱了description改成name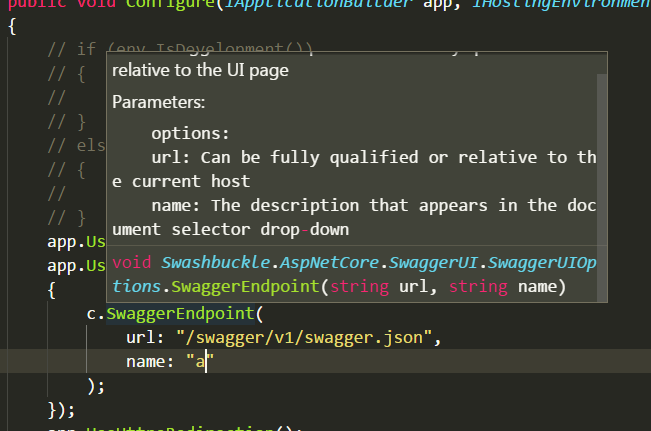
還有大大讀API文件的位置
我看圖是http://localhost:5000/swagger/v1/swagger.json
但是我打開是直接讀到他的json檔
後來改讀預設路徑http://localhost:5000/swagger
才讀的到
我用的版本asp.net core 2.1
是的,Swashbuckle.AspNetCore新版把 description 改成 name。
John Wu
謝謝大大回答