2017 Google I/O除了Architecture Components之外還有另一個重大消息:Kotlin成為Android開發的第一級語言。有了Google官方的支持,Kotlin的相關資源開始快速成長,在Android Studio 3也成為了內建的開發語言,聲勢如日中天。
Modern Android development with Kotlin
Kotlin的語法比Java簡潔很多,今天會把專案全部轉成Kotlin,比較同樣語法在兩者間的差異,以及相關library如Dagger2、Data Binding在轉換時須注意的地方。
特別想提到的是,Kotlin跟Java是完全相容的,專案中的.java和Kotlin檔案(.kt)可以一起運作,所以現有專案可以從最簡單的地方開始逐步轉成Kotlin,不用一次全部轉完。
Kotlin被稱為是**「Modern. Expressive. Safe.」**的語言,前兩者表示語法的簡潔和語意清楚,最後的Safe是著名的Null Safety特性:
var output: String
output = null   // Compilation error

==================================

val name: String? = null    // Nullable type
println(name.length())      // Compilation error
宣告變數時沒有加上?就表示它不能是null,只要在compile時發現是null就會立即報錯,讓我們盡早發現漏洞。反之如果是需要為null的變數就加上?,這樣就跟Java一樣在取用時才會報錯。
至於簡潔的部分,基本上整體各處都比Java簡潔,挑幾個Android開發常用的來看:setOnClickListener在Kotlin已經簡化到極致。
// Java
button.setOnClickListener(new View.OnClickListener(){
    @Override
    public void onClick(View v){
        doSomething();
    }
});

==================================

// Kotlin
button.setOnClickListener { doSomething() }
Kotlin提供Data class來處理POJO,不用手動寫getter、setter、equals和toString等方法。
// Java
public class Owner {

    public final String login;
    public final String avatarUrl;
    public final String url;

    public Owner(String login, String avatarUrl, String url) {
        this.login = login;
        this.avatarUrl = avatarUrl;
        this.url = url;
    }

    @Override
    public boolean equals(Object o) {
        if (this == o) return true;
        if (o == null || getClass() != o.getClass()) return false;
        Owner owner = (Owner) o;
        return Objects.equals(this.login, owner.login) &&
                Objects.equals(this.avatarUrl, owner.avatarUrl) &&
                Objects.equals(this.url, owner.url);
    }

    @Override
    public int hashCode() {
        int result = login != null ? login.hashCode() : 0;
        result = 31 * result + (url != null ? url.hashCode() : 0);
        return result;
    }
}

==================================

// Kotlin
data class Owner(val login: String,
                 val avatarUrl: String,
                 val url: String)
instance of簡化成is
// Java
if (activity instanceof HasSupportFragmentInjector) {

}

==================================

// Kotlin
if (activity is HasSupportFragmentInjector) {

}
最後是從小被嫌到大的findViewById,歷經ButterKnife和Data Binding的改革,在Kotlin又更上一層樓,只要import layout之後就可以直接用裡面全部的元件,不須任何宣告。
import kotlinx.android.synthetic.main.content_main.*

class MainActivity : AppCompatActivity() {

    override fun onCreate(savedInstanceState: Bundle?) {
        super.onCreate(savedInstanceState)
        setContentView(R.layout.activity_main)
        // No need to call findViewById(R.id.textView) as TextView
        textView.text = "Kotlin for Android rocks!"

    }
}
textView.text等同於textView.setText(),而且也許你已經發現了,Kotlin不用寫分號,整體而言在各處都比Java簡潔清楚。
Android Studio提供轉換工具幫我們把Java語法轉成Kotlin,只要開啟目標Java檔並選擇Android Studio -> Code -> Convert Java File to Kotlin File就會變Kotlin語法了,其他方式可參考Get Started with Kotlin on Android。
轉換時有幾個地方須特別留意,如果library有用到annotationProcessor,在Kotlin需改成kapt:
// Java
annotationProcessor "com.google.dagger:dagger-compiler:2.14.1"

==================================

// Kotin
apply plugin: 'com.android.application'
apply plugin: 'kotlin-android'
apply plugin: 'kotlin-kapt'

...

dependencies {
    kapt "com.google.dagger:dagger-compiler:2.14.1"
    ...
}
如果有用到Data Binding,在app-level gradle要加入kapt,並且版本號要跟gradle版本一樣:
// project-level gradle
buildscript {
    ext.kotlin_version = '1.2.20'

    repositories {
        ...
    }
    dependencies {
        classpath "org.jetbrains.kotlin:kotlin-gradle-plugin:$kotlin_version"
        classpath 'com.android.tools.build:gradle:3.0.1' // <- gradle version
        ...
    }
}

// app-level gradle
dependencies {
    kapt "com.android.databinding:compiler:3.0.1" // <- same as gradle version
    ...
}
這樣建置的部分就OK了,接著是語法。
先是Dagger的部分,轉換工具會將@Inject的變數標成internal,這樣Dagger無法處理,須將internal移除。
// Before
@Inject
internal var dispatchingAndroidInjector: DispatchingAndroidInjector<Activity>? = null

==================================

// After
@Inject
lateinit var dispatchingAndroidInjector: DispatchingAndroidInjector<Activity>
GithubViewModelFactory中的Provider前面要加上@JvmSuppressWildcards
@Singleton
class GithubViewModelFactory @Inject
constructor(private val creators: Map<Class<out ViewModel>, @JvmSuppressWildcards Provider<ViewModel>>) : ViewModelProvider.Factory {

    ...
}
Data Binding的Custom binding要加上@JvmStatic
object RepoBindings {

    @JvmStatic
    @BindingAdapter("visibleGone")
    fun showHide(view: View, show: Boolean) {
        view.visibility = if (show) View.VISIBLE else View.GONE
    }
}
最後是Room的@Entity,須特別留意變數宣告是否要加上?,這會影響到schema的NOT NULL屬性,所以轉換前後對於欄位是否能為null要一致,否則視同修改schema,Room會要求更新資料庫版本。
以RepoSearchResult為例,轉換前的query不允許null以及int原本就不會是null,轉換後要一致。
public class RepoSearchResult {
    @NonNull
    @PrimaryKey
    public final String query;
    public final List<Integer> repoIds;
    public final int totalCount;

    ...
}

==================================

class RepoSearchResult(@field:PrimaryKey
                       val query: String,
                       val repoIds: List<Int>?,
                       val totalCount: Int)
repoIds是透過@TypeConverters轉換的,所以裡面的參數也要跟著加上?喔
class GithubTypeConverters {
    @TypeConverter
    fun stringToIntList(data: String?): List<Int>? {
        return if (data == null) {
            emptyList()
        } else splitToIntList(data)
    }

    @TypeConverter
    fun intListToString(ints: List<Int>?): String? {
        return joinIntoString(ints)
    }
}
轉換成Kotlin大致就這些要注意的地方,如果有漏掉的話再看原始碼對照一下。
Kotlin Android Extensions是針對Android的優化plugin,稍早提到的簡化findViewById就是其功能之一。
於app-level gradle啟用:
apply plugin: 'kotlin-android-extensions'
在View中import layout就可以用了,Activity中使用就如上面看過的範例:
import kotlinx.android.synthetic.main.content_main.*

class MainActivity : AppCompatActivity() {

    override fun onCreate(savedInstanceState: Bundle?) {
        super.onCreate(savedInstanceState)
        setContentView(R.layout.activity_main)
        // No need to call findViewById(R.id.textView) as TextView
        textView.text = "Kotlin for Android rocks!"

    }
}
Fragment使用的話需留意不要在onCreateView中呼叫元件,因為在return view之前元件還沒準備好,應改在onViewCreated中呼叫。
import kotlinx.android.synthetic.main.repo_fragment.*

class RepoFragment : Fragment(), Injectable {

    ...

    override fun onCreateView(inflater: LayoutInflater, container: ViewGroup?, savedInstanceState: Bundle?): View? {
        binding = RepoFragmentBinding.inflate(inflater, container, false)
        return binding.root
    }

    override fun onViewCreated(view: View, savedInstanceState: Bundle?) {
        btnSearch.setOnClickListener { doSearch() }
        recyclerView.layoutManager = ...
        recyclerView.adapter = repoAdapter
    }
    ...
}
另外還有多個在測試階段的功能,有興趣的可以前往官方網站進一步了解。
其他的Java和Kotlin差異就請參考文末的原始碼,我還沒在正式的專案使用Kotlin,實戰經驗不足所以是用Android Studio轉換加上手動調整完成的,如有誤用的語法還請多指點。
最後的專案結構: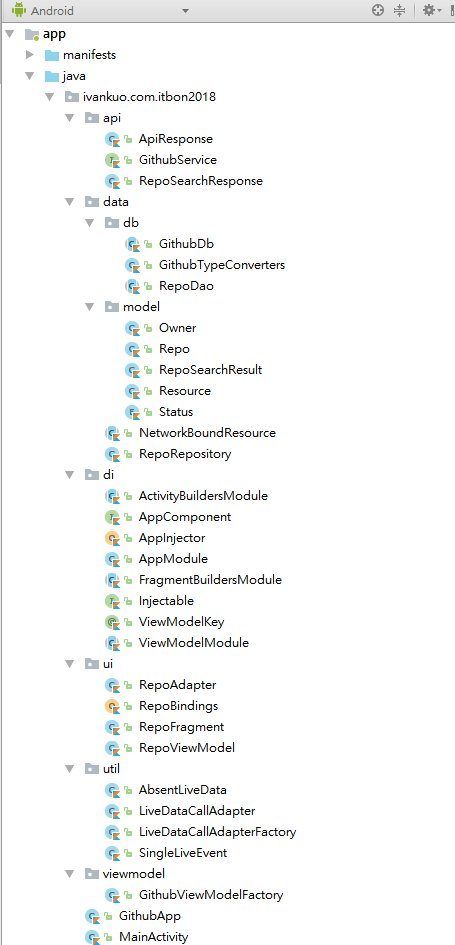
終於,畢生所學就到此了,感謝相遇過的每一個人,掰掰!
GitHub source code:
https://github.com/IvanBean/ITBon2018


 iThome鐵人賽