今天想筆記的是把自己寫的Ruby on Rails專案部署(Deploy)到Heroku!
Heroku是Salesforce公司旗下的雲端服務商,支援多種程式語言像是Ruby, PHP, Python等等。
提早讓應用程式能快速建置、部署的主要好處就是提早一步發現問題囉,
如果將所有功能都寫好再一起丟上去,可能會不容易發現不同的錯誤是分別出在哪裡!
而且能在網路上讓全世界看到自己努力實作的成果,還是比只有在本機localhost觀賞更有成就感的。
以下以我在前篇文章寫的Ruby on Rails專案為例:
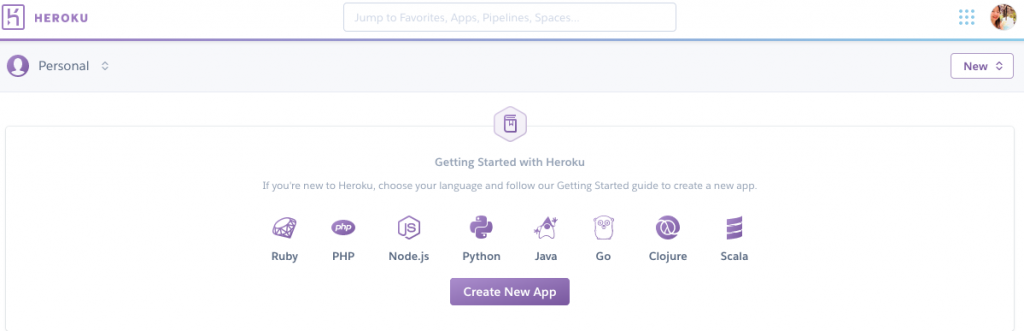
二話不說,我們先到Heroku的申請頁面用好自己的帳號,然後進入後台選擇Ruby程式語言,按下create new app:
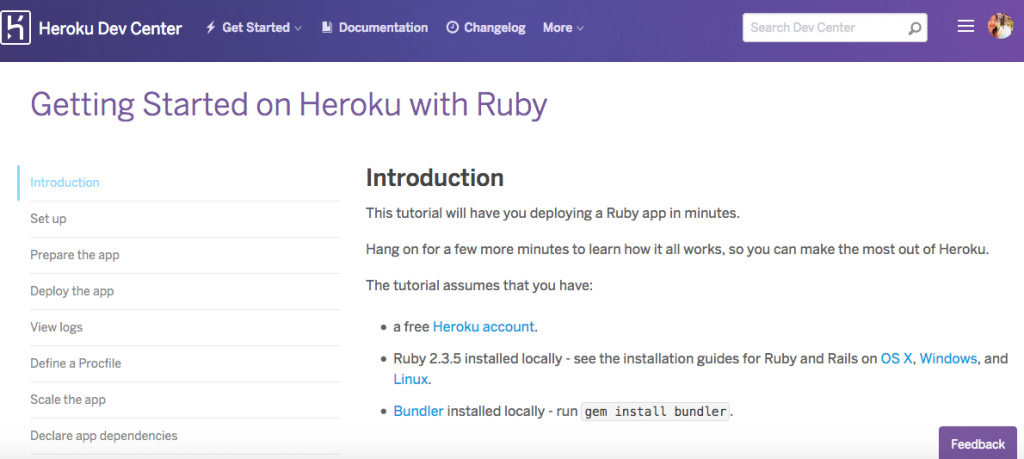
頁面會跳轉至如何設定Ruby的教學文件,開始一步步研究它:
ruby -vtingdeMacBook-Air:~ tingtinghsu$ ruby -v
ruby 2.4.2p198 (2017-09-14 revision 59899) [x86_64-darwin17]
gem install bundler在Ruby世界裡,
Gem代表套件,是各種打包好的程式碼,讓開發效率更加速,節省工程師的寶貴時間。*
而Bundler 是管理Gem相依性(dependencies)的工具,解決不同套件之間的依存關係,避免因為版本問題而產生衝突。*
tingdeMacBook-Air:~ tingtinghsu$ gem install bundler
Fetching: bundler-1.16.4.gem (100%)
Successfully installed bundler-1.16.4
Parsing documentation for bundler-1.16.4
Installing ri documentation for bundler-1.16.4
Done installing documentation for bundler after 8 seconds
1 gem installed
可以看到指令已經自動幫我裝好了bundler-1.16.4.gem
如果你的還沒有裝Git版本控制系統的話,Heroku教學文件也附上Git官網安裝連結。
以上的步驟對接下來故事的發展很重要喔!
接下來進入Set Up頁面照著步驟進行:
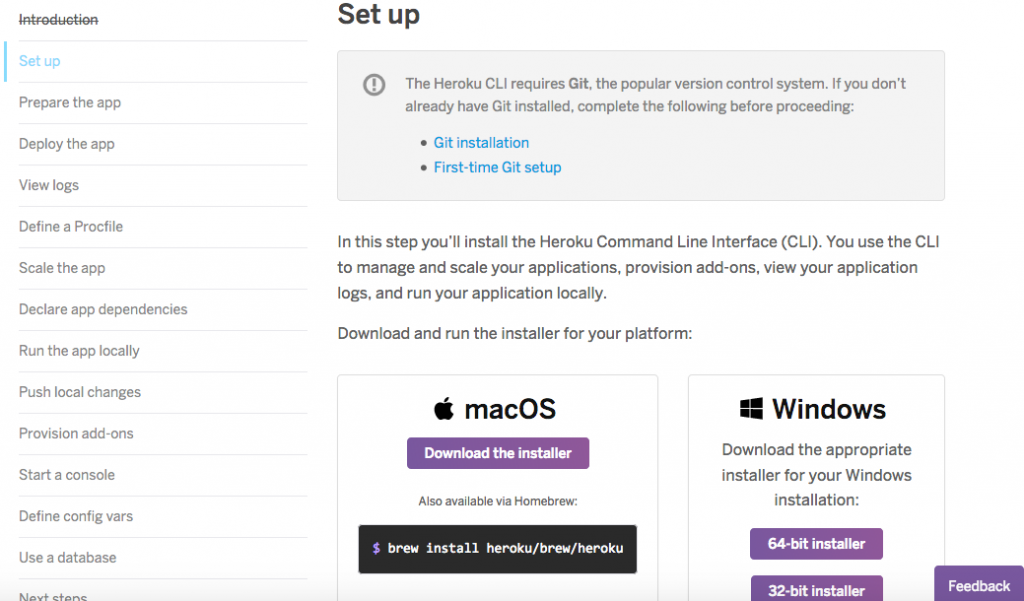
由於我使用的是MacOS,除了直接下載圖形化安裝介面,文件提到我可以:
使用Homebrew的指令brew install heroku/brew/heroku。
什麼是Homebrew呢?這裡PTT的大大提到Mac專用的套件管理系統(就是像ubuntu的apt-get)。
來看看自己以前是否有裝過(因為很有實驗精神的我很愛亂碰一些東西):brew -v
tingdeMacBook-Air:~ tingtinghsu$ brew -v
Homebrew 1.4.0
Homebrew/homebrew-core (git revision fc09; last commit 2017-12-12)
記錄顯示一年前有玩弄過~
果然今年開始養成寫筆記的好習慣是正確的,不然做過什麼有趣的事都忘記了,就很可惜呢。:)
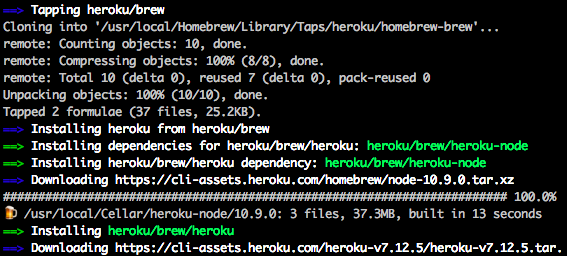
現在我可以放心的輸入指令brew install heroku/brew/heroku:
如果還沒安裝的人,可移駕至Homebrew官網瞧瞧~
從以下程式碼
brew update可看到安裝heroku的同時,系統也幫我把2017年的Homebrew 1.4.0更新到Homebrew 1.7.2:
tingdeMacBook-Air:~ tingtinghsu$ brew update
Updated 1 tap (heroku/brew).
==> Updated Formulae
heroku/brew/heroku ✔
tingdeMacBook-Air:~ tingtinghsu$ brew -v
Homebrew 1.7.2
Homebrew/homebrew-core (git revision 14e75; last commit 2018-08-30)
關於部署Deploy,參考教學文件,首先移動到你專案的路徑位置:(我的以yelpdemo資料夾為例)。
輸入指令heroku login,然後輸入你的heroku帳號密碼:
$ heroku login
Enter your Heroku credentials.
Email: user@example.com

Password:
下一步是輸入指令heroku create:代表我們已經在Heroku上建立app(應用程式)了。
以上顯示我已經在Heroku上開一台伺服器,Heroku隨機分配的名稱叫做dry-sea-32555,
用git remote -v指令確認一下git在heroku遠端的節點:
tingdeMacBook-Air:yelpdemo tingtinghsu$ git remote -v
heroku	https://git.heroku.com/dry-sea-32555.git (fetch)
heroku	https://git.heroku.com/dry-sea-32555.git (push)
如果你想把網址改成好記一點的,可以輸入heroku rename+你喜歡的名稱:
tingdeMacBook-Air:yelpdemo tingtinghsu$ heroku rename tingsrailsdemo
Renaming dry-sea-32555 to tingsrailsdemo... done
https://tingsrailsdemo.herokuapp.com/ | https://git.heroku.com/tingsrailsdemo.git
Git remote heroku updated
接著去改完名的這個網址瞧瞧:
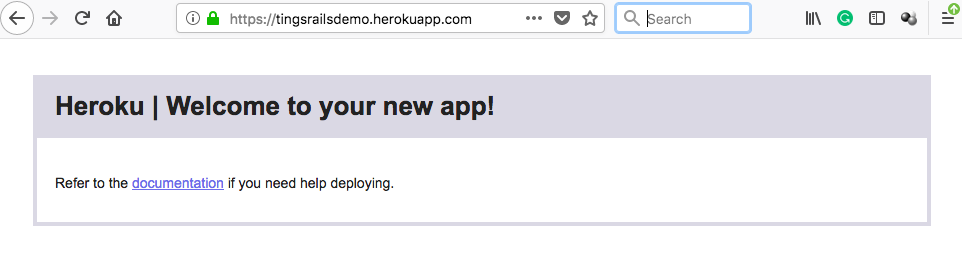
太好了,伺服器完工!
重頭戲「利用指令部署專案至Heroku」開始上場!
以下紀錄在把Ruby on Rail專案往Heroku上面推之前,記得到程式架構裡修改的步驟。
rails -v:tingdeMacBook-Air:yelpdemo tingtinghsu$ rails -v
Rails 5.1.6
這時候一定要用力參考這篇如何設定Rails的教學文件Getting Started on Heroku with Rails 5.x,讓我們的程式碼可以順利在網際網路上運行。記得參考的Heroku文件必須搭配相應的rails版本,如果你的rails版本是4或更舊的版本,文件裡也有連結。
還記得剛剛文章開頭我們聊過打包好的程式碼gem(套件),這時馬上是個練習的好機會。
Horoku高度推薦我們開發專案所使用的資料庫是Postgresql:
If you’re using an existing app that was created without specifying --database=postgresql, you need to add the pg gem to your Rails project.
Edit your Gemfile and change this line:gem 'sqlite3'To this:gem 'pg'
所以現在來到我的本地資料夾裡的gem file,新增一個gem叫做'pg'
source 'https://rubygems.org'

git_source(:github) do |repo_name|
  repo_name = "#{repo_name}/#{repo_name}" unless repo_name.include?("/")
  "https://github.com/#{repo_name}.git"
end
# Bundle edge Rails instead: gem 'rails', github: 'rails/rails'
gem 'rails', '~> 5.1.6'
#gem 'sqlite3'             #database for Active Record
gem 'pg'                   #在這個地方新增Postgresql gem
gem 'puma', '~> 3.7'       #app server
gem 'sass-rails', '~> 5.0' #stylesheets
gem 'uglifier', '>= 1.3.0' #compressor for JavaScript assets
gem 'coffee-rails', '~> 4.2' #.coffee assets and views
gem 'turbolinks', '~> 5' #navigate your web application faster
gem 'jbuilder', '~> 2.5' #Build JSON APIs
bundle確認套件版本之間的相依性沒有衝突。如同本文開頭所提到的,這個步驟很重要。
記得,只要改過任何gemfile,就要再跑過bundle install指令,確認相依性:
Fetching gem metadata from https://rubygems.org/.........
Fetching gem metadata from https://rubygems.org/.
Resolving dependencies...
bundler很乖地幫我們查找到了一個,這就是剛剛修改的Pg套件:
Fetching pg 1.1.2
Installing pg 1.1.2 with native extensions
...
Bundle complete! 16 Gemfile dependencies, 70 gems now installed.
Use `bundle info [gemname]` to see where a bundled gem is installed.
每次頭一回安裝一個新套件,還跟它不熟時,
你可以輸入bundle info +套件名稱深入了解詳細資料,增強自己的印象,以及對技術的近一步認識(以免裝過什麼gem玩意都很容易失憶啊):
tingdeMacBook-Air:yelpdemo tingtinghsu$ bundle info pg
  * pg (1.1.2)
	Summary: Pg is the Ruby interface to the {PostgreSQL RDBMS}[http://www.postgresql.org/]
	Homepage: https://bitbucket.org/ged/ruby-pg
	Path: /Users/tingtinghsu/.rvm/gems/ruby-2.4.2/gems/pg-1.1.2
git push heroku mastertingdeMacBook-Air:yelpdemo tingtinghsu$ git push heroku master
Counting objects: 129, done.
Delta compression using up to 4 threads.
Compressing objects: 100% (112/112), done.
Writing objects: 100% (129/129), 28.60 KiB | 0 bytes/s, done.
Total 129 (delta 9), reused 105 (delta 3)
...
To https://git.heroku.com/tingsrailsdemo.git
* [new branch] master -> master
好了!既然推上去了,就跑去Heroku網站看一眼長什麼樣子:
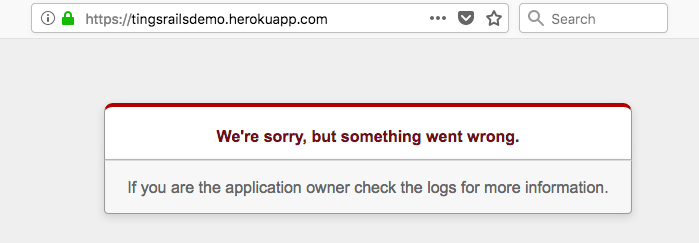
疑?我精美的網站呢?
heroku run rake db:migrate 更新資料庫為了解決剛剛的問題,在這裡解釋:
Rails的環境分成三種
development開發模式,test測試模式,和production產品正式上線模式。在這裡的Heroku就是我們的產品模式。
這個指令的意思,每次更改資料庫時,記得最後要在Heroku(產品正式上線模式)跑migration。
tingdeMacBook-Air:yelpdemo tingtinghsu$ heroku run rake db:migrate
Running rake db:migrate on ⬢ tingsrailsdemo... up, run.3211 (Free)
================================
-- create_table(:restaurants)
   -> 0.0102s
== 20180823054504 CreateRestaurants: migrated (0.0107s) =======================
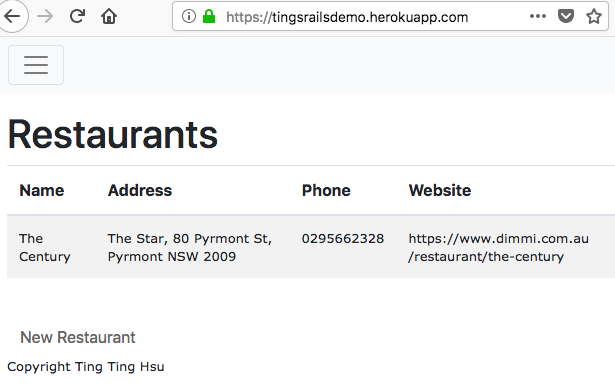
跑完rake db:migrate後,頁面終於順利出現。:)
後記,在最後的處理資料庫部分的時候,我卡了快2小時...因為我之前預設的rails專案是使用sqlite3而不是PostgreSQL!不過為了解決bug,之後近一步參考why you cannot use Sqlite3 on Heroku,再搜尋錯誤訊息的關鍵字,增加了更多知識,順便連下一篇文章主題都想好了:如何把你的Rails app資料庫從sqlite移轉成postgre。開心!XD
Ref:
龍哥的部落格
 貓貓工程師 / PM Ting

