選用MVC是因為之前OC有使用過
MVVM可以分散controller肥大問題
但我目前沒使用 待以後補上
OC
HomeViewController * _homeViewController = [[HomeViewController alloc] init];
[self presentViewController:_homeViewController animated:YES completion:NULL];
Swift
let vc = AddViewController() //change this to your class name
self.present(vc, animated: true, completion: nil)
present部分
Swift直接省略ViewController部分
之前前輩教導是先轉換controller
然後在controller裡面在addsubview
不知道對不對
直接新增一個View
mainView = MainView.init(frame: CGRect.init(x: self.view.frame.origin.x, y: self.view.frame.origin.y, width: UIScreen.main.bounds.width, height: UIScreen.main.bounds.height));
self.view.addSubview(mainView);
View的Button action
也是要在controller作動喔
所以在controller宣告以下
mainView.addBtn.addTarget(self,
                         action: #selector(clickAddBtn),
                         for: .touchUpInside)
以及對應的func
@IBAction func clickAddBtn(_ sender: Any) {
    //code
}
前面步驟
首先就新增一個UIView與Xib
然後在UIView裡面添加
以下程式
nibName: "ShipView"
要與Xib名稱一致
其餘照抄就可以了
    var contentView:UIView!
    override init(frame: CGRect) {
        super.init(frame: frame)
        setUp()
    }

    required init?(coder aDecoder: NSCoder) {
        super.init(coder: aDecoder)
        setUp()
    }
    func setUp() {
        let bundle = Bundle(for: type(of: self))
        let nib = UINib(nibName: "ShipView", bundle: bundle)
        contentView = (nib.instantiate(withOwner: self, options: nil)[0] as! UIView)
        contentView.frame = bounds
        addSubview(contentView)
    }
    override func layoutSubviews() {
        super.layoutSubviews()

    }
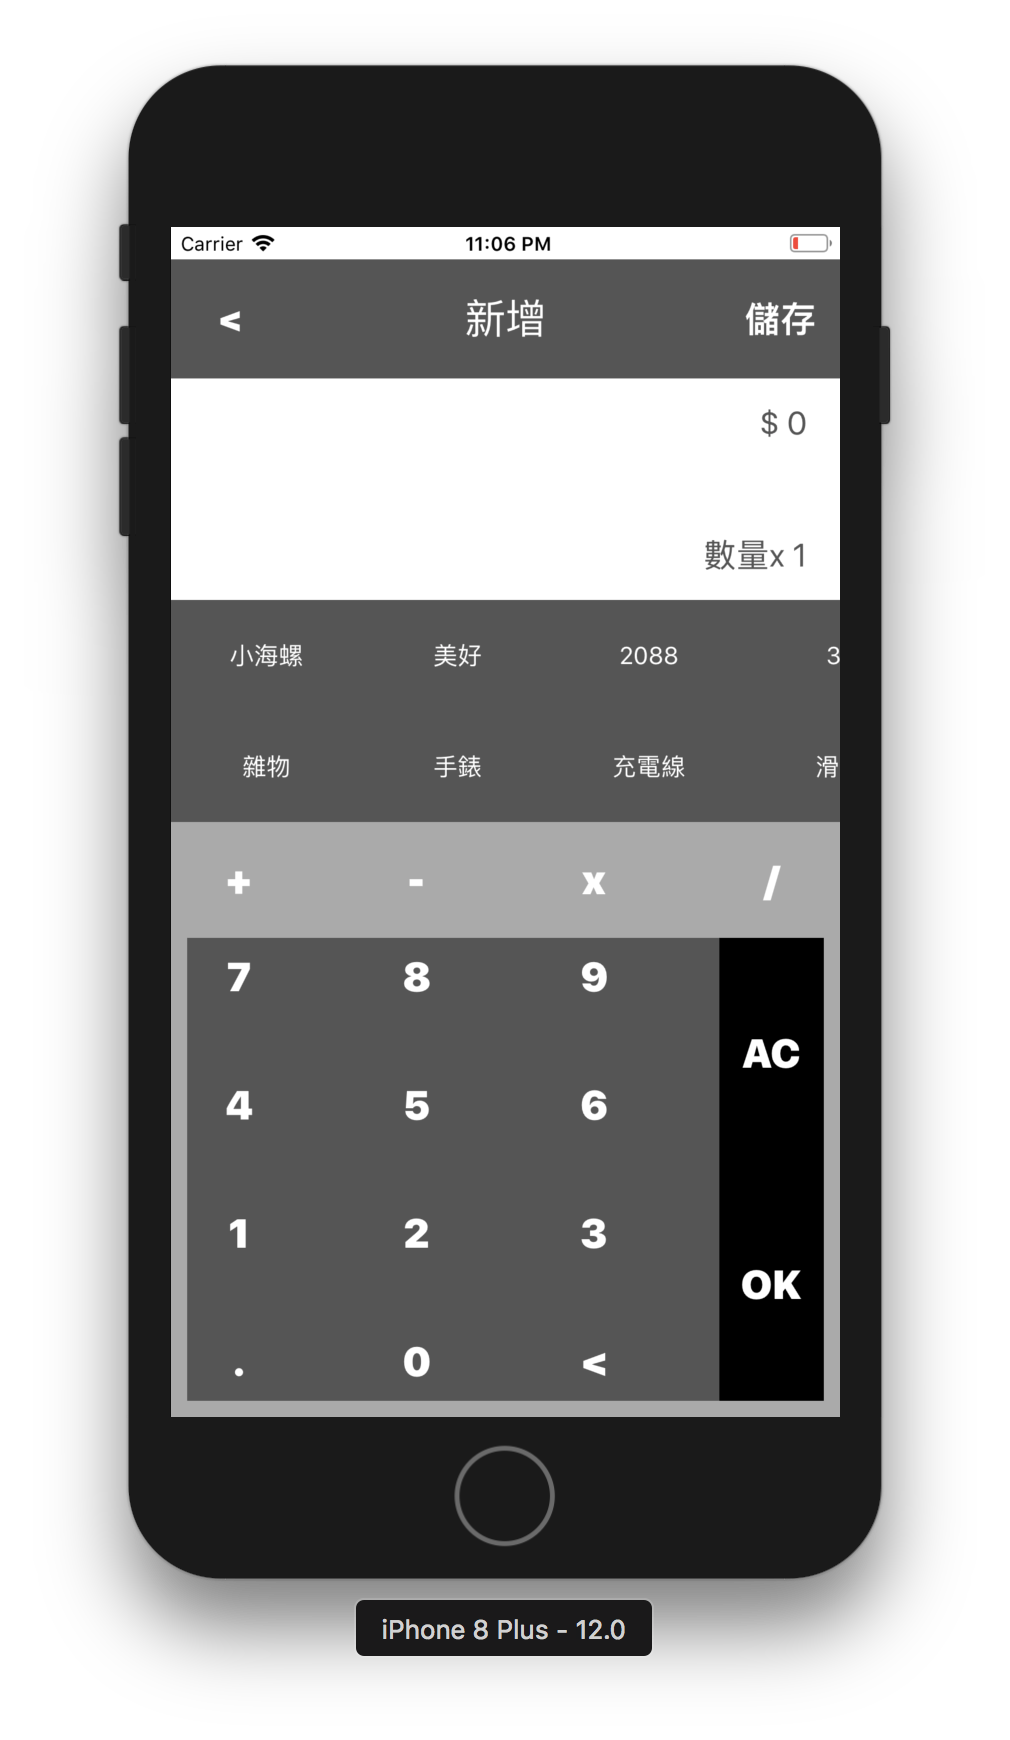
拉了這些UI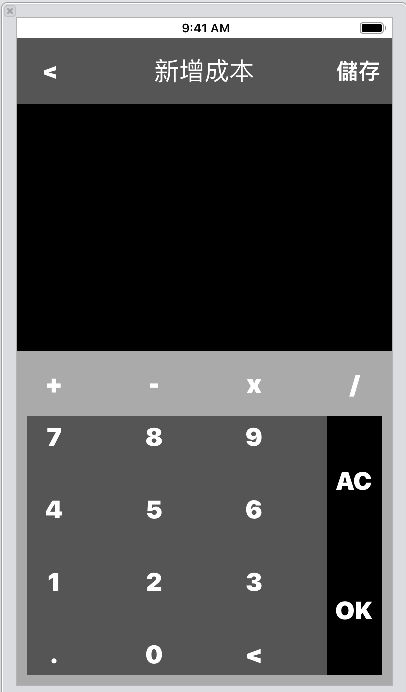
中間黑色部分改用addsubview
因為會有 成本與收入 兩個
其中只有部分不同
想用BOOL做區別
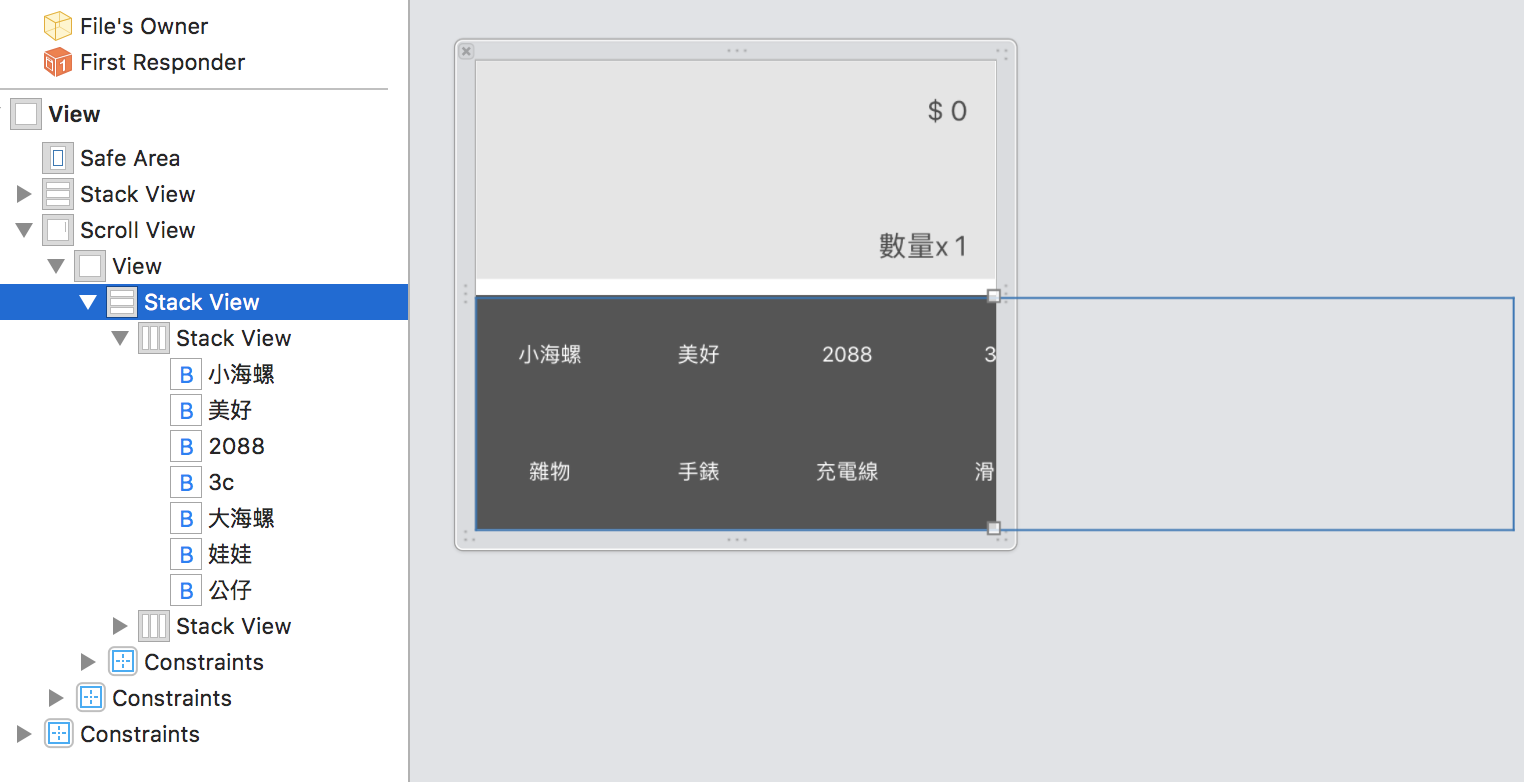
這裡比較不熟的事Scroll View
做一下紀錄
Scroll View與Self.View同寬
Scroll View中在加入View寬等於Self.View的兩倍
基本上就可以讓Scroll View左右滑動的感覺
全程使用xib就可以實現
金魚也學得會的「KD指標」! 什麼是KD黃金交叉、KD死亡交叉 - 2021年


 iThome鐵人賽