經過前幾天的架構與設定,初步的專案大致都架構完成了
現在來整合操作一下
constructor裡面new Angaular Material裡面的MatSnackBar來用 constructor(public snackBar: MatSnackBar) { }
public openSnackBar(message: string, action: string) {
this.snackBar.open(message, action, {
duration: 1000, //出現幾秒
//horizontalPosition: 'left' //水平顯示位置可調整,預設為中心往上
});
}
constructor裡面new我們之前建好的serviceconstructor(private programService: ProgramsService) {}
public openSnackbar() {
this.programService.openSnackBar('鐵人三十天測試一波', '完成');
}
<button mat-fab color="warn" (click)="openSnackbar()">
  <span matTooltip="Snack Bar出現囉">
    <mat-icon>add</mat-icon>
  </span>
</button>
這邊有個關鍵,如果發現你的icon圖示沒有出來,趕快到
index.html裡面load icon圖示
<link href="https://fonts.googleapis.com/icon?family=Material+Icons" rel="stylesheet">
button裡面的click事件直接呼叫openSnackbar()
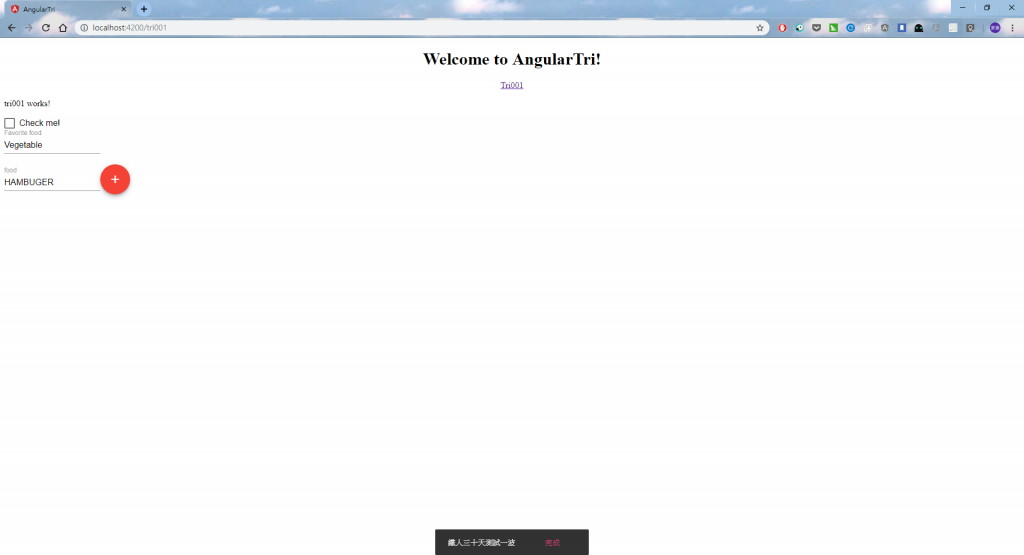
下面的Snack Bar就出來啦
這個功能常用來做成系統上的提醒,驗證資料時非常好用
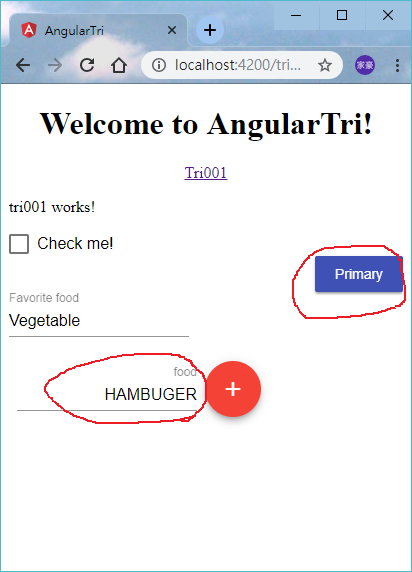
在butoon裡面給予兩個之前寫好的css名稱standard-closed與standard-width
<div class="standard-closed">
  <button mat-raised-button color="primary">Primary</button>
</div>
<mat-form-field class="standard-width standard-closed">
  <input matInput placeholder=" food" value="HAMBUGER">
</mat-form-field>

看的出來Button與文字都往右邊跑了,SCCS這樣寫沒問題
以上從建component與service、配置Routing與共用的SCSS、套用Angular Material當作前端元件都測試過了
接下來會講一下如何來撈資料,如何更進一步利用Angular框架來寫程式
這一系列都算我實作的心得筆記,記錄下來讓自己不要忘了
