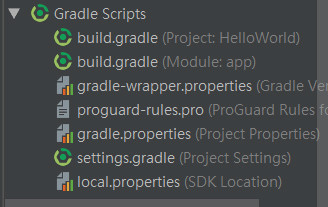
昨天學了Gradle的基本概念,現在就來看看檔案裡實際上寫了什麼吧!
一樣參考Gradle官網,檔案為Android Studio生成專案的default檔:
// Top-level build file where you can add configuration options common to all sub-projects/modules.

buildscript {

    repositories { // 看來default的知識庫有兩個來源呢
        google()
        jcenter()
    }
    dependencies {
        classpath 'com.android.tools.build:gradle:3.2.1' // 命名規則是"group:name:version"
                                                          // default需要Gradle這個artifact

        // NOTE: Do not place your application dependencies here; they belong
        // in the individual module build.gradle files
        // 從這註解來看,這邊之後應該不會新增東西?
    }
}

allprojects {  // 整個 project的設定會寫在這邊
    repositories { // buildscript那邊明明寫過了,分兩個地方寫不知有什麼用意?
        google()
        jcenter()
    }
}

task clean(type: Delete) { // 應該是像make clean之類的東西,不過現在還不清楚實際上做哪些事
    delete rootProject.buildDir
}
第一次build Gradle的時候,會去下載artifact並存在cache,之後build就不用重新下載了。
apply plugin: 'com.android.application' // 類似import from上面那個檔案裡的buildscript section的概念

android { // 設定開始囉
    compileSdkVersion 27 // 一定要是最新版本
    defaultConfig {
        applicationId "com.example.hana.helloworld" // 很重要的applicationId,在Goodle Play商店裡要唯一
        minSdkVersion 15 // 最舊支援到哪版
        targetSdkVersion 27 // 一定要是最新版本
        versionCode 1 // 給Goodle Play看的,有新版本就要改這個數字才能上傳Goodle Play
        versionName "1.0" // 給自己看的
        testInstrumentationRunner "android.support.test.runner.AndroidJUnitRunner" // 使用 JUnit 4 test runner,目前還不知是啥東東,看名字應該是某種unit test套件
    }
    buildTypes { // default支援兩種build,debug版和release版
                 // debug section沒寫出來,代表使用default config
        release {
            minifyEnabled false
            proguardFiles getDefaultProguardFile('proguard-android.txt'), 'proguard-rules.pro'
        }
    }
}

dependencies { // default使用的artifact囉
    implementation fileTree(dir: 'libs', include: ['*.jar'])
    implementation 'com.android.support:appcompat-v7:27.1.1'
    implementation 'com.android.support.constraint:constraint-layout:1.1.3'

    // 以下三個測試工具之後可研究看看怎麼用
    testImplementation 'junit:junit:4.12'
    androidTestImplementation 'com.android.support.test:runner:1.0.2'
    androidTestImplementation 'com.android.support.test.espresso:espresso-core:3.0.2'
}
官網講完這兩個檔案就開始build啦,啊其他檔案咧???
我想先講build一定有他的道理,那我也先來build一下。
官網教學是用shell script來build,但我的電腦是Windows啊,那要怎麼build?只好在Android Studio隨便找個很像個按鈕亂按看看,似乎是成功了。
下午 09:03 Gradle build finished in 54 s 32 ms
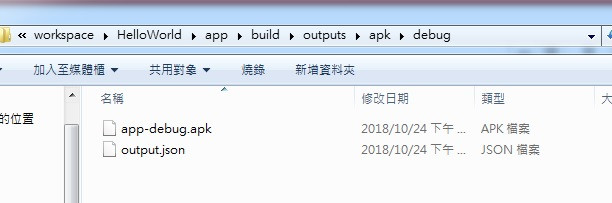
Build只會出現debug版,要release版的話要先做signing之類的動作,不過開發階段先不需要。