「哦哦哦哦!好像又更懂一點了!!」Wayne 點了點頭說。
「有更懂一點就好,也不枉費我講的這麼辛苦。」我喝了口咖啡後說道。
「那我們可以做更複雜一點的應用了吧?!」Wayne 閃著他那水汪汪的小眼睛望著我說。
「沒問題,那這次我們來做個留言板吧!」
這次我們來做個陽春型的留言板,主要是練習使用屬性綁定、事件綁定以及雙向綁定。做完大概會像這樣:

開始囉!一樣先新建一個專案:
ng new MyMessageBoard
建好之後就可以先用以下指令讓 Angular CLI 幫我們可以在 localhost:4200 看到我們的頁面:
ng serve
然後用以下程式碼將原本 app.component.html 裡的 Template 換掉 (這部份都可以自由發揮,不一定要跟我的一樣醜):
<form>
  <p>
    名稱:<input type="text">
  </p>

  <p>
    內容:<input type="text">
  </p>

  <p>
    <button type="submit">新增留言</button>
  </p>
</form>

<p>
  留言人:
</p>

<p>
  訊息內容:
</p>

<p>
  時間:
</p>
完成後的畫面看起來會像是這樣:

謎之音:嗯,真的很醜。
接著來開始處理資料綁定的部份,先在 app.component.ts 裡新增 name 與 content 這兩個屬性:
import { Component } from '@angular/core';

@Component({
  selector: 'app-root',
  templateUrl: './app.component.html',
  styleUrls: ['./app.component.css']
})
export class AppComponent {

  /**
   * 綁定畫面中的「名稱」欄位
   *
   * @memberof AppComponent
   */
  name = '';

  /**
   * 綁定畫面中的「內容」欄位
   *
   * @memberof AppComponent
   */
  content = '';

}
然後再到 app.component.html 裡新增插值表達式與雙向綁定的 Template 語法:
<form>
  <p>
    名稱:
    <input
      type="text"
      [(ngModel)]="name"
    >
  </p>

  <p>
    內容:
    <input
      type="text"
      [(ngModel)]="content"
    >
  </p>

  <p>
    <button type="submit">新增留言</button>
  </p>
</form>

<p>
  留言人: {{ name }}
</p>

<p>
  訊息內容: {{ content }}
</p>

<p>
  時間:
</p>
完成後存檔,再到瀏覽器一看:咦?!怎麼一片空白?!
打開開發人員工具應該會看到這樣子的訊息:

這是什麼意思?!
其實這是因為,如果要使用 [(ngModel)] 這個雙向綁定的 Directive 的話,必須要引入 Angular 的 FormsModule 才能正常使用。
謎之音:阿是不會早點講噢?!
怎麼引入呢?首先先打開 app.module.ts ,接著輸入以下的程式碼:
import { FormsModule } from '@angular/forms';
然後在 imports 的陣列裡加入 FromsModule ,像是:
imports: [
  BrowserModule,
  FormsModule
]
import 完並儲存之後你會發現,還是有錯誤!!

這次是因為,如果我們在 <form></form> 裡面用 [(ngModel)] 這個雙向綁定的 Directive 的話,input 的欄位上就要有 name 的屬性,或是加上 [ngModelOptions]="{standalone: true}" 也可以。在此我們用第一種方式來處理:
<input
  type="text"
  name="name"
  [(ngModel)]="name"
>
<input
  type="text"
  name="content"
  [(ngModel)]="content"
>
改完之後畫面跟功能就正常了:

等等,怎麼會讓使用者還沒有按按鈕就就可以留言了呢?!而且這從頭到尾都只有一筆留言阿?!所以我們趕快來調整一下!!
首先為了之後方便處理資料,我們來建立一個 Message 的資料物件模型來處理留言的資料。怎麼做呢?!先按下 Ctrl + ` 來打開整合在 VSCode 裡的終端機,接著輸入:
ng generate class message
或是:
ng g cl message
輸入完之後, Angular CLI 就會幫你新增一個 message.ts 的檔案,裡面長這樣:
export class Message {

}
我們預期希望每一筆留言都會有留言者的名稱、留言的內容以及留言的日期,所以我們新增三個屬性來儲存這三個資料:
export class Message {

  /**
   * 留言者的名稱
   *
   * @type {string}
   * @memberof Message
   */
  name: string;

  /**
   * 留言的內容
   *
   * @type {string}
   * @memberof Message
   */
  content: string;

  /**
   * 留言的日期
   *
   * @type {Date}
   * @memberof Message
   */
  date: Date;

}
接著我們希望在創造這個資料物件的實體時,應該只要傳入名稱跟內容,時間的話讓它在創造時幫我們直接產生。所以我們用建構式的部份來處理:
/**
 * Creates an instance of Message.
 *
 * @param {string} name - 留言者的名稱
 * @param {string} content - 留言的內容
 * @memberof Message
 */
constructor(name: string, content: string) {

  this.name = name;
  this.content = content;
  this.date = new Date();

}
然後到 app.component.ts 裡新增一個屬性 messages,用以存放所有的留言:
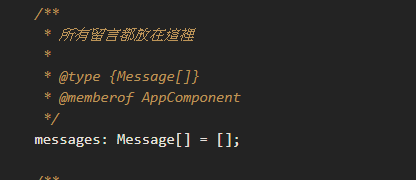
/**
 * 所有留言都放在這裡
 *
 * @type {Message[]}
 * @memberof AppComponent
 */
messages: Message[] = [];
再來是按下新增留言的按鈕的時候應該要能夠新增留言,所以我們寫一個新增留言的函式:
/**
 * 新增留言
 *
 * @memberof AppComponent
 */
addMessage(): void {

 // 防呆,避免名稱或內容是空值時也可以留言
  if (
    !this.name.trim() ||
    !this.content.trim()
  ) {
    return;
  }

  // 用名稱跟內容產生一個留言的資料物件
  const message = new Message(this.name, this.content);

  // 將留言的資料物件放進容器裡
  this.messages.push(message);

  // 清空內容
  this.content = '';

}
最後到 app.component.html 加上新增留言的事件綁定以及結構型 Directive- *ngFor ,令其可以幫我們將所有留言渲染出來:
<!-- 綁定 form submit 的事件就可以按下 enter 就能觸發事件了 -->
<form (ngSubmit)="addMessage()">

  <p>
    名稱:
    <input
      type="text"
      name="name"
      [(ngModel)]="name"
    >
  </p>

  <p>
    內容:
    <input
      type="text"
      name="content"
      [(ngModel)]="content"
    >
  </p>

  <p>
    <button type="submit">新增留言</button>
  </p>

</form>

<!-- 用 ng-container 來迴圈就不需要額外再包一層了 -->
<ng-container *ngFor="let message of messages">

  <p>
    留言人: {{ message.name }}
  </p>

  <p>
    訊息內容: {{ message.content }}
  </p>

</ng-container>
完成後的效果大致上會像是這樣:

是不是超簡單的?!
我們來回顧一下今天所用到的程式碼吧!
app.module.ts 檔的部份如下:
import { BrowserModule } from '@angular/platform-browser';
import { NgModule } from '@angular/core';
import { FormsModule } from '@angular/forms';

import { AppComponent } from './app.component';

@NgModule({
  declarations: [
    AppComponent
  ],
  imports: [
    BrowserModule,
    FormsModule
  ],
  providers: [],
  bootstrap: [AppComponent]
})
export class AppModule { }
app.component.html 檔的部份如下:
<!-- 綁定 form submit 的事件就可以按下 enter 就能觸發事件了 -->
<form (ngSubmit)="addMessage()">

  <p>
    名稱:
    <input
      type="text"
      name="name"
      [(ngModel)]="name"
    >
  </p>

  <p>
    內容:
    <input
      type="text"
      name="content"
      [(ngModel)]="content"
    >
  </p>

  <p>
    <button type="submit">新增留言</button>
  </p>

</form>

<!-- 用 ng-container 來迴圈就不需要額外再包一層了 -->
<ng-container *ngFor="let message of messages">

  <p>
    留言人: {{ message.name }}
  </p>

  <p>
    訊息內容: {{ message.content }}
  </p>

  <p>
    時間: {{ message.date | date: 'yyyy/MM/dd HH:mm:ss' }}
  </p>

</ng-container>
app.component.ts 檔的部份如下:
import { Component } from '@angular/core';
import { Message } from './message';

@Component({
  selector: 'app-root',
  templateUrl: './app.component.html',
  styleUrls: ['./app.component.css']
})
export class AppComponent {

  /**
   * 綁定畫面中的「名稱」欄位
   *
   * @memberof AppComponent
   */
  name = '';

  /**
   * 綁定畫面中的「內容」欄位
   *
   * @memberof AppComponent
   */
  content = '';

  /**
   * 所有留言都放在這裡
   *
   * @type {Message[]}
   * @memberof AppComponent
   */
  messages: Message[] = [];

  /**
   * 新增留言
   *
   * @memberof AppComponent
   */
  addMessage(): void {

    // 防呆,避免名稱或內容是空值時也可以留言
    if (
      !this.name.trim() ||
      !this.content.trim()
    ) {
      return;
    }

    // 用名稱跟內容產生一個留言的資料物件
    const message = new Message(this.name, this.content);

    // 將留言的資料物件放進容器裡
    this.messages.push(message);

    // 清空內容
    this.content = '';

  }

}
好的!相信大家都已經完成自己的留言板了!!如果有任何問題都可以在底下留言給我噢!!
在這個小練習裡我有使用一些簡單的小技巧,你發現了嗎?!

addMessage(): void {}
之前看其他人蠻多省略void
addMessage(){}
感覺看到void比較親切,可能c#用久的關係@@
this.messages.push(message);
之前看到有人寫
this.messages = [message, ...this.messages];
查了一下才明白,但push()也是比較親切,因為c#習慣list用add()
Hi jackuj,
this.messages = [message, ...this.messages];
上述這個用法滿特別的@@
也是隔壁棚的神奇寶貝大師之路
https://ithelp.ithome.com.tw/articles/10203203
AfterViewInit 與 AfterViewChecked
https://stackblitz.com/edit/ironman-2019-lifecycles-afterview?file=src%2Fapp%2Fapp.component.ts
神奇寶貝大師之路XDDD 您真幽默!
您好~为什么我按照您的代码一步步写到这里会报这样的问题
Hi anlovedota,
這個錯誤的意思是你的 messages 的資料型態有誤噢!
messages 的資料型態應該要是 [] 也就是 array 的資料型態才對。
Hi anlovedota,
這個錯誤的意思是你的 messages 的資料型態有誤噢!
messages 的資料型態應該要是 [] 也就是 array 的資料型態才對。
您檢查看一下您的 messages 宣告是不是只有 Message 少加了 [],應該要是 Message[] 才對噢~
 您好我是完全按照您的代码写的,但是您这里不是规定好messages的类型是Message吗?
雖然在最後回顧 app.component.ts 中有第二行import { Message } from './message';,但在 step by step 中沒有提到。
把這行加進去就好了
Hi anlovedota,
沒錯!但要注意一個地方是, messages 的類型是 Message[] 不是 Message 噢!
push 是 [] 型別的原生 function,所以如果宣告錯誤,自然就不會有該 function 可以使用囉!
Hi thwu,
非常感謝您幫忙回覆!^^
請問下方程式碼是要加在何處呢?在回顧中也沒看到喔。
constructor(name: string, content: string) {
  this.name = name;
  this.content = content;
  this.date = new Date();
}
另外,請問 Message 這個 class 是否可以用 interface 取代呢?這樣就不需要上面的 constructor 了。
Hi SuperMike,
請問下方程式碼是要加在何處呢?
程式碼是 Message 這個 Class 裡的唷!
請問 Message 這個 class 是否可以用 interface 取代呢?
當然可以阿,只不過 date 這個欄位的值就會需要在每次留言時指定一個日期給它囉!
Hi Leo大大
我按照以上步驟輸入程式碼
    <form>
  <p>
    名稱:
    <input
      type="text"
      name="name"
      [(ngModel)]= "name";
    >
  </p>
但是出現以下錯誤
AppComponent.html:4 ERROR DOMException: Failed to execute 'setAttribute' on 'Element': ';' is not a valid attribute name.
並且是在input 的地方出現紅色底線毛毛蟲符號,想請問這是甚麼原因呢?
謝謝大大~~
Hi linsslinss2004,
你的 [(ngModel)]="name" 後面多了個 ; 唷!
Sorry 哈哈哈寫java寫習慣了
![]()
Umm...
我在寫的時候遇到一個小問題
在 message.ts 中
export class Message {
  name = String;
  content = String;
  date = Date;
  constructor(name: String, content: String) {
    this.name = name;
    this.content = content;
    this.date = new Date();
  }
}
這樣的語法會報錯
ERROR in src/app/message.ts(8,5): error TS2739: Type 'String' is missing the following properties from type 'StringConstructor': prototype, fromCharCode, fromCodePoint, raw
    src/app/message.ts(9,5): error TS2322: Type 'String' is not assignable to type 'StringConstructor'.
    src/app/message.ts(10,5): error TS2739: Type 'Date' is missing the following properties from type 'DateConstructor': prototype, parse, UTC, now
Hi, stanma0716
你的程式碼有錯噢,請改成:
export class Message {
  name: String;
  content: String;
  date: Date;
  constructor(name: String, content: String) {
    this.name = name;
    this.content = content;
    this.date = new Date();
  }
}