「原來 Angular 的 Template 語法跟資料綁定有這麼多名堂阿?!」Wayne 揉揉他的太陽穴,貌似有點快消化不良的樣子。
「是阿!但這一切其實都是為了讓我們可以更方便地使用、更容易閱讀、維護與重用,可謂用心良苦阿!」我說完便遞給他兩顆口香糖,讓他提提神。
「那接下來呢?」Wayne 嚼了嚼口香糖後說道。
「接下來我們來聊聊之前用過的 pipe 跟 *ngFor 吧!其實...」
很多時候當我們前端拿到資料或是我們要將資料送給後端時,往往都跟我們畫面上所需要顯示的東西不一樣。拿時間來說,有時候我們從後端拿到的東西會是 Timestamp 的格式像是 1540102625599 ,但其實我們畫面上必須顯示的必須像是 2018/10/21 14:17:05 。這時候該怎麼辦?
謎之音:自己寫阿不然咧?!
好,所以我們自己寫出了類似這樣子的東西 (我隨便寫寫不要鞭我) :
var dateObj = new Date(1540102625599);
var years = dateObj.getFullYear();
var months = dateObj.getMonth() + 1;
var dates = dateObj.getDate();
var hours = dateObj.getHours();
var mins = dateObj.getMinutes();
var seconds = dateObj.getSeconds();

console.log(years + '/' + months + '/' + dates + ' ' + hours + ':' + mins + ':' + seconds);
寫過的舉手!!
如果使用 DatePipe 的話:
{{today | date:'yyyy/MM/dd HH:mm:ss'}}
一行結束!!輕鬆又愉快!!
當然,現在有很多套件其實也都可以很輕鬆地辦到,但其實 Angular 除了 DatePipe 之外,很貼心地提供了非常多類似的 Pipe 如:
如果上述這些都沒辦法滿足你的需求,沒關係!一樣自己做:
import { Pipe, PipeTransform } from '@angular/core';

/*
 * Raise the value exponentially
 * Takes an exponent argument that defaults to 1.
 * Usage:
 *   value | exponentialStrength:exponent
 * Example:
 *   {{ 2 | exponentialStrength:10 }}
 *   formats to: 1024
*/
@Pipe({name: 'exponentialStrength'})
export class ExponentialStrengthPipe implements PipeTransform {
  transform(value: number, exponent: string): number {
    let exp = parseFloat(exponent);
    return Math.pow(value, isNaN(exp) ? 1 : exp);
  }
}
上面是官網所提供的一個客製化計算次方數的 Pipe 的範例。範例中可以看到名為 @Pipe 的裝飾器,Metadata 裡的 name 指的是這個 Pipe 在使用時的名字 exponentialStrength,類別則要實作 PipeTransform 的 transform 函式,而傳入 transform 函式中的 value 是原本的值; exponent 則是要計算的次方數。
接著只要像這樣使用:
import { Component } from '@angular/core';

@Component({
  selector: 'app-power-boost-calculator',
  template: `
    <h2>Power Boost Calculator</h2>
    <div>Normal power: <input [(ngModel)]="power"></div>
    <div>Boost factor: <input [(ngModel)]="factor"></div>
    <p>
      Super Hero Power: {{power | exponentialStrength: factor}}
    </p>
  `
})
export class PowerBoostCalculatorComponent {
  power = 5;
  factor = 1;
}
就可以完成像是這樣的功能:

Directive 在 Angular 裡也是一個很重要的存在,嚴格說起來,Component 也是 Directive。只是 Component 是 Angular 比較獨特且核心的部分,所以它才用 @Component 的裝飾器,而不是用 @Directive 。
那至今我們用過的功能中,有什麼是 Directive 呢?答案是: *ngfor 。
Directive 其實分兩種:
結構型-結構型的 Directive 透過新增、刪除或是取代 DOM 中的元素來更改 Layout。像之前用的 *ngFor 就是結構型的 Directive,它會根據資料的數量新增 DOM 中的元素。值得一提的是,通常結構型的 Directive 會加上 * 的前綴。
屬性型-屬性型的 Directive 則是可以更改現有元素的外觀或行為。因其在 Template 中看起來就像是 HTML Tag 的屬性一樣,故以此命名。之前提到過的 [(ngModel)] 其實就是屬性型的 Directive。
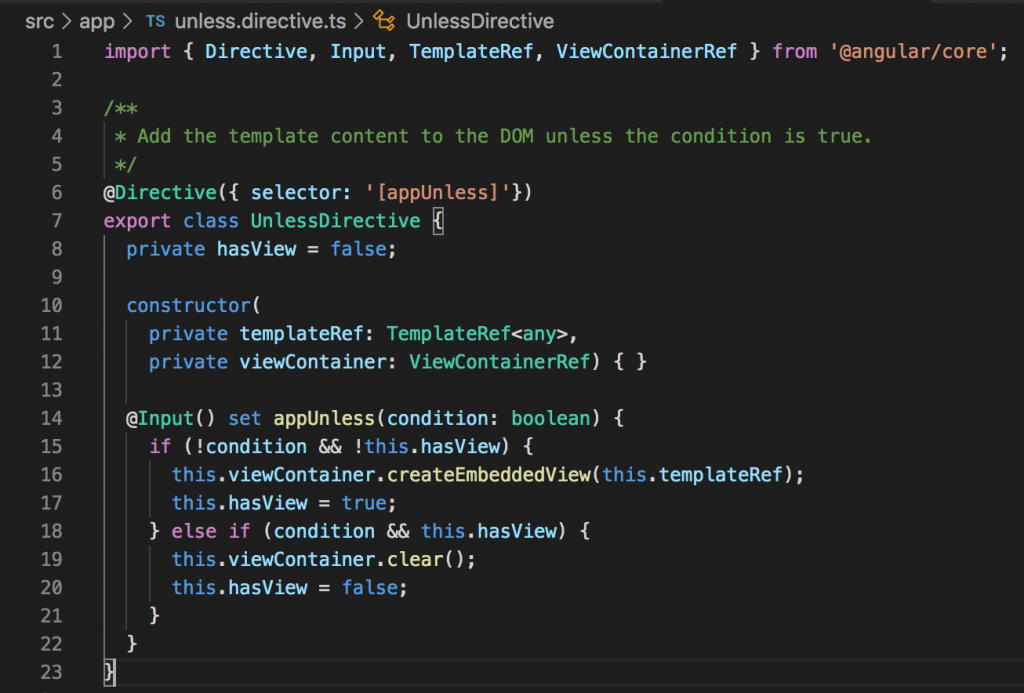
那結構型的 Directive 怎麼寫呢?我們一樣來參考官網的範例:
import { Directive, Input, TemplateRef, ViewContainerRef } from '@angular/core';

/**
 * Add the template content to the DOM unless the condition is true.
 */
@Directive({ selector: '[appUnless]'})
export class UnlessDirective {
  private hasView = false;

  constructor(
    private templateRef: TemplateRef<any>,
    private viewContainer: ViewContainerRef) { }

  @Input() set appUnless(condition: boolean) {
    if (!condition && !this.hasView) {
      this.viewContainer.createEmbeddedView(this.templateRef);
      this.hasView = true;
    } else if (condition && this.hasView) {
      this.viewContainer.clear();
      this.hasView = false;
    }
  }
}
@Directive 裝飾器裡的 Metadata 是在 Template 中使用時的名字,然後我們可以透過 constructor 函式的參數 templateRef 與 viewContainer 取得使用該 Directive 的 Template 與視圖容器;再根據傳入 appUnless 的 condition 來決定是要透過 viewContainer 將 templateRef 新增進畫面裡,還是要清空 viewContainer 裡的東西。
接著再到 Template 中使用:
<p *appUnless="condition" class="unless a">
  (A) This paragraph is displayed because the condition is false.
</p>

<p *appUnless="!condition" class="unless b">
  (B) Although the condition is true,
  this paragraph is displayed because appUnless is set to false.
</p>
就可以完成這樣子的效果:

結構型的 Directive 寫完了,我們來試著寫寫看屬性型的吧!繼續參考官網的範例:
import { Directive, ElementRef } from '@angular/core';

@Directive({
  selector: '[appHighlight]'
})
export class HighlightDirective {
    constructor(el: ElementRef) {
       el.nativeElement.style.backgroundColor = 'yellow';
    }
}
裝飾器的部份相信大家都知道所以就不再贅述了。透過 constructor 的參數 el 可以拿到當前使用這個 Directivce 的元素實體。然後只要在 Template 中加入這個 Directive 就可以將其背景變成黃色:
<p appHighlight>Highlight me!</p>
但是這樣好無聊,我們希望它可以更有趣一點!例如將滑鼠游標移入時,背景才變色;滑鼠游標移出之後則變回原來的顏色。既然如此,就需要來偵測滑鼠游標移入與移出的事件。該怎麼做呢?
首先我們可以將一個叫做 HostListener 的裝飾器 import 進來:
import { Directive, ElementRef, HostListener } from '@angular/core';
這樣就可以利用以下程式碼來達成偵測滑鼠游標移入移出的事件:
@HostListener('mouseenter') onMouseEnter() {
  this.highlight('yellow');
}

@HostListener('mouseleave') onMouseLeave() {
  this.highlight(null);
}

private highlight(color: string) {
  this.el.nativeElement.style.backgroundColor = color;
}
@HostListener 裝飾器讓我們的 onMouseEnter/onMouseLeave 函式在父層元素發生對應的事件時會被觸發,讓我們的 Directive 可以相應地切換背景顏色。

但目前 Hightlight 的顏色都是固定黃色,這樣也不太合理,應該要能在使用時指定 Hightlight 的顏色才對!怎麼做呢?我們再從 @angular/core 多 import 一個叫做 Input 的裝飾器進來:
import { Directive, ElementRef, HostListener, Input } from '@angular/core';
並且新增一個名為 highlightColor 的屬性,準備用來存取使用者傳進來的顏色字串:
@Input() highlightColor: string;
@Input() 裝飾器令我們的 highlightColor 可以用以下兩種方式接受父層傳進來的資料:
<p appHighlight highlightColor="yellow">Highlighted in yellow</p>
<p appHighlight [highlightColor]="'orange'">Highlighted in orange</p>
有注意到嗎?這兩個方式的差別在於屬性名稱有沒有用 [] 包住。如果該屬性的值是純字串,就不要用 [] 包住屬性名稱;如果該屬性的值是存放著值的某個變數,則記得要用 [] 包住參數名稱。
但目前 appHighlight 這個名稱只是純裝飾,每次使用時要加兩個屬性好不方便,我們來調整一下:
@Input('appHighlight') highlightColor: string;
將 appHighlight 這個名字當做參數傳入 @Input 裝飾器裡。意思是父層要傳資料進來時,就要使用 appHighlight 這個屬性名稱,但對於這個類別來說,這個變數的名稱其實還是 highlightColor :
<p [appHighlight]="color">Highlight me!</p>
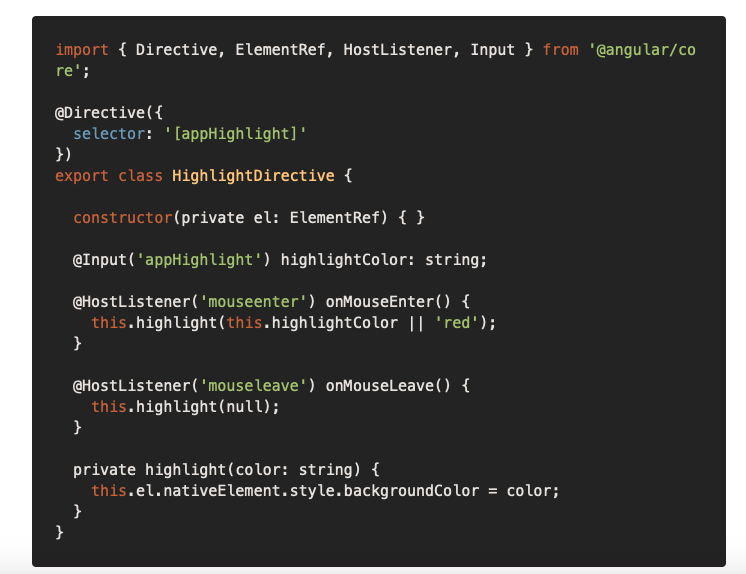
所以最終的程式碼大概會長這樣:
import { Directive, ElementRef, HostListener, Input } from '@angular/core';

@Directive({
  selector: '[appHighlight]'
})
export class HighlightDirective {

  constructor(private el: ElementRef) { }

  @Input('appHighlight') highlightColor: string;

  @HostListener('mouseenter') onMouseEnter() {
    this.highlight(this.highlightColor || 'red');
  }

  @HostListener('mouseleave') onMouseLeave() {
    this.highlight(null);
  }

  private highlight(color: string) {
    this.el.nativeElement.style.backgroundColor = color;
  }
}
mis10302 的提醒,修正所有的範例圖片都用到同一張的問題。
DatePipe 的功能讓我想到 moment.js,請問能否在 Angular CLI 中引入 moment.js 呢?
是否用 npm 安裝以後,在某處引入呢?
Hi SuperMike,
沒錯,就是這樣噢!

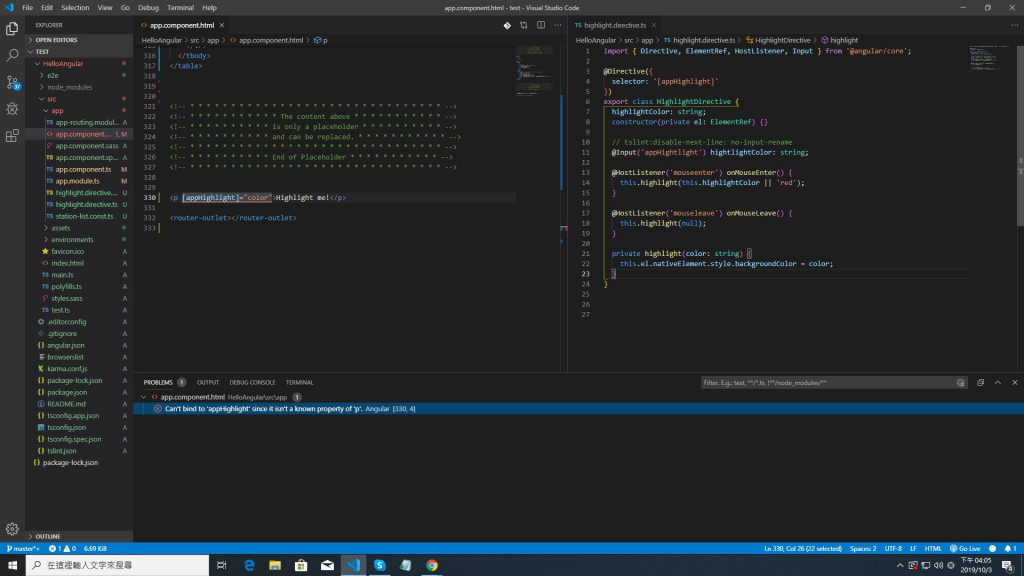
Hi!請問大大, 本人照著以上範例實作卻發生一個bug, 請問該怎麼解決呢
Hi lila1002,
請參考官網範例的原始碼,我想你是沒有將 UnlessDirective 引入到 AppModule 裡。
如:
import { NgModule }      from '@angular/core';
import { FormsModule }   from '@angular/forms';
import { BrowserModule } from '@angular/platform-browser';

import { AppComponent }         from './app.component';
import { heroSwitchComponents } from './hero-switch.components';

// 加入此行
import { UnlessDirective }    from './unless.directive';

@NgModule({
  imports: [ BrowserModule, FormsModule ],
  declarations: [
    AppComponent,
    heroSwitchComponents,

    // 加入此行
    UnlessDirective
  ],
  bootstrap: [ AppComponent ]
})
export class AppModule { }
Hi!大大,你好 謝謝你的回覆
不好意思, 我那個範例應該是HighlightDirective這個,而app.module也已經import進去了, 還是不曉得為什麼錯誤; 然後hightlight.directive.ts內第10行一定要加入// tslint:disable-next-line: no-input-rename, 不然11行就會噴錯, 請大大點解為什麼, 好苦惱呀!
是否是我少了這支: src/app/unless.directive.ts
https://ithelp.ithome.com.tw/upload/images/20191003/20121830Q6IGnFYQz0.png
Hi lila1002,
TSLint 那個就是設定而已,插入 // tslint:disable-next-line: no-input-rename 是針對當下的情況作單次規則調整,也可以直接到 tslint.json 直接改掉整份專案的規則。
至於其他的部份,由於你給的資訊不足,我不曉得你 HighlightDirective 裡寫了什麼,也不知道你的錯誤訊息是什麼,所以無從得知原因噢!@@
Leo 大大你好:
我在練習“結構型的 Directive ”時出現這個問題
Identifier 'condition' is not defined. The component declaration, template variable declarations, and element references do not contain such a member
我有將 UnlessDirective 引入到 AppModule 裡
顯示出來是這樣,想請問我有哪個地方出錯嗎?
謝謝你:)

app.component.html
unless.directive.ts (我是直接新增一個檔案沒有用ng generate directive unless )
Hi smile98,
看那個錯誤訊息的說明,貌似是你的 app.component.html 沒有 condition 這個變數,你再檢查看看! :)
Hi,
請問這個不算是變數嗎? :)
*appUnless="condition"
我最後是在app.component.ts
加了這行:)錯誤訊息就解決了
condition: boolean;
Hi smile98,
噢,我打錯字了XD
我原本就是在說你 app.component.ts 沒有宣告 condition 這個變數,很高興你自己找到解決方法。 :)
謝謝你:)
請問是不是把HighlightDirective這個獨立成單支的XXX.ts
然後再在app.component.ts引入XXX.ts,這裡引入後還需要再export AppComponent中加入嗎?)
而html的部分直接寫在app.component.html?
Hi thuartlynn,
請問是不是把HighlightDirective這個獨立成單支的XXX.ts
是,我自己甚至會讓它是獨立一個 Module ,會比較好被引用。
然後再在app.component.ts引入XXX.ts,這裡引入後還需要再export AppComponent中加入嗎?)
是在 xxx.module.ts 裡引用唷,只要有在 Module 裡引用,該 Module 的 Component 就會認得它
而html的部分直接寫在app.component.html?
是