這篇我們要先來講一下ConstraintLayout。因為接下來的ConstraintSet animation、Motion layout都跟ConstraintLayout有關係。
ConstraintLayout 是Android Studio2.2以後新增的編輯版面方式,
在還沒有ConstraintLayout,以往我們都使用LinearLayout來編排較多,但LinearLayout可能會造成階層太多,效能較差。使用ConstraintLayout能用較扁平化的編排方式。
而在編排方式,以往我們在開發時,界面通常是在XML上編寫,雖然Android studio也可用視覺的拉UI方式,但總是沒那麼方便。 但使用ConstraintLayout,反而是用視覺的拉UI方式比較容易。
使用方式
在build.gradle 加上以下
dependencies {
    compile 'com.android.support.constraint:constraint-layout:1.0.2'
}
概念
ConstraintLayout:根據布局中的其他元件或View,確定View在螢幕中的位置。 受到三類約束:父元件, 其他元件, Guideline
屬性視窗介紹

Parent position,父元件約束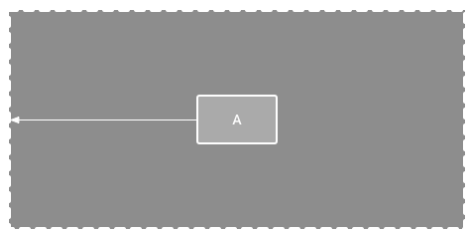
範例:使用Constraint達到TextView置中於父元件
步驟:
新增一個TextView,
在4個邊加上Wrap Content的Constraint
設定Bias為50,50,(預設為50),表示置中
Order position,與其他View約束
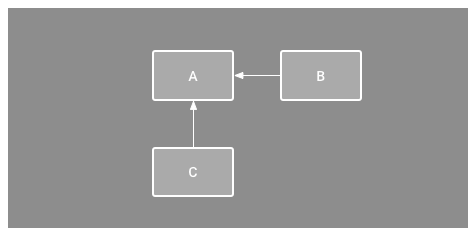
Alignment,對齊
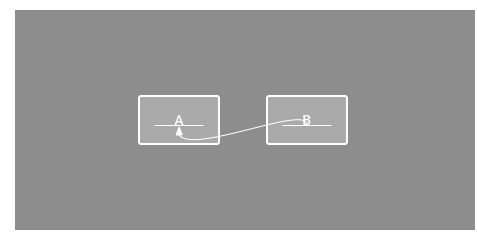
Baseline alignment
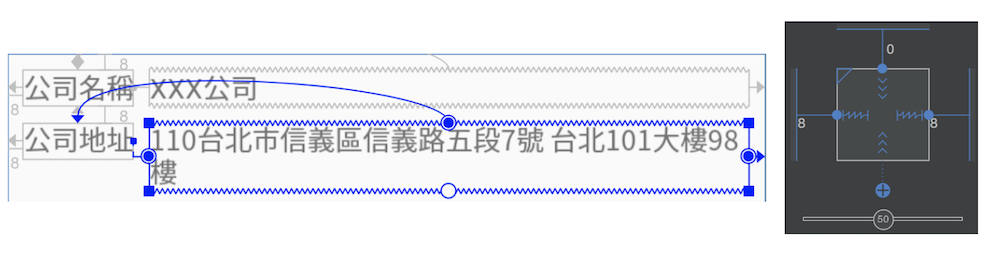
範例:使用Constraint Layout做出如下的UI
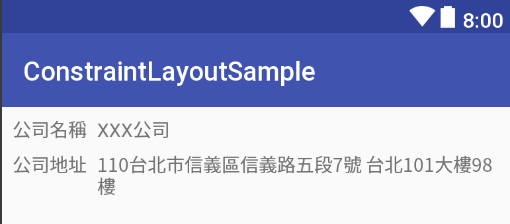
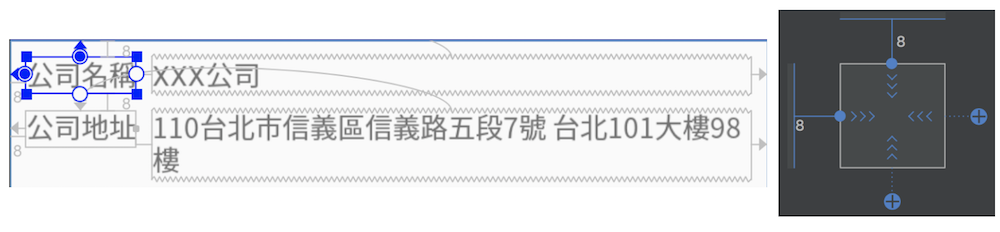
左邊=父元件的左邊margin=8
上方=父元件的上方margin=8
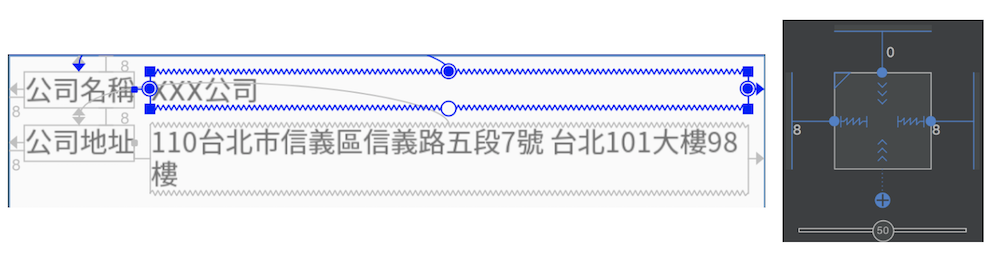
Top=公司名稱Top
左邊=公司名稱的右邊
寬度=match_constraint(0dp)
高度=wrap_content
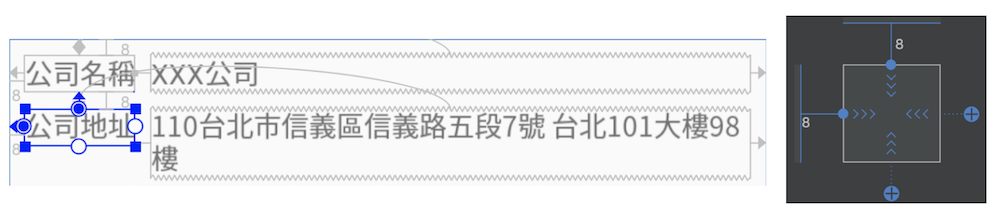
左邊=父元件的左邊margin=8
上方=公司名稱的下方margin=8
寬度=wrap_content
高度=wrap_content
左邊=公司地址的右邊margin=8
上方=公司地址的上方
寬度=match_constraint(0dp)
高度=wrap_content
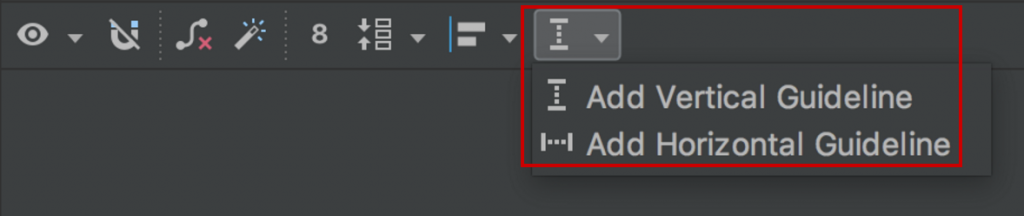
除了對齊父元件、其他View,還可以對齊guideline,guideline在執行是不會被看到的。
新增guideline,如下圖,選擇新增垂直或水平guideline
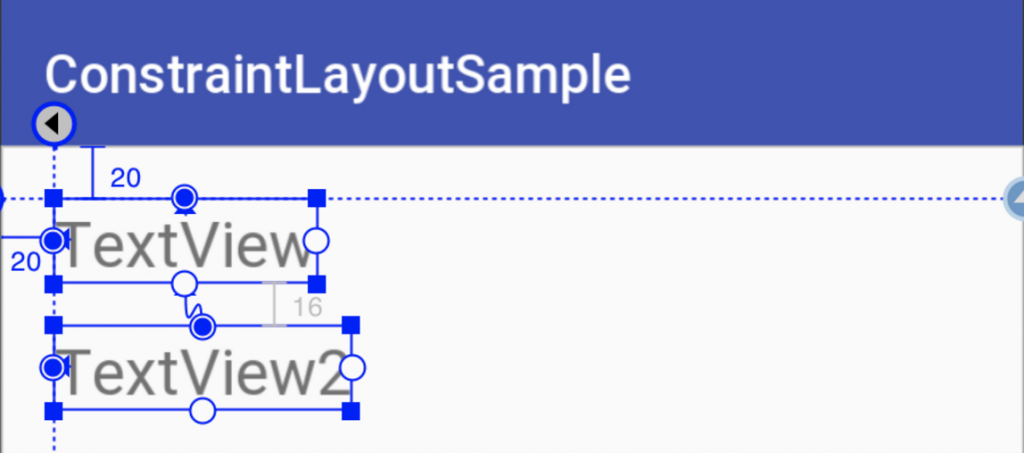
下圖新增了一條距離邊界20margin的垂直與水平guideline。
Textview元件就可對齊這個guideline, 使用guideline的好處是,將來要對多個Textview改左邊的margin時,只要修改guideline就可以了。
<android.support.constraint.ConstraintLayout xmlns:android="http://schemas.android.com/apk/res/android"
    xmlns:app="http://schemas.android.com/apk/res-auto"
    xmlns:tools="http://schemas.android.com/tools"
    android:layout_width="match_parent"
    android:layout_height="match_parent"
  tools:context="evan.chen.tutorial.constraintlayoutsample.GuidelineConstraintActivity">

    <android.support.constraint.Guideline
        android:id="@+id/guideline"
        android:layout_width="wrap_content"
        android:layout_height="wrap_content"
        android:orientation="vertical"
        app:layout_constraintGuide_begin="20dp" />

    <android.support.constraint.Guideline
        android:id="@+id/guideline2"
        android:layout_width="wrap_content"
        android:layout_height="wrap_content"
        android:orientation="horizontal"
        app:layout_constraintGuide_begin="20dp" />

    <TextView
        android:id="@+id/textView6"
        android:layout_width="wrap_content"
        android:layout_height="wrap_content"
        android:layout_marginTop="16dp"
        android:text="TextView2"
        android:textSize="24sp"
        app:layout_constraintStart_toStartOf="@+id/guideline"
        app:layout_constraintTop_toBottomOf="@+id/textView7" />

    <TextView
        android:id="@+id/textView7"
        android:layout_width="wrap_content"
        android:layout_height="wrap_content"
        android:text="TextView"
        android:textSize="24sp"
        app:layout_constraintStart_toStartOf="@+id/guideline"
        app:layout_constraintTop_toTopOf="@+id/guideline2" />
</android.support.constraint.ConstraintLayout>
Constraint使用bias來調整權重,透過屬性視窗下方與左方可調整bias偏移,預設為50。

<Button
        android:id="@+id/button4"
        android:layout_width="wrap_content"
        android:layout_height="wrap_content"
        android:text="Button"
        app:layout_constraintBottom_toBottomOf="parent"
        app:layout_constraintEnd_toEndOf="parent"
        app:layout_constraintHorizontal_bias="0.69"
        app:layout_constraintStart_toStartOf="parent"
        app:layout_constraintTop_toTopOf="parent"
        app:layout_constraintVertical_bias="0.35" />
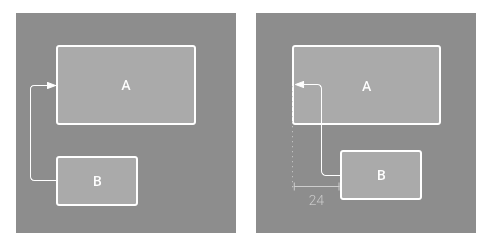
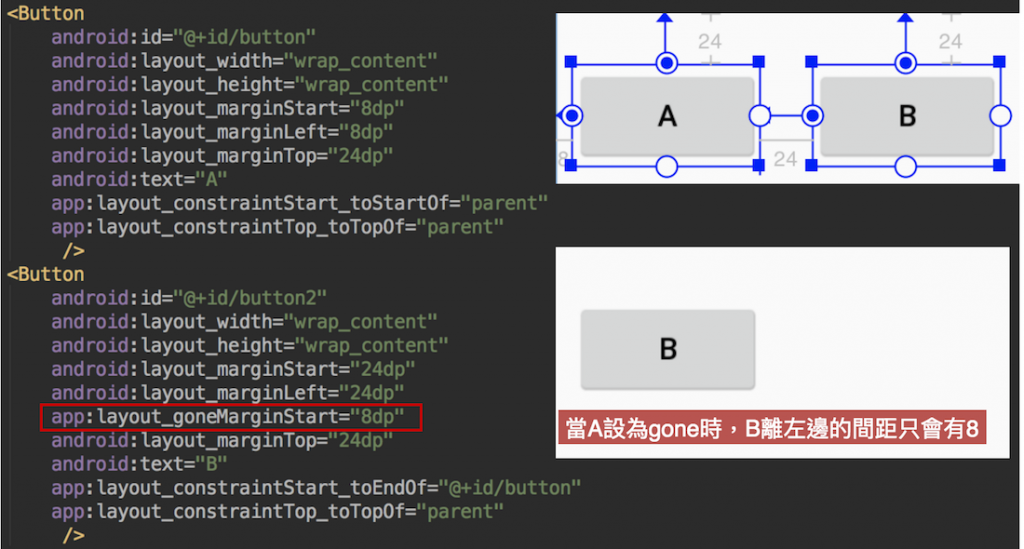
當約束的target元件View.GONE時,可用layout_goneMarginStart屬性指定不同的間距。
<Button
    android:id="@+id/button"
    android:layout_width="wrap_content"
    android:layout_height="wrap_content"
    android:layout_marginStart="8dp"
    android:layout_marginTop="24dp"
    android:text="A"
    android:visibility="gone"
    app:layout_constraintStart_toStartOf="parent"
    app:layout_constraintTop_toTopOf="parent" />
<Button
    android:id="@+id/button2"
    android:layout_width="wrap_content"
    android:layout_height="wrap_content"
    android:layout_marginStart="24dp"
    android:layout_marginLeft="24dp"
    app:layout_goneMarginStart="8dp"
    android:layout_marginTop="24dp"
    android:text="B"
    app:layout_constraintStart_toEndOf="@+id/button"
    app:layout_constraintTop_toTopOf="parent"
/>
Chains 提供一個類似群組的概念Chains 鏈結佈局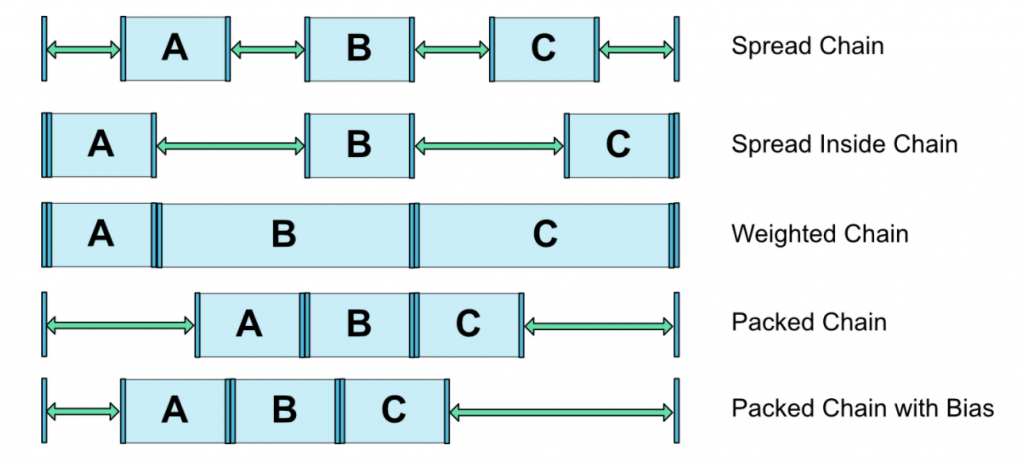
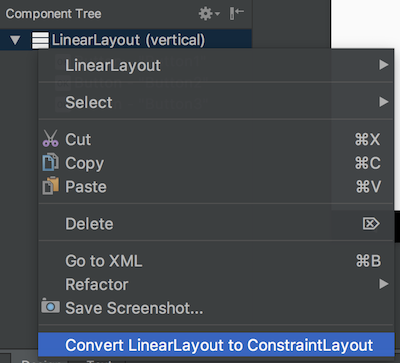
使用方式:

在Component Tree,在Layout上按右鍵,即可轉換為ConstraintLayout
參考:
https://developer.android.com/reference/android/support/constraint/ConstraintLayout.html
給Android 初學者 的快速成長 線上課程
1️⃣ UI 進階實戰 — Material Design Component 讓你簡單做出效果超好的UI
2️⃣ 動畫入門到進階 — 用動畫提升使用者體驗
3️⃣ 架構設計 — MVP、MVVM 讓你程式碼好維護
1️⃣ + 2️⃣ + 3️⃣ 3堂組合包更划算 — Android 架構設計 + 動畫入門到進階 + UI 進階實戰
出版書:
Android TDD 測試驅動開發:從 UnitTest、TDD 到 DevOps 實踐


 iThome鐵人賽