上一篇介紹如何設定並套用lektor-theme-nix主題,現在讓我們來看一下lektor-theme-nix如何建立主題的。首先看一下他的架構:
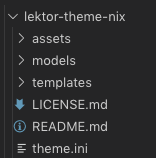
除了前面提到的lektor部分架構:assets, models, templates外,這個主題資料夾中還有一個theme.ini檔案。
首先看到assets資料夾,裡面只放了css檔案,這個檔案裡面設定此主題套用的樣式。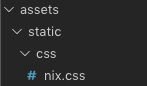
再來看檔案第二多的資料夾models,裡面共有5個檔案。其中blog-post.ini, blog.ini及page.ini在前面利用quickstart自動產生的專案中就有提到,檔案內容也跟之前的專案內完全一樣。
但如果在這邊有調整的話,套用主題就會使用這邊的model,就不是原本專案的model囉。

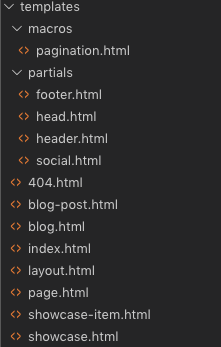
templates資料夾中包含macros及partials資料夾,以及許多html檔案。其中partial資料夾是第一次看到,資料夾中包含footer, head, header, social這5個檔案,讓我們看一下這些檔案之間的關聯吧!
在Django、Flask及Lektor等應用中,常常會將命名layout的檔案作為網頁主模板,在看partial裡面的檔案前,先看一下layout裡面寫了什麼。
<!DOCTYPE html>
<html>
  <head>
    <title> {{ this.title }} · {{ config.PROJECT.name }} </title>
    {% include "partials/head.html" %}
  </head>

  <body>
    {% include "partials/header.html" %}
    <div class="container wrapper">
    {% block content %}
    {% endblock%}
    </div>
    <div class="push"></div>
    {% include "partials/footer.html" %}
  </body>
</html>
可以看到layout共引用了3個檔案,包含下面會提到的footer, head, header,以下將一一介紹。
footer在layout中被引用在body的最下方,因此正常情況中也會顯示在網頁的最下層。以下為footer.html檔案中的程式碼:
<footer class="footer text-center">
  <p>Copyright © 2019 {{ config.THEME_SETTINGS.name }} -
    <span class="credit">
      Powered by
      <a target="_blank" href="https://www.getlektor.com">Lektor</a>
      and
      <a target="_blank" href="https://github.com/rlaverde/lektor-theme-nix/">Nix</a> theme.
    </span>
  </p>
</footer>
這邊用到了config.THEME_SETTINGS.name的項目,將對應前面提到的.lektorproject檔案中。如果有在檔案中設定[theme_settings]中的name,那生成網站時就會將這個資訊顯示在網頁中。以下是我在.lektorproject中的設定:
[project]
name = LektorTest_Theme
themes = lektor-theme-nix
[theme_settings]
githubID = HanInfinity
name = 塔塔默
headerusername = Tatamo
headerhostname = Tatamo_host
about = Tatamo
comments = no
gitlabId = tatamo
profilepicture = img/profile.png

[packages]
lektor-disqus-comments = 0.4.1
我在檔案中有設定[theme_settings]中的name = 塔塔默,所以當我套用這個主題時,footer會讀到我設定的值,並顯示在網頁中,變成『Copyright © 2019 塔塔默 -Powered by Lektor and Nix theme.』。

head.html程式碼比較多,都是在網頁的head標籤中引用網站需要的項目,如css, jQuery或是Bootstrap等。比較不一樣的是,這個主題很貼心的幫你設想到,如果你有引用Google Analytics的話,只要在.lektorproject檔案中,設定[theme_settings]裡googleanalytics的id,這個主題就會自動匯入。擷取head中有關Google Analytics的程式碼如下:
<!-- Google Analytics -->
{% if config.THEME_SETTINGS.googleanalytics %}
<script>
  (function(i,s,o,g,r,a,m){i['GoogleAnalyticsObject']=r;i[r]=i[r]||function(){
      (i[r].q=i[r].q||[]).push(arguments)},i[r].l=1*new Date();a=s.createElement(o),
      m=s.getElementsByTagName(o)[0];a.async=1;a.src=g;m.parentNode.insertBefore(a,m)
          })(window,document,'script','https://www.google-analytics.com/analytics.js','ga');

ga('create', '{{ config.THEME_SETTINGS.googleanalytics }}', 'auto');
    ga('send', 'pageview');

</script>
{% endif %}
可以看到他使用{% if %}{% endif %}設一個判斷式,假設你在.lektorproject檔案中有設定[theme_settings]裡googleanalytics的id,程式就會在網頁原始碼中加上這一段,並帶入你設定的googleanalytics id。
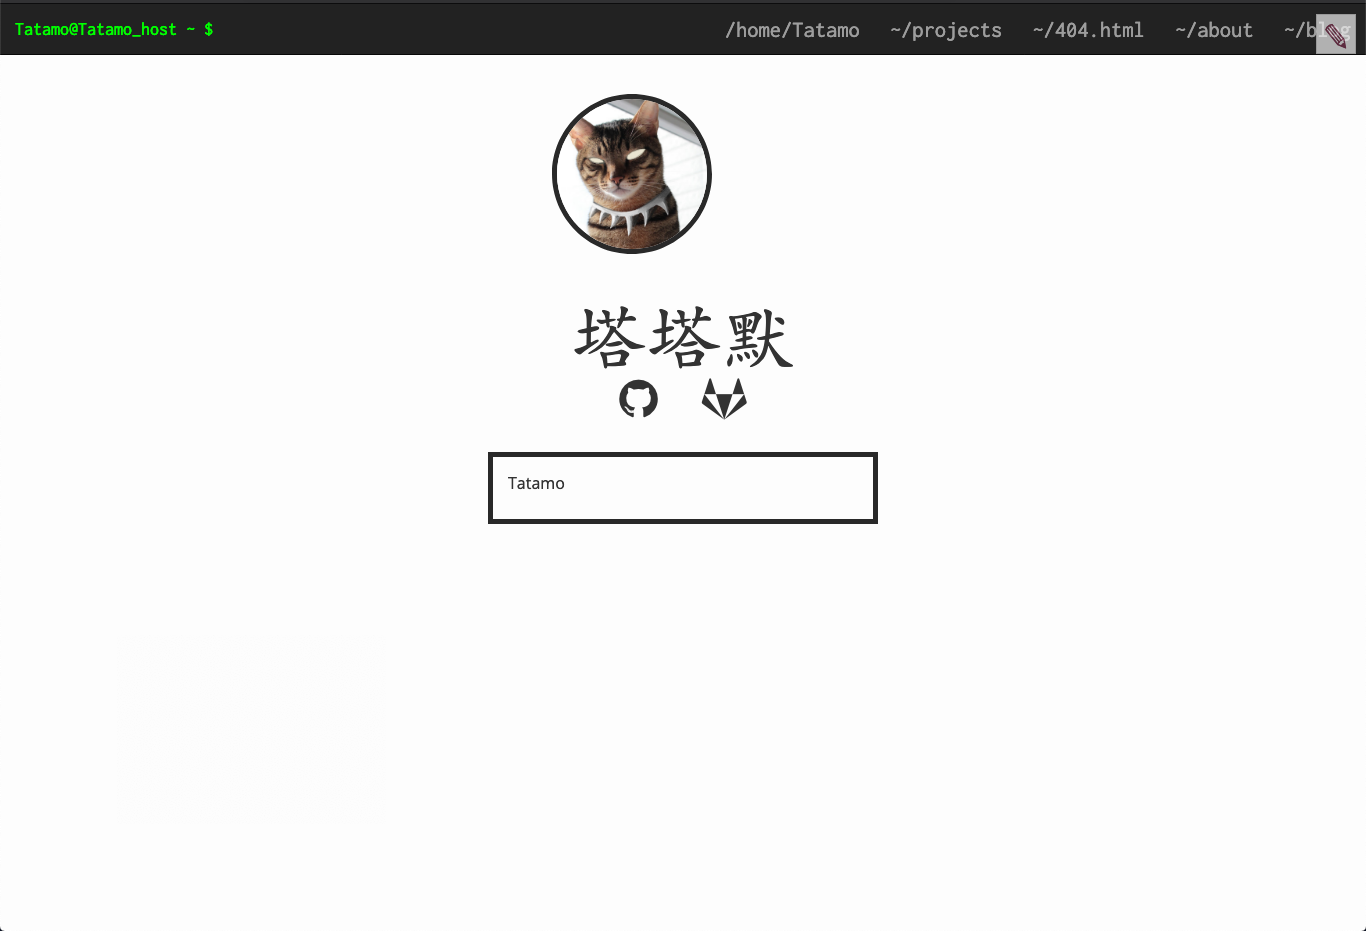
header.html裡放的為nav bar的排版,先看一下生成後的樣子,

再來看網頁原始碼:
<header>
<nav class="navbar navbar-default navbar-fixed-top navbar-inverse font-header">
  <div class="container-fluid">
    <div class="navbar-header">
      <button type="button" class="navbar-toggle collapsed" data-toggle="collapse" data-target="#navbar-collapse-1" aria-expanded="false">
        <span class="sr-only">Toggle navigation</span>
        <span class="icon-bar"></span>
        <span class="icon-bar"></span>
        <span class="icon-bar"></span>
      </button>
      <!-- 左邊綠色Tatamo@Tatamo_host ~ $ -->
      <a class="navbar-brand" id="green-terminal" href={{ '/'|url }}>{{config.THEME_SETTINGS.headerusername}}@{{config.THEME_SETTINGS.headerhostname}} ~ $</a>
    </div>

    <!-- Collect the nav links, forms, and other content for toggling -->
    <div class="collapse navbar-collapse" id="navbar-collapse-1">
      <ul class="nav navbar-nav navbar-right">
        <li>
          <a href={{ '/'|url }}>/home/{{config.THEME_SETTINGS.headerusername}}</a>
        </li>
        {% for page in site.query('/') %}
        {% if page.path != '/404' %}
        <li >
          <a href="{{page.url_path | url }}">~{{ page.path }}</a>
        </li>
        {% endif %}
        {% endfor %}

      </ul>
    </div><!-- /.navbar-collapse -->
  </div><!-- /.container-fluid -->
</nav>
</header>
這邊也是用了許多Jinja2的功能,讓Lektor幫你把繁重的工作簡單化。像是{% for page in site.query('/') %}{% endfor%}這個區段,讓lektor直接在專案資料夾中搜尋所有目錄,並利用
<a href="{{page.url_path | url }}">~{{ page.path }}</a>
建立nav bar的項目,這樣一來,只要有新增主項目資料夾,這邊就會直接把你抓到所有連結,不用怕忘記加而出現隱藏頁面。
這裡我發現一個bug,就是設定完主題後,nav bar會出現
~/404.html的項目。因為README中提要到建立404網頁,需要命名資料夾為404.html而非404,實測也是404.htmllektor才會理你。所以上面的判別式應該是{% if page.path != '/404.html' %}就順便給作者發了PR,希望能幫忙修正這個問題。
partial資料夾中最後一個檔案。先看程式碼:
{% if config.THEME_SETTINGS.slackURL %}
  <a href="{{ config.THEME_SETTINGS.slackURL }}" title="Slack"><i class="fa fa-slack fa-3x" aria-hidden="true"></i></a>
{% endif %}
{% if config.THEME_SETTINGS.twitterID %}
  <a href="https://twitter.com/{{ config.THEME_SETTINGS.twitterID }}" title="Twitter"><i class="fa fa-twitter fa-3x" aria-hidden="true"></i></a>
{% endif %}
{% if config.THEME_SETTINGS.googleplusID %}
  <a href="https://plus.google.com/{{ config.THEME_SETTINGS.googleplusID }}/about" title="Google+"><i class="fa fa-google-plus fa-3x" aria-hidden="true"></i></a>
{% endif %}
{% if config.THEME_SETTINGS.facebookID %}
  <a href="https://facebook.com/{{ config.THEME_SETTINGS.facebookID }}" title="Facebook"><i class="fa fa-facebook fa-3x" aria-hidden="true"></i></a>
{% endif %}
{% if config.THEME_SETTINGS.githubID %}
  <a href="https://github.com/{{ config.THEME_SETTINGS.githubID }}" title="GitHub"><i class="fa fa-github fa-3x" aria-hidden="true"></i></a>
{% endif %}
{% if config.THEME_SETTINGS.gitlabId %}
  <a href="https://gitlab.com/{{ config.THEME_SETTINGS.gitlabId }}" title="GitLab"><i class="fa fa-gitlab fa-3x" aria-hidden="true"></i></a>
{% endif %}
{% if config.THEME_SETTINGS.codepenID %}
  <a href="https://codepen.io/{{ config.THEME_SETTINGS.codepenID }}" title="Codepen"><i class="fa fa-codepen fa-3x" aria-hidden="true"></i></a>
{% endif %}
{% if config.THEME_SETTINGS.linkedInID %}
  <a href="https://linkedin.com/in/{{ config.THEME_SETTINGS.linkedInID }}" title="LinkedIn"><i class="fa fa-linkedin fa-3x" aria-hidden="true"></i></a>
{% endif %}
{% if config.THEME_SETTINGS.instagramID %}
  <a href="https://instagram.com/{{ config.THEME_SETTINGS.instagramID }}" title="Instagram"><i class="fa fa-instagram fa-3x" aria-hidden="true"></i></a>
{% endif %}
{% if config.THEME_SETTINGS.telegramID %}
  <a href="https://t.me/{{ config.THEME_SETTINGS.telegramID }}" title="Telegram"><i class="fa fa-telegram fa-3x" aria-hidden="true"></i></a>
{% endif %}
{% if config.THEME_SETTINGS.email %}
  <a href="mailto:{{ config.THEME_SETTINGS.email }}" title="Email"><i class="fa fa-envelope fa-3x" aria-hidden="true"></i></a>
{% endif %}
以上每一個連結都有建立一個判定式,當你在.lektorproject檔案中有設定社群相關參數的時候,才會在網頁中顯示。像我在前面有提到我的設定內容,裡面包含githubID及gitlabId,所以lektor找到這2個資訊,就只會將Github與Gitlab顯示出來。如果你有更多資訊,只要在.lektorproject更新設定,系統就會幫你新增,是不是很方便呢!!
寫到這邊,其實今天的篇幅已經過長了。但在這個主題中還有一些東西出現在檔案,但是沒有顯示到網頁中,就是showcase.html及showcase-item.html。下一篇將試著讓這2個功能可以放到網頁中,另外還有theme.ini,也會在下一篇一同介紹。
CSScoke - 金魚都能懂的這個網頁畫面怎麼切 - 金魚都能懂了你還怕學不會嗎
King Tzeng - IoT沒那麼難!新手用JavaScript入門做自己的玩具~
Hina Hina - 陣列大亂鬥
阿斬 - Python 程式交易 30 天新手入門
Clarence - LINE bot 好好玩 30 天玩轉 LINE API
塔塔默 - 用Python開發的網頁不能放到Github上?Lektor說可以!!
Vita Ora - 好 Js 不學嗎 !? JavaScript 入門中的入門。


 iThome鐵人賽