還在補,請後天回來看
[Day9] 開工嘍,開始建立結構
常用指令:

    cd ios && pod install && cd ..
        ///安裝 pod 0.60以後不需要 使用 link or rnpm
    react-native run-ios
    or
    react-native run-ios --simulator "iPhone 11"
    or
    react-native run-ios --device "DAYuan_iPad"
    or
    open -a Simulator
        ///啟動 APP 到指定裝置

    open ios/*.xcworkspace
    or
    open ios/*.xcodeproj
          ///啟動 xcode 專案
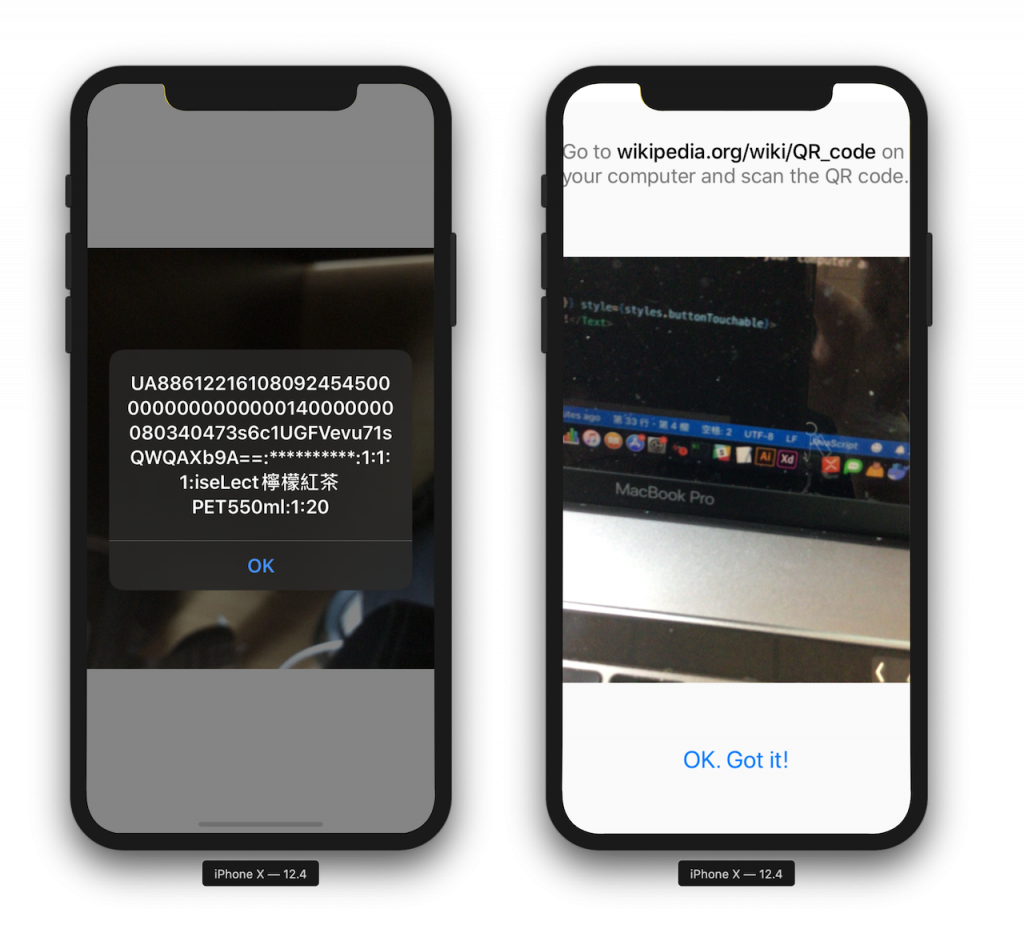
如何建立簡單的 QR_code 掃描器
import React, { Component } from 'react';
import {
  StyleSheet,
  View,
  Text,
  TouchableOpacity,
  Alert,
} from 'react-native';
import QRCodeScanner from 'react-native-qrcode-scanner';
let data = null;
const data_Context = React.createContext(data);
export { data_Context }
export default class Scanner extends Component {
  constructor(props) {
    super(props);
    this.state = {
      userToken: "A",
      camera: false,
      A: false,
      camera_state: true,
      myName: null
    };
  }
  componentDidMount() {
    ///生命週期 component 載入前執行
  }
  componentWillReceiveProps(nextProps) {
    this.setState({
      camera: nextProps.camera,
    });
  }
  onSuccess = async (e) => {
    data = e.data;
    Alert.alert(data);
  }
  render() {
    return (
      <View style={styles.container}>
        <QRCodeScanner
          onRead={this.onSuccess}
          topContent={null}
          reactivate={this.state.camera_state}
          //reactivate={false}
          /////////切換頁面時要關閉/開啟
          reactivateTimeout={1500}
          bottomContent={
            <TouchableOpacity style={styles.buttonTouchable} onPress={() => {
              this.setState({ camera_state: !this.state.camera_state })
              this.testForceFun.bind(this)
            }} >
              <Text style={styles.buttonText}>{this.state.camera_state}</Text>
            </TouchableOpacity>
          }
        />
      </View>
    );
  }
}
const styles = StyleSheet.create({
  container: {
    flex: 1,
    justifyContent: 'center',
    alignItems: 'center',
    backgroundColor: 'white',
  }, centerText: {
    flex: 1,
    fontSize: 18,
    padding: 32,
    color: '#777',
  },
  textBold: {
    fontWeight: '500',
    color: '#000',
  },
  buttonText: {
    fontSize: 21,
    color: 'rgb(0,122,255)',
  },
  buttonTouchable: {
    padding: 16,
  },
});
讓我們來安裝所需套件
安裝步驟

建立 APP :
    react-native init <APP名稱>
    exp :react-native init QR_scanner
(假設你已經有照前幾天的做完 就可以跳過 )


npm install react-native-camera --save
npm install react-native-qrcode-scanner --save

 npm install --save react-native-permissions @react-native-community/async-storage
npm install react-navigation
 npm install react-native-reanimated react-native-gesture-handler
npm install  react-navigation-stack
npm install react-navigation-tabs
npm install --save react-native-vector-icons

cd ios && pod install && cd ..
        ///安裝 pod 0.60以後不需要 使用 link or rnpm
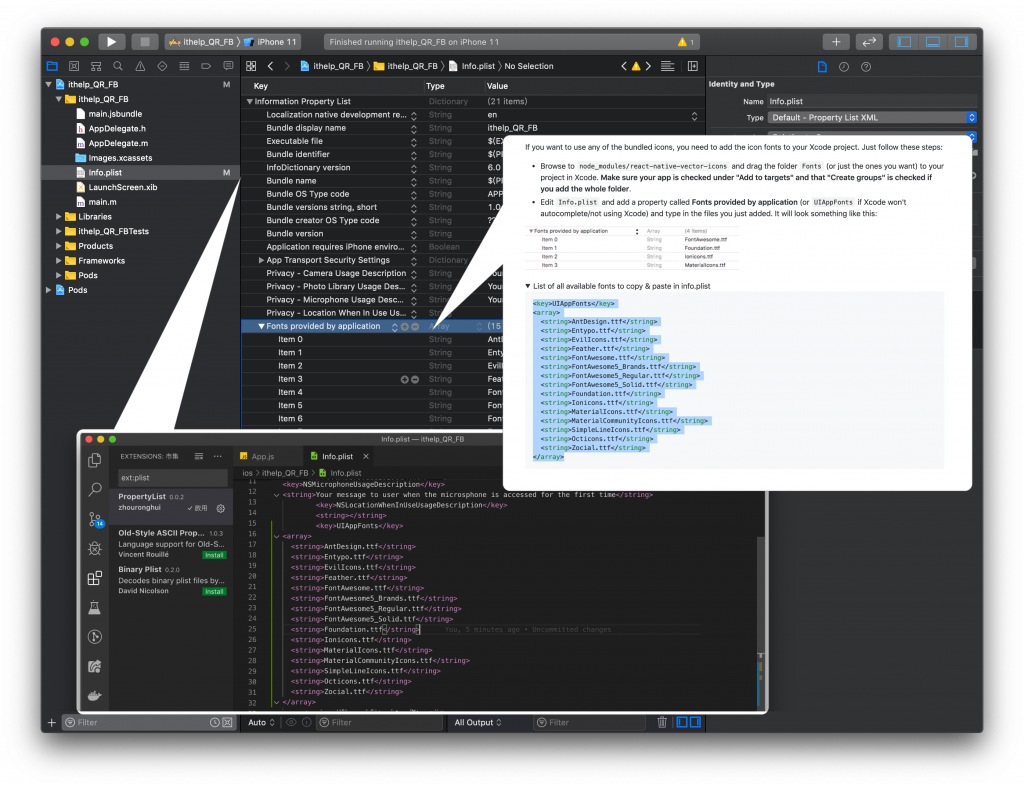
關於 app 如何加入權限 & react-native-vector-icons 用到的字體
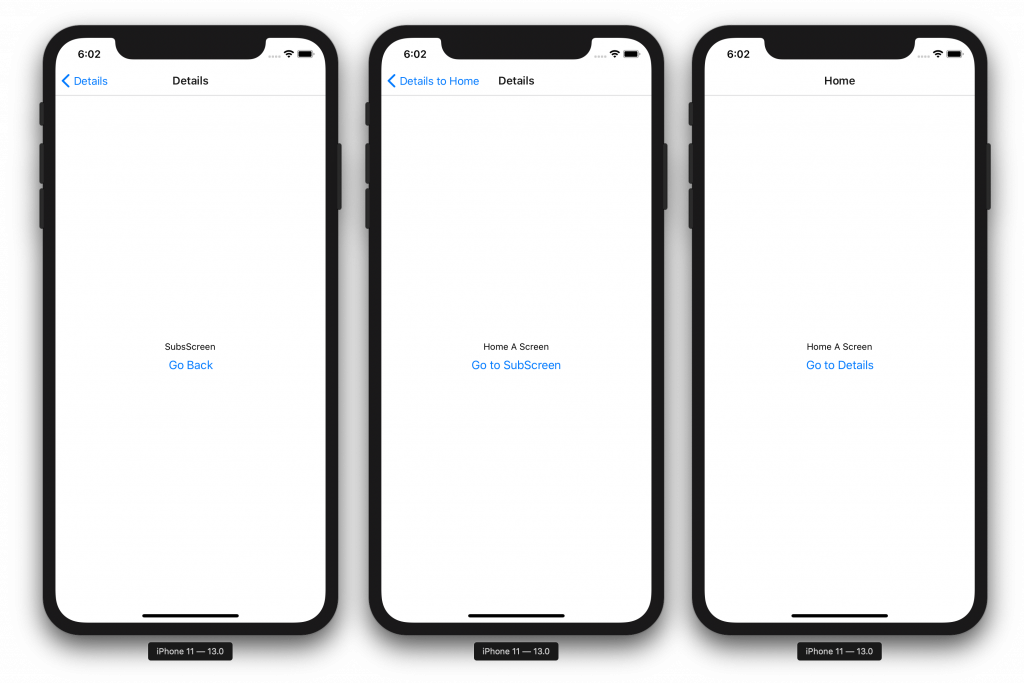
加入 StackNavigator 堆棧(就是先進後出的順序)導航器
code
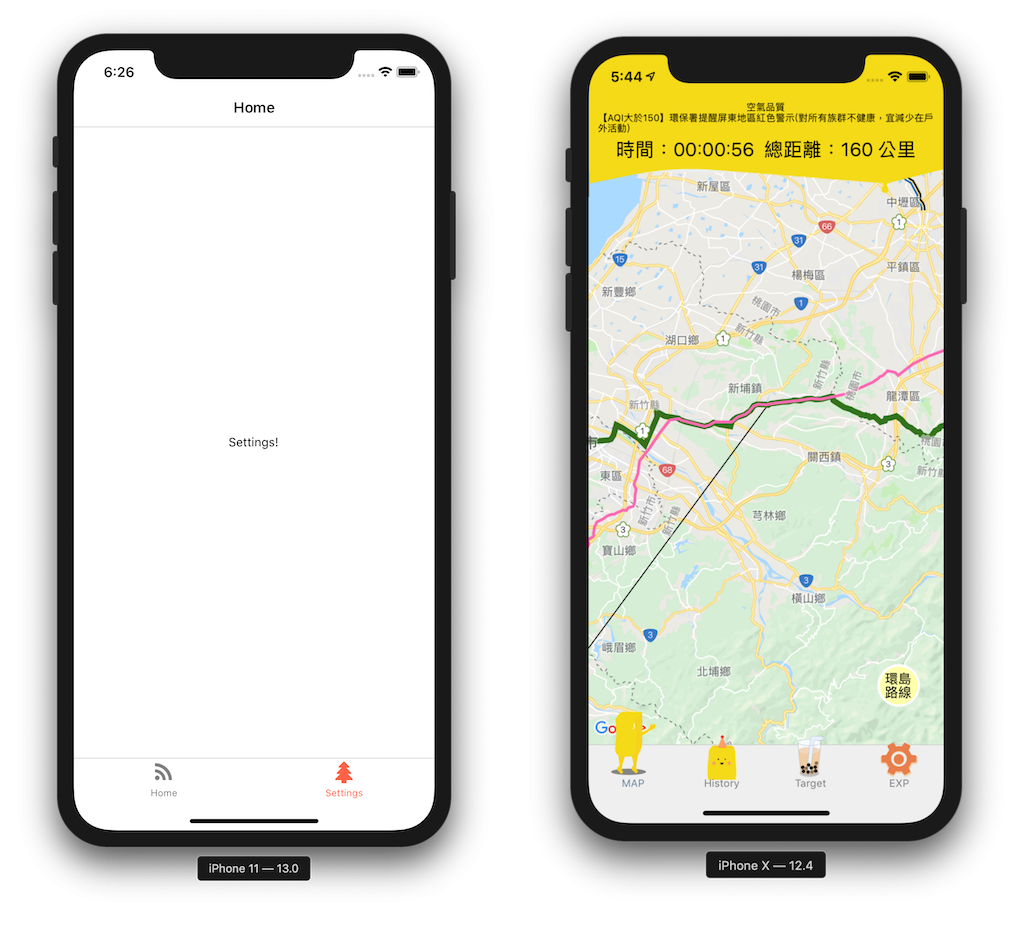
加入 TabNavigator 底部標籤路由(導航器) 的code
/* eslint-disable prettier/prettier */
import React, { Component } from 'react';
import {
  StyleSheet,
  Text,
  View,
  TouchableOpacity,
  Linking,
  SafeAreaView,
  Alert,
  Button,
} from 'react-native';
import Icon from 'react-native-vector-icons/FontAwesome';
import { createAppContainer } from 'react-navigation';
import { createBottomTabNavigator } from 'react-navigation-tabs';
class HomeScreen extends React.Component {
  render() {
    return (
      <View style={{ flex: 1, justifyContent: 'center', alignItems: 'center' }}>
        <Text>Home!</Text>
      </View>
    );
  }
}
class SettingsScreen extends React.Component {
  render() {
    return (
      <View style={{ flex: 1, justifyContent: 'center', alignItems: 'center' }}>
        <Text>Settings!</Text>
      </View>
    );
  }
}
const TabNavigator = createBottomTabNavigator(
  {
    Home: HomeScreen,
    Settings: SettingsScreen,
  },
  {
    defaultNavigationOptions: ({ navigation }) => ({
      tabBarIcon: ({ focused, horizontal, tintColor }) => {
        const { routeName } = navigation.state;
        let iconName;
        //有時我們想在某些Tab上添加icons。
        if (routeName === 'Home') {
          // iconName = `ios-information-circle${focused ? '' : '-outline'}`;
          iconName = `feed`;
        } else if (routeName === 'Settings') {
          // iconName = `ios-options`;
          iconName = `tree`
        }
        //您可以在此處使用任何您喜歡的組件!
        ///可以參考附圖&code
        return <Icon name={iconName} size={25} color={tintColor} />;
      },
    }),
    tabBarOptions: {
      activeTintColor: 'tomato',
      inactiveTintColor: 'gray',
    },
  }
);
export default createAppContainer(TabNavigator);////導出 TabNavigator 這個物件
下圖說明如何使用自定義組件
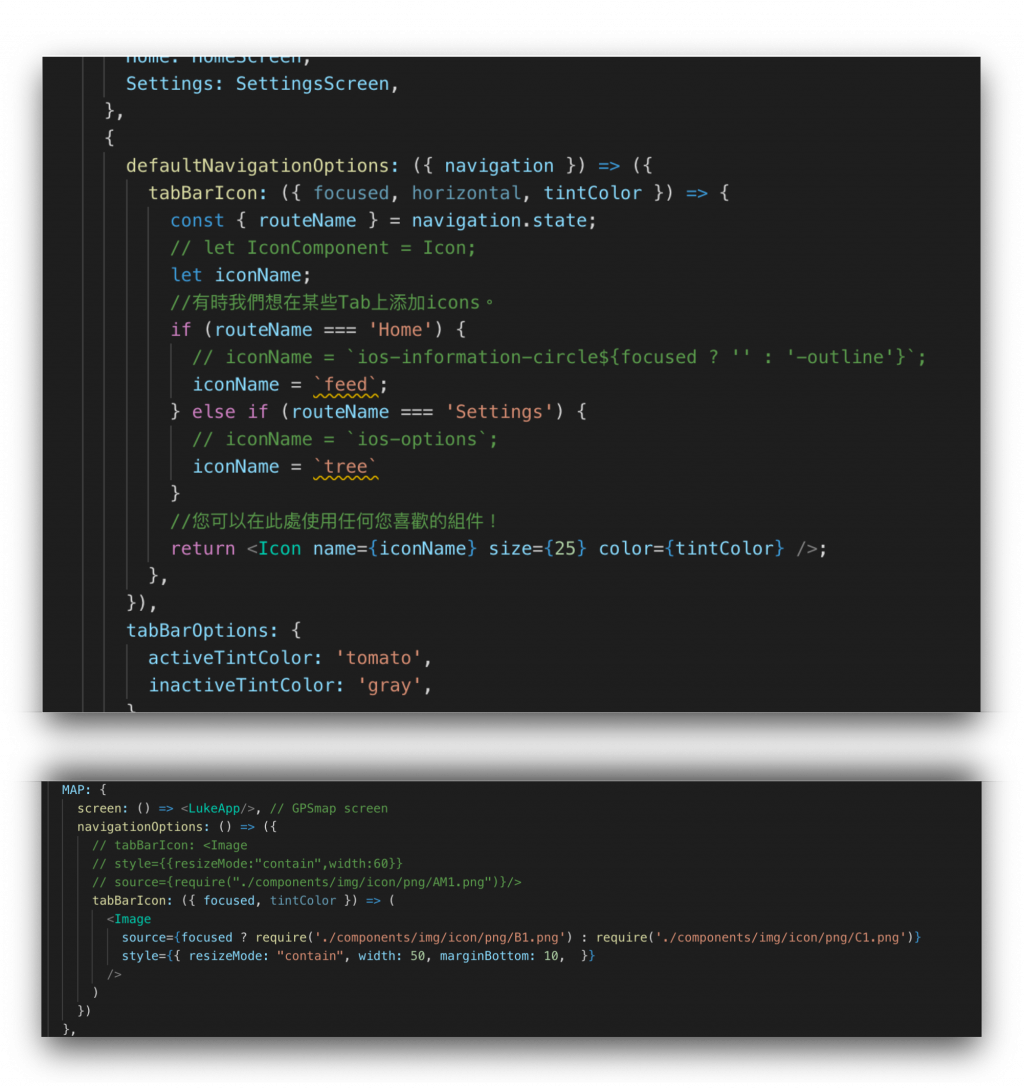
左圖是 return <Icon/> 右圖是 return <Image/>的效果