Lektor官網提供了快速指南,針對常用功能撰寫了比較詳細的說明文件,接下來這10天將快速看過一遍!
今天要來介紹的是部落格功能,這個功能在之前使用quickstart時已經接觸許多,這邊再統一說明,讓你對Blog的功能更清楚。說明流程將由Model開始,接著提到template,最後才是content。
一般的部落格規劃中,會有一個列表畫面,點列表中的其中一篇文章,才會進入檢視該文章內容。因此部落格功能需要建立2個model,這裡分別命名為blog.ini及blog-post.ini,一個管理列表,一個管理文章。
以下為部落格的model內容,裡面除了設定blog-post.ini為其子項目([children]),並設定排序方式(order_by),也設定了每一頁顯示的文章數量(per_page)。除此之外,hidden使得新增頁面時無法選擇此model作為頁面(按下鉛筆圖案後的介面),等同於無法新增同樣為blog的網頁;protected則保護blog model不被刪除。
[model]
name = Blog
label = Blog
hidden = yes
protected = yes

[children]
model = blog-post
order_by = -pub_date, title

[pagination]
enabled = yes
per_page = 10
blog-post為部落格文章的model。每筆資料包含標題(title)、日期(pub_date)、作者(author)及內文(body)其中title及pub_date在blog.ini有引用到,作為排序使用。
[model]
name = Blog Post
label = {{ this.title }}
hidden = yes

[fields.title]
label = Title
type = string
size = large

[fields.pub_date]
label = Publication date
type = date
width = 1/2

[fields.author]
label = Author
type = string
width = 1/2

[fields.body]
label = Body
type = markdown
第1行使用layout.html的模板,第2行則是引入分頁的模組,pagination的使用邏輯會在後面的文章說明。在layout.html中有title及body2個block,所以blog.html中也會針對這2個block填入要顯示的資訊。
{% extends "layout.html" %}
{% from "macros/pagination.html" import render_pagination %}
{% block title %}My Blog{% endblock %}
{% block body %}
  <h1>My Blog</h1>

  <ul class="blog-index">
  {% for post in this.pagination.items %}
    <li>
      <a href="{{ post|url }}">{{ post.title }}</a> —
      by {{ post.author }}
      on {{ post.pub_date|dateformat }}
    </li>
  {% endfor %}
  </ul>

  {% if this.pagination.pages > 1 %}
    {{ render_pagination(this.pagination) }}
  {% endif %}
{% endblock %}
blog-post顯示文章內容,所以跟blog.html比就沒有pagination的需要。同時在title及body2個block填入要顯示的資訊。
{% extends "layout.html" %}
{% block title %}{{ this.title }} | My Blog{% endblock %}
{% block body %}
  <h1>{{ this.title }}
  <p class="meta">
    by {{ this.author }}
    on {{ this.pub_date|dateformat('full') }}
  <div class="body">{{ this.body }}</div>
{% endblock %}
完成了model及template還不夠,少了contents.lr,就無法在網頁中看到,所以要在content/資料夾中加入部落格的頁面資料夾,假設命名blog,則在blog資料夾中建立contents.lr,如此一來就能讀取到blog.html。在contents.lr中寫入以下程式碼,指定model為blog:
_model: blog
此時就可以在網頁中看到blog的畫面,也能在編輯頁面中建立文章。
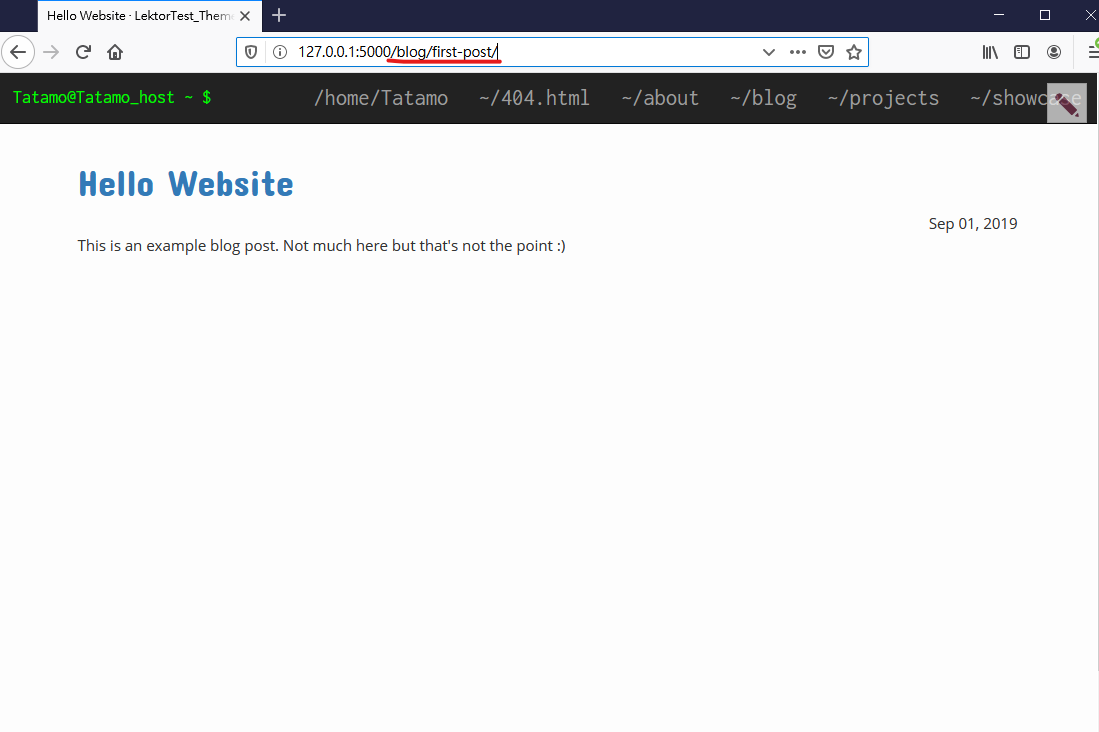
以quickstart建置的blog專案,裡面包含一篇文章first-post,預設的URL為http://127.0.0.1:5000/blog/first-post/
想要改URL架構,可以在blog.ini檔案中將這段文字加到[children]項目中:
slug_format = {{ (this.pub_date|dateformat('YYYY/M/') if this.pub_date) ~ this._id }}
[model]
name = Blog
label = Blog
hidden = yes
protected = yes

[children]
model = blog-post
order_by = -pub_date, title
slug_format = {{ (this.pub_date|dateformat('YYYY/M/') if this.pub_date) ~ this._id }}

[pagination]
enabled = yes
per_page = 10
這個slug_format設定URL架構包含文章的年份及日期,以下是修改後的URL路徑:
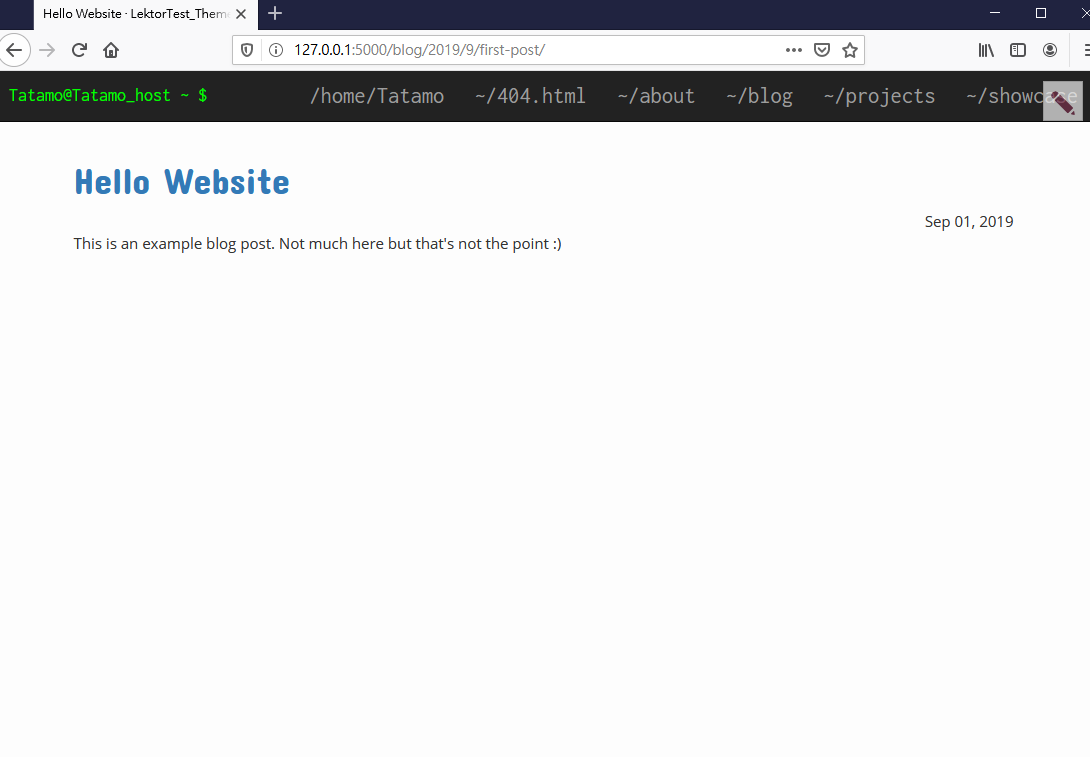
可以看到路徑改為/blog/2019/9/first-post/
看完之後我想blog這個功能對你來說已經駕輕就熟了吧!
CSScoke - 金魚都能懂的這個網頁畫面怎麼切 - 金魚都能懂了你還怕學不會嗎
King Tzeng - IoT沒那麼難!新手用JavaScript入門做自己的玩具~
Hina Hina - 陣列大亂鬥
阿斬 - Python 程式交易 30 天新手入門
Clarence - LINE bot 好好玩 30 天玩轉 LINE API
塔塔默 - 用Python開發的網頁不能放到Github上?Lektor說可以!!
Vita Ora - 好 Js 不學嗎 !? JavaScript 入門中的入門。