昨天我們看過了Resource Quota和Namespace的使用,今天我們再延伸介紹之前約定要探討的主題:PersistentVolume,之前在Volume有提過要介紹,所謂的Persistent Volume要運作,就必須要藉由Persistent Volume Claim去與其binding才行。另外,這邊也會介紹ephemeral-storage的用法,這我們之前提過是限制空間用的,當然這用法有不同模式,底下詳細介紹。
注意到這篇是之前的內容加上新的pv及pvc的整合應用,如果對Pod、Deployment、Service、Job內容有不熟悉的朋友,強烈建議先把前面看完再往下看喔!
傳送門:Pod、Deployment、Service、Job
之前在Volume那篇有稍微提到,今天讓我們更進一步去理解它,這個Persistent Volume號稱永久存儲,它比較類似於Docker的Volume,使用上都是先額外新增一個Volume物件,然後再看是什麼元件要使用就去掛載它。
在看這個東西之前,我們先小複習一下Docker中的Volume掛載方式:


以上三種模式,接著我們介紹Persistent Volume供比較,給個例子:
編輯Persistent Volume的YAML
$vim pod-persistentVolume.yaml
apiVersion: v1
kind: PersistentVolume
metadata:
  name: local-storage-www
  labels:
    type: local
spec:
  storageClassName: local-storage-www
  persistentVolumeReclaimPolicy: Retain
  capacity:
    storage: 10Gi
  accessModes:
    - ReadWriteMany
  hostPath:
    path: "/mnt/local-storage-www"

---
apiVersion: v1
kind: PersistentVolume
metadata:
  name: local-storage-mysql
  labels:
    type: local
spec:
  storageClassName: local-storage-mysql
  persistentVolumeReclaimPolicy: Retain
  capacity:
    storage: 10Gi
  accessModes:
    - ReadWriteOnce
  hostPath:
    path: "/mnt/local-storage-mysql"
這邊定義了兩個Persistent Volume,www和mysql,我們來詳細看下:
apiVersion定義了它要用的版本,這裡是v1
kind定義了元件,這裡是Persistent Volume
metadata定義了一些關於元件的詳細訊息,如:名稱、標籤
spec定義了關於元件的詳細設置:
設置Persistent Volume Claim,為了讓Persistent Volume能作用
$vim pod-persistentVolumeClaim.yaml
kind: PersistentVolumeClaim
apiVersion: v1
metadata:
  name: pvc-apache-www
spec:
  storageClassName: local-storage-www
  accessModes:
    - ReadWriteMany
  resources:
    requests:
      storage: 1Gi

---

kind: PersistentVolumeClaim
apiVersion: v1
metadata:
  name: pvc-mysql-data
spec:
  storageClassName: local-storage-mysql
  accessModes:
    - ReadWriteOnce
  resources:
    requests:
      storage: 2Gi
基本上它的設置邏輯跟PV很像,注意到request是在開啟的時候就要的空間
接著我們啟動PV和PVC
$kubectl create -f pod-persistentVolume.yaml
persistentvolume/local-storage-www created
persistentvolume/local-storage-mysql created
$kubectl create -f pod-persistentVolumeClaim.yaml
persistentvolumeclaim/pvc-apache-www created
persistentvolumeclaim/pvc-mysql-data created
檢查PV和PVC的狀態
$kubectl get pv
NAME                  CAPACITY   ACCESS MODES   RECLAIM POLICY   STATUS   CLAIM                    STORAGECLASS          REASON   AGE
local-storage-mysql   10Gi       RWO            Retain           Bound    default/pvc-mysql-data   local-storage-mysql            17s
local-storage-www     10Gi       RWX            Retain           Bound    default/pvc-apache-www   local-storage-www              17s
$kubectl get pvc
NAME             STATUS   VOLUME                CAPACITY   ACCESS MODES   STORAGECLASS          AGE
pvc-apache-www   Bound    local-storage-www     10Gi       RWX            local-storage-www     16s
pvc-mysql-data   Bound    local-storage-mysql   10Gi       RWO            local-storage-mysql   16s
注意到PV的STATUS是Bound,沒有綁定的話會是空的
新增一個包含相關元件的YAML
$vim pod-persistentVolumeClaim-deploy.yaml
apiVersion: apps/v1
kind: Deployment
metadata:
  name: php-apache
spec:
  replicas: 2
  selector:
    matchLabels:
      app: php-apache
  template:
    metadata:
      labels:
        app: php-apache
    spec:
      containers:
      - image: php:7.2-apache
        name: php-apache
        ports:
        - containerPort: 80
          name: php-apache
        volumeMounts:
          - mountPath: "/var/www/html"
            name: apache-www
      volumes:
      - name: apache-www
        persistentVolumeClaim:
          claimName: pvc-apache-www

---
apiVersion: apps/v1
kind: Deployment
metadata:
  name: mysql
spec:
  replicas: 1
  selector:
    matchLabels:
      app: mysql
  template:
    metadata:
      labels:
        app: mysql
    spec:
      containers:
      - image: mysql:5.6
        name: mysql
        env:
        - name: MYSQL_ROOT_PASSWORD
          value: qazxcdews123
        ports:
        - containerPort: 3306
          name: mysql
        volumeMounts:
        - mountPath: /var/lib/mysql
          name: mysql-data
      volumes:
      - name: mysql-data
        persistentVolumeClaim:
          claimName: pvc-mysql-data

---
apiVersion: batch/v1
kind: Job
metadata:
  name: install-adminer
spec:
  template:
    spec:
      containers:
      - image: php:7.2-apache
        name: php-apache
        volumeMounts:
          - mountPath: "/var/www/html"
            name: apache-www
        command: ["bash", "-c", "curl -L 'https://github.com/vrana/adminer/releases/download/v4.7.0/adminer-4.7.0.php' -o adminer.php"]
      volumes:
      - name: apache-www
        persistentVolumeClaim:
          claimName: pvc-apache-www
      restartPolicy: Never
  backoffLimit: 4

---
apiVersion: v1
kind: Service
metadata:
  name: web
spec:
  type: NodePort
  ports:
  - name: http
    port: 80
    protocol: TCP
    nodePort: 30080
    targetPort: 80
  - name: https
    port: 443
    protocol: TCP
    nodePort: 30443
    targetPort: 443
  selector:
    app: php-apache
這邊為了設置方便,直接把密碼輸在Deployment中,也可以改成Secret去設置
另外可以注意到Job這裡多了一個backoffLimit參數,這是指Job執行失敗的重試次數
接著我們啟動它吧!
$kubectl create -f pod-persistentVolumeClaim-deploy.yaml
deployment.apps/php-apache created
deployment.apps/mysql created
job.batch/install-adminer created
service/web created
詳細檢視集群狀態
$kubectl get all
NAME                              READY   STATUS    RESTARTS   AGE
pod/install-adminer-kx2bx         1/1     Running   0          5s
pod/mysql-659cc95856-468n5        1/1     Running   0          5s
pod/php-apache-7cdc8945d8-n6n5k   1/1     Running   0          5s
pod/php-apache-7cdc8945d8-skw2g   1/1     Running   0          5s

NAME                 TYPE        CLUSTER-IP      EXTERNAL-IP   PORT(S)                      AGE
service/kubernetes   ClusterIP   10.96.0.1       <none>        443/TCP                      5d12h
service/web          NodePort    10.109.36.223   <none>        80:30080/TCP,443:30443/TCP   5s

NAME                         READY   UP-TO-DATE   AVAILABLE   AGE
deployment.apps/mysql        1/1     1            1           5s
deployment.apps/php-apache   2/2     2            2           5s

NAME                                    DESIRED   CURRENT   READY   AGE
replicaset.apps/mysql-659cc95856        1         1         1       5s
replicaset.apps/php-apache-7cdc8945d8   2         2         2       5s

NAME                        COMPLETIONS   DURATION   AGE
job.batch/install-adminer   0/1           5s         5s
接著我們開啟瀏覽器,檢視http://192.168.99.100:30080/adminer.php
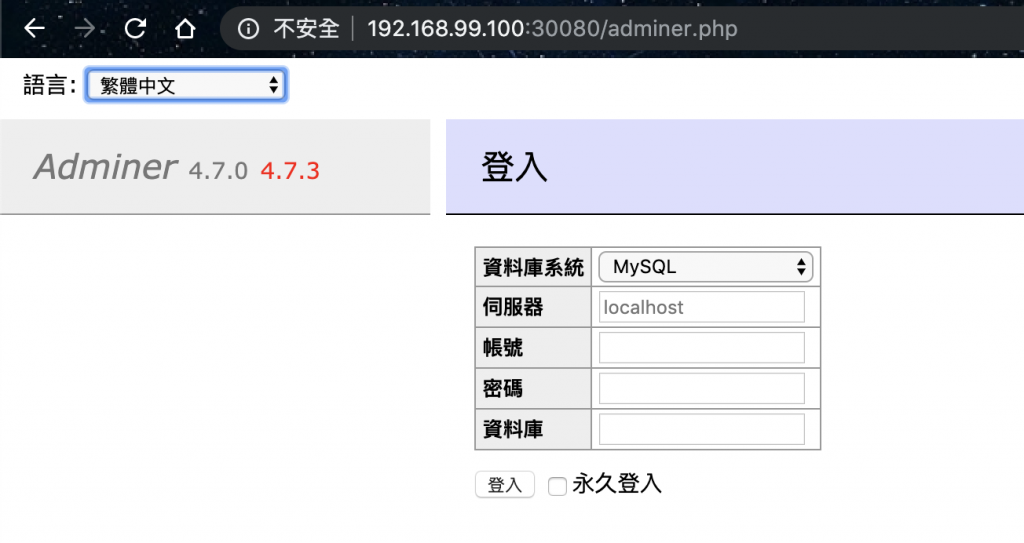
OK,可以透過網頁操作並設置MySQL資料庫,測試成功!
為了不干擾其他測試,按照慣例,我們回復原狀
$kubectl delete -f pod-persistentVolumeClaim-deploy.yaml
deployment.apps "php-apache" deleted
deployment.apps "mysql" deleted
job.batch "install-adminer" deleted
service "web" deleted
$kubectl delete -f pod-persistentVolumeClaim.yaml
persistentvolumeclaim "pvc-apache-www" deleted
persistentvolumeclaim "pvc-mysql-data" deleted
$kubectl delete -f pod-persistentVolume.yaml
persistentvolume "local-storage-www" deleted
persistentvolume "local-storage-mysql" deleted
再來這邊是限制容量的部分,我們這邊主要探討兩件事情:
第一個部分是指ephemeral storage的設置
第二個部分是指eviction policy的設置
在k8s系統中,如果我們設置了ephemeral storage,當Pod使用超出限制時,會被強制踢出,也就是evict
Node上的eviction有些設定可以修改,像是設置eviction policy,這是強制踢出的條件設置,預設是直接踢出
新增一個ephemeral的Deployment
$vim pod-deploy-ephemeral.yaml
apiVersion: apps/v1
kind: Deployment
metadata:
  name: nginx-deployment
  labels:
    app: nginx
spec:
  replicas: 3
  selector:
    matchLabels:
      app: nginx
  template:
    metadata:
      labels:
        app: nginx
    spec:
      containers:
      - name: nginx
        image: nginx
        resources:
          limits:
            ephemeral-storage: 2Gi
          requests:
            ephemeral-storage: 2Gi
注意到在requests和limits的區塊多了ephemeral-storage,只要超出limit的值Pod就會被踢出,這裡是限制2G
啟動這個Deployment
$kubectl get po
NAME                                    READY   STATUS    RESTARTS   AGE
helloworld-deployment-c98bf6d9f-6fv7p   1/1     Running   0          56s
helloworld-deployment-c98bf6d9f-cvjcp   1/1     Running   0          56s
helloworld-deployment-c98bf6d9f-s2rnn   1/1     Running   0          56s
接著我們進去這個Pod,並在裡面新增一個4G的檔案
$kubectl exec -it helloworld-deployment-c98bf6d9f-6fv7p  /bin/bash
root@helloworld-deployment-c98bf6d9f-6fv7p:/# ls
bin   dev  home  lib64  mnt  proc  run   srv  tmp  var
boot  etc  lib   media  opt  root  sbin  sys  usr
root@helloworld-deployment-c98bf6d9f-6fv7p:/# cd root
root@helloworld-deployment-c98bf6d9f-6fv7p:~# ls
root@helloworld-deployment-c98bf6d9f-6fv7p:~# dd if=/dev/zero of=./test.dat bs=4096 count=1024000
1024000+0 records in
1024000+0 records out
4194304000 bytes (4.2 GB, 3.9 GiB) copied, 13.6194 s, 308 MB/s
root@helloworld-deployment-c98bf6d9f-6fv7p:~# command terminated with exit code 137
可以發現無預警跳出Container了,我們來看看Pod的狀態
$kubectl get po
NAME                                    READY   STATUS    RESTARTS   AGE
helloworld-deployment-c98bf6d9f-6fv7p   0/1     Evicted   0          7m26s
helloworld-deployment-c98bf6d9f-6vcjl   1/1     Running   0          55s
helloworld-deployment-c98bf6d9f-cvjcp   1/1     Running   0          7m26s
helloworld-deployment-c98bf6d9f-s2rnn   1/1     Running   0          7m26s
要修改eviction policy,必須要重啟minikube,這是要在集群開起來就要設置的
先關閉minikube集群
$minikube stop
* Stopping "minikube" in virtualbox ...
* "minikube" stopped.
值得注意的是,它這個Policy分為硬性和軟性,軟性與硬性不同的是,它可以設置倒數計時,時間到就把超出限制的Pod踢掉
設置minikube的使用記憶體、CPU、名稱,硬件的限制為了下面測試用的
$minikube config set memory 2000
$minikube config set cpus 2
$minikube config set vm-driver virtualbox
接著啟動minikube,要增加一些參數設定如下:
$minikube start --kubernetes-version v1.15.0 \
                --extra-config=kubelet.eviction-hard="memory.available<400Mi" \
                --extra-config=kubelet.feature-gates="ExperimentalCriticalPodAnnotation=true" \
                --extra-config=kubelet.eviction-pressure-transition-period="30s" \
                --extra-config=kubelet.eviction-soft="memory.available<600Mi"  \
                --extra-config=kubelet.eviction-soft-grace-period="memory.available=2m"
說明下以上的參數配置:
kubelet.eviction-hard:這是硬性規定,memory.available是記憶體限制,若剩餘少於400MB則將Pod逐出kubelet.feature-gates:這是為了minikube單節點用的,避免一些關鍵Pod被逐出kubelet.eviction-pressure-transition-period:kubelet從壓力狀態中退出之前必須等待的時間,這裡是30skubelet.eviction-soft:這是軟性規定,memory.available是記憶體限制,若剩餘少於600MB則考慮將其逐出kubelet.eviction-soft-grace-period:滿足軟性規則的指定時間,這裡是在真正逐出之前,會有2分鐘的可用時間設置好後,我們新增幾個Pod試試
新增一個myramPod
$vim myramPod.yaml
apiVersion: v1
kind: Pod
metadata:
  name: myram2
spec:
  containers:
  - name: myram-container-1
    image: mytutorials/centos:bench
    imagePullPolicy: IfNotPresent

    command: ['sh', '-c', 'stress --vm 1 --vm-bytes 50M --vm-hang 3000 -t 3600']

    resources:
      limits:
        memory: "600Mi"
      requests:
        memory: "10Mi"

  restartPolicy: Never
  terminationGracePeriodSeconds: 0
接著檢查Node的Memory Pressure
$kubectl describe node minikube | grep MemoryPressure
MemoryPressure   False   KubeletHasSufficientMemory   kubelet has sufficient memory available
啟動這個Pod
$kubectl create -f myramPod2.yaml
pod/myram2 created
再次檢查Memory Pressure
kubectl describe node minikube | grep MemoryPressure
  MemoryPressure   True   KubeletHasInsufficientMemory   kubelet has insufficient memory available
因為軟性規定是2分鐘,也要等kubelet發現後才會開始計算時間,會有點延遲,所以我們稍微等一下
$kubectl get po
NAME     READY   STATUS    RESTARTS   AGE
myram2   1/1     Running   0          2m3s
$kubectl get po
NAME     READY   STATUS    RESTARTS   AGE
myram2   0/1     Evicted   0          2m20s
可以發現超過2分鐘沒處理Pod就會被Evicted!
測試完後先將Pod刪掉,後面測試還要用
$kubectl delete pod myram2
pod "myram2" deleted
新增第二和第三個myramPod
$vim myramPod3.yaml
apiVersion: v1
kind: Pod
metadata:
  name: myram3
spec:
  containers:
  - name: myram-container-1
    image: mytutorials/centos:bench
    imagePullPolicy: IfNotPresent

    command: ['sh', '-c', 'stress --vm 1 --vm-bytes 50M --vm-hang 3000 -t 3600']

    resources:
      limits:
        memory: "600Mi"
      requests:
        memory: "10Mi"

  restartPolicy: Never
  terminationGracePeriodSeconds: 0

$vim myramPod4.yaml
apiVersion: v1
kind: Pod
metadata:
  name: myram4
spec:
  containers:
  - name: myram-container-1
    image: mytutorials/centos:bench
    imagePullPolicy: IfNotPresent

    command: ['sh', '-c', 'stress --vm 1 --vm-bytes 50M --vm-hang 3000 -t 3600']

    resources:
      limits:
        memory: "100Mi"
      requests:
        memory: "10Mi"

  restartPolicy: Never
  terminationGracePeriodSeconds: 0
檢查Memory Pressure
$kubectl describe node minikube | grep MemoryPressure
  MemoryPressure   False   KubeletHasSufficientMemory   kubelet has sufficient memory available
這次我們一次新增三個myramPod,最後一個記憶體limits設成100Mi
$kubectl create -f myramPod2.yaml
pod/myram2 created
$kubectl create -f myramPod3.yaml
pod/myram3 created
$kubectl create -f myramPod4.yaml
pod/myram4 created
檢查Memory Pressure
$kubectl describe node minikube | grep MemoryPressure
  MemoryPressure   True   KubeletHasSufficientMemory   kubelet has sufficient memory available
檢查Pod狀態
$kubectl get po
NAME     READY   STATUS    RESTARTS   AGE
myram2   1/1     Running   0          8s
myram3   1/1     Running   0          6s
myram4   1/1     Running   0          3s
看起來正常,我們稍等一下
$kubectl get po
NAME     READY   STATUS    RESTARTS   AGE
myram2   0/1     Evicted   0          3m38s
myram3   1/1     Running   0          3m36s
myram4   0/1     Evicted   0          3m33s
接著看一下Memory Pressure
$kubectl describe node minikube | grep MemoryPressure
  MemoryPressure   False   KubeletHasSufficientMemory   kubelet has sufficient memory available
OK,經測試會將超出limit的Pod都逐出,直到系統沒有Memory Pressure為止
今天我們更進一步認識了Volume,以及了解了Persistent Volume和Persistent Volume Claim的元件使用方式,我們透過之前所學過的Pod、Deployment、Service、Job與PV和PVC做結合,實作了一個整合性範例。今天我們也進一步認識了Ephemeral Storage及學習了相關的Evcition Policy,看到了對於集群管理實務上更深的操作,其中的Hard Rule和Soft Rule可以滿足我們對於不同使用情境的需求。
本文同步刊載於https://github.com/x1y2z3456/ironman
感謝您撥冗閱讀此文章,不喜勿噴,有任何問題建議歡迎下方留言:)
說個笑話,希望我能寫滿30天啊(笑


 iThome鐵人賽