昨天我們稍微說明了雲端上k8s運作的基本邏輯,也介紹了一些會用到的AWS元件並做了些前置準備,今天我們從頭開始,一步步把k8s在AWS上的群集建立起來。內容會稍微複雜,所以分成上下兩篇。
上篇的部分:AWS的基礎設置、創建k8s的控制介面(Today)
下篇的部分:kubectl的安裝與設置、登入EC2的工作節點(Tomorrow)
@重要提醒:使用EKS不是免費的,除非你有綁定信用卡的額外預算,不然最好是速速部署測試,一小時約6塊TWD,沒用的時候記得關掉!不然就準備噴錢囉
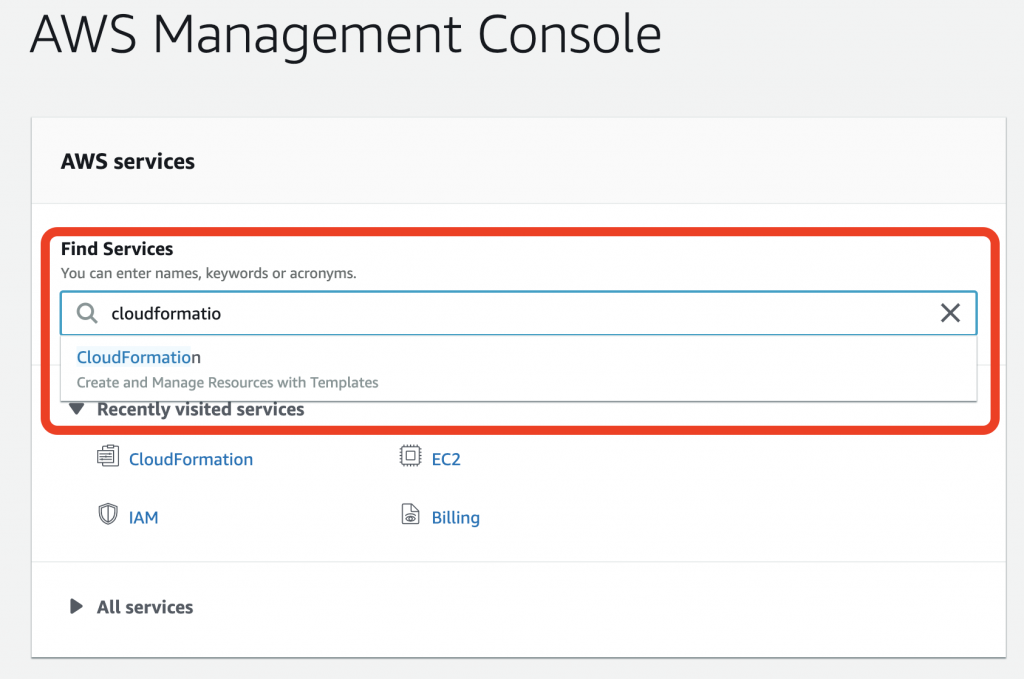
我們先回到Management Service的介面,尋找cloudformation這個服務
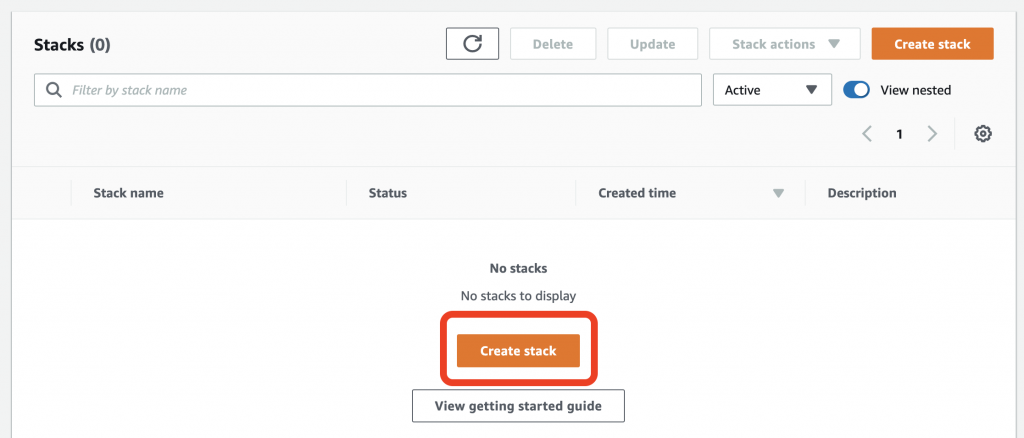
接著Create Stack
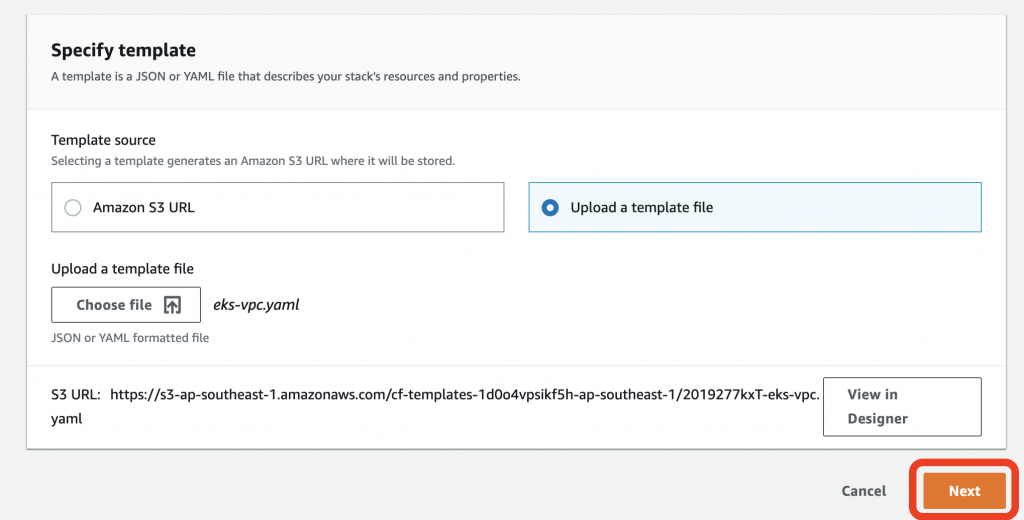
接著我們導入一個VPC的template,詳細可參考文檔
---
AWSTemplateFormatVersion: '2010-09-09'
Description: 'AWS EKS'

Parameters:

  VpcBlock:
    Type: String
    Default: 192.168.0.0/16
    Description: CIDR range for VPC

  Subnet01Block:
    Type: String
    Default: 192.168.64.0/18
    Description: CIDR for first subnet within VPC

  Subnet02Block:
    Type: String
    Default: 192.168.128.0/18
    Description: CIDR for second subnet within VPC

  Subnet03Block:
    Type: String
    Default: 192.168.192.0/18
    Description: CIDR for third subnet within VPC

Resources:
  VPC:
    Type: AWS::EC2::VPC
    Properties:
      CidrBlock:  !Ref VpcBlock
      EnableDnsSupport: true
      EnableDnsHostnames: true
      Tags:
      - Key: Name
        Value: !Sub '${AWS::StackName}-VPC'

  InternetGateway:
    Type: "AWS::EC2::InternetGateway"

  VPCGatewayAttachment:
    Type: "AWS::EC2::VPCGatewayAttachment"
    Properties:
      InternetGatewayId: !Ref InternetGateway
      VpcId: !Ref VPC

  RouteTable:
    Type: AWS::EC2::RouteTable
    Properties:
      VpcId: !Ref VPC
      Tags:
      - Key: Name
        Value: Public Subnets
      - Key: Network
        Value: Public

  Route:
    DependsOn: VPCGatewayAttachment
    Type: AWS::EC2::Route
    Properties:
      RouteTableId: !Ref RouteTable
      DestinationCidrBlock: 0.0.0.0/0
      GatewayId: !Ref InternetGateway

  Subnet01:
    Type: AWS::EC2::Subnet
    Properties:
      AvailabilityZone:
        Fn::Select:
        - '0'
        - Fn::GetAZs:
            Ref: AWS::Region
      CidrBlock:
        Ref: Subnet01Block
      VpcId:
        Ref: VPC
      Tags:
      - Key: Name
        Value: !Sub "${AWS::StackName}-Subnet1"

  Subnet02:
    Type: AWS::EC2::Subnet
    Properties:
      AvailabilityZone:
        Fn::Select:
        - '1'
        - Fn::GetAZs:
            Ref: AWS::Region
      CidrBlock:
        Ref: Subnet02Block
      VpcId:
        Ref: VPC
      Tags:
      - Key: Name
        Value: !Sub "${AWS::StackName}-Subnet2"

  Subnet03:
    Type: AWS::EC2::Subnet

    Properties:
      AvailabilityZone:
        Fn::Select:
        - '2'
        - Fn::GetAZs:
            Ref: AWS::Region
      CidrBlock:
        Ref: Subnet03Block
      VpcId:
        Ref: VPC
      Tags:
      - Key: Name
        Value: !Sub "${AWS::StackName}-Subnet3"

  Subnet01RouteTableAssociation:
    Type: AWS::EC2::SubnetRouteTableAssociation
    Properties:
      SubnetId: !Ref Subnet01
      RouteTableId: !Ref RouteTable

  Subnet02RouteTableAssociation:
    Type: AWS::EC2::SubnetRouteTableAssociation
    Properties:
      SubnetId: !Ref Subnet02
      RouteTableId: !Ref RouteTable

  Subnet03RouteTableAssociation:
    Type: AWS::EC2::SubnetRouteTableAssociation
    Properties:
      SubnetId: !Ref Subnet03
      RouteTableId: !Ref RouteTable

  ControlPlaneSecurityGroup:
    Type: AWS::EC2::SecurityGroup
    Properties:
      GroupDescription: Cluster communication with worker nodes
      VpcId: !Ref VPC

Outputs:

  SubnetIds:
    Description: your subnets
    Value: !Join [ ",", [ !Ref Subnet01, !Ref Subnet02, !Ref Subnet03 ] ]

  SecurityGroups:
    Description: SecGroup for communication betw controlplane and workernodes
    Value: !Join [ ",", [ !Ref ControlPlaneSecurityGroup ] ]

  VpcId:
    Description: The VPC Id
    Value: !Ref VPC
接著應顯示如下,可以檢視Design去看它的設計拓墣架構,這裡筆者直接下一步
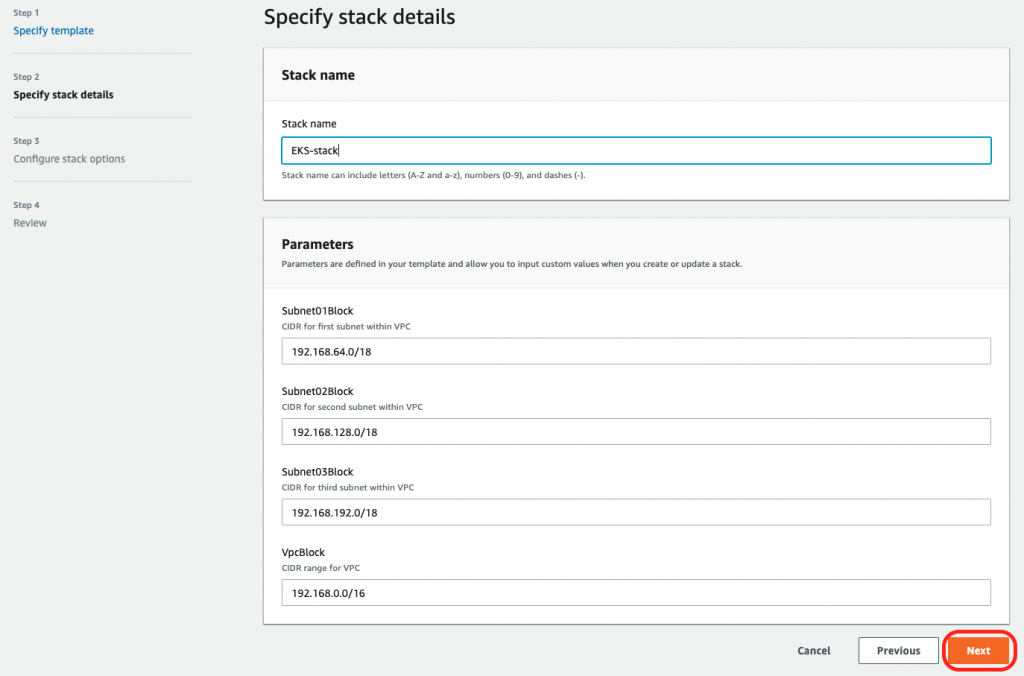
設定名稱EKS-stack,好了下一步
後面都不用改什麼設定,直接下一步到Create Stack就行
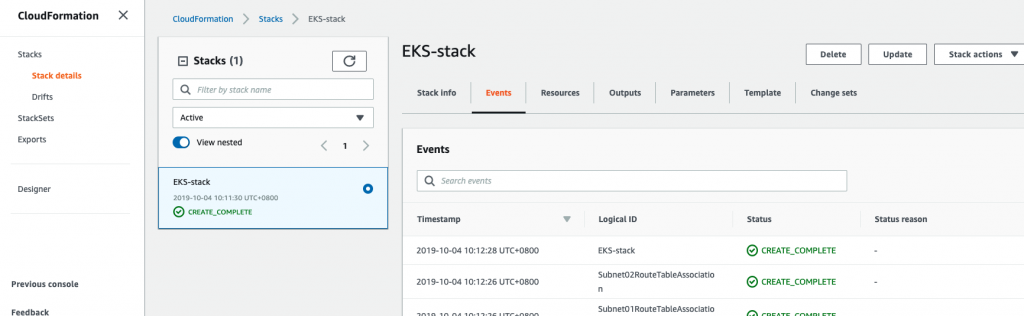
再來就是檢視完成介面

會稍微花一點時間,要等它一下,喝口茶,休息一下。(睡個覺再來
好了應該要有類似訊息
檢查Output
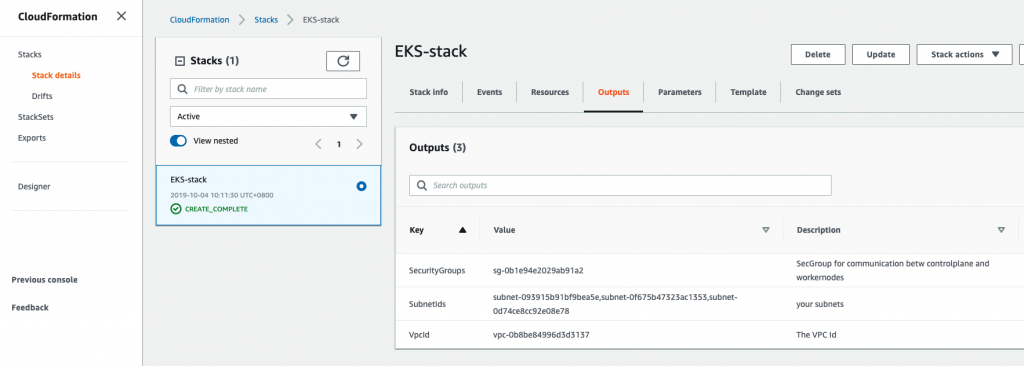
OK,看起來沒啥問題,我們接續下個部分
這個部分我們延續前面繼續操作,直接設置
我們先回到Management Service的介面,尋找EKS這個服務,然後到那個頁面後,選擇Clusters
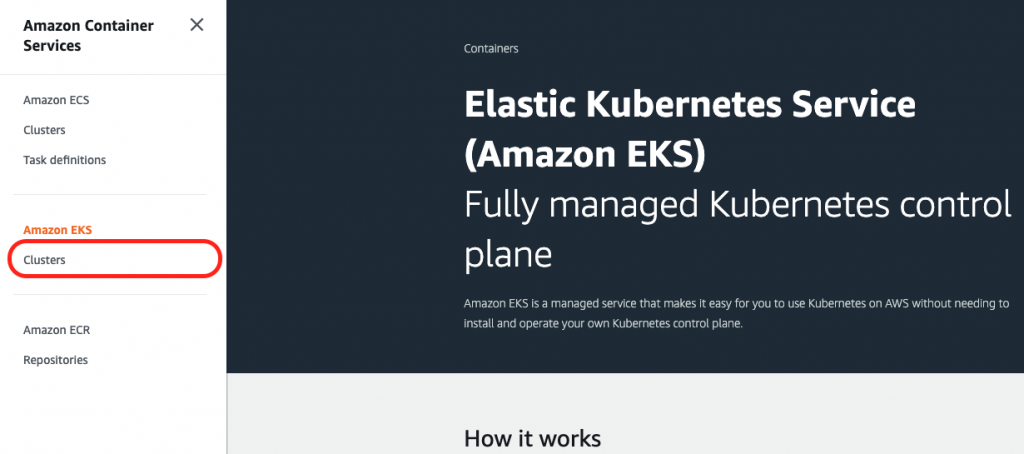
這邊是要我們建立一個新的Cluster,我們先做些設定
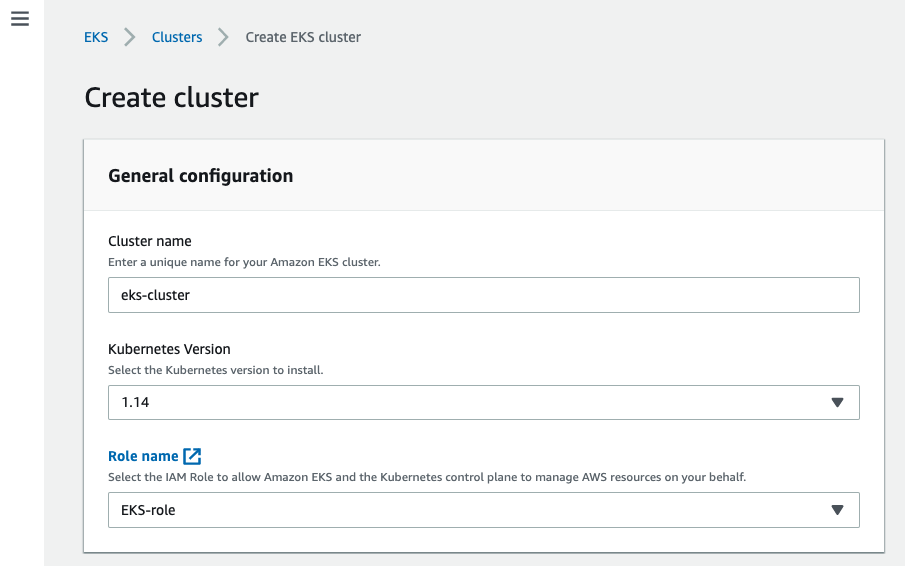
主要是把一些我們前面設置過的設定套用,像是EKS開頭的那些東西
設定cluster name、k8s version、role name,目前EKS只支援到1.14,現在最新是1.16,也就是我們之前minikube用的k8s版本
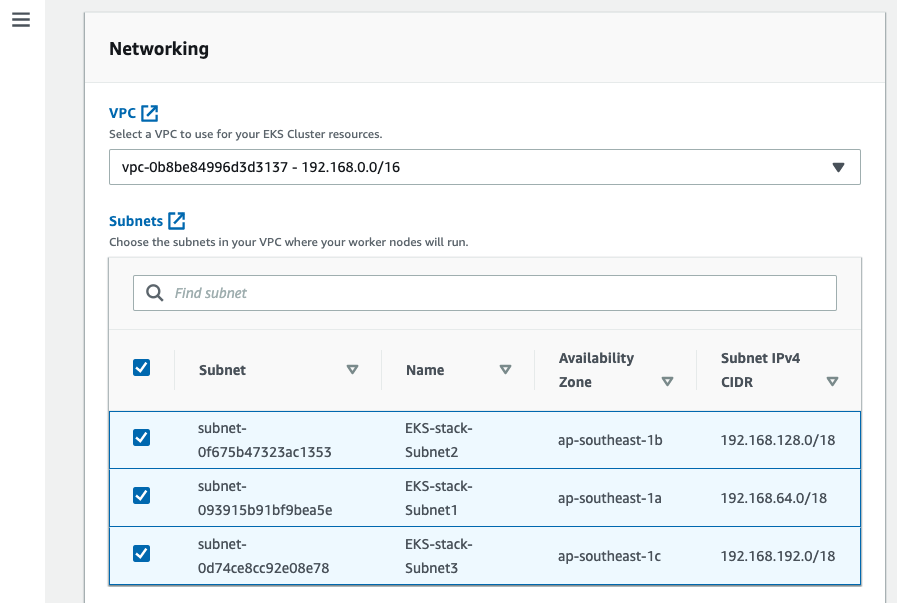
設置VPC及對應的子網域(這個在選定VPC後應會自動套入),它原本就有個預設的VPC,不要選錯了!
設定Security groups,也是找EKS相關的
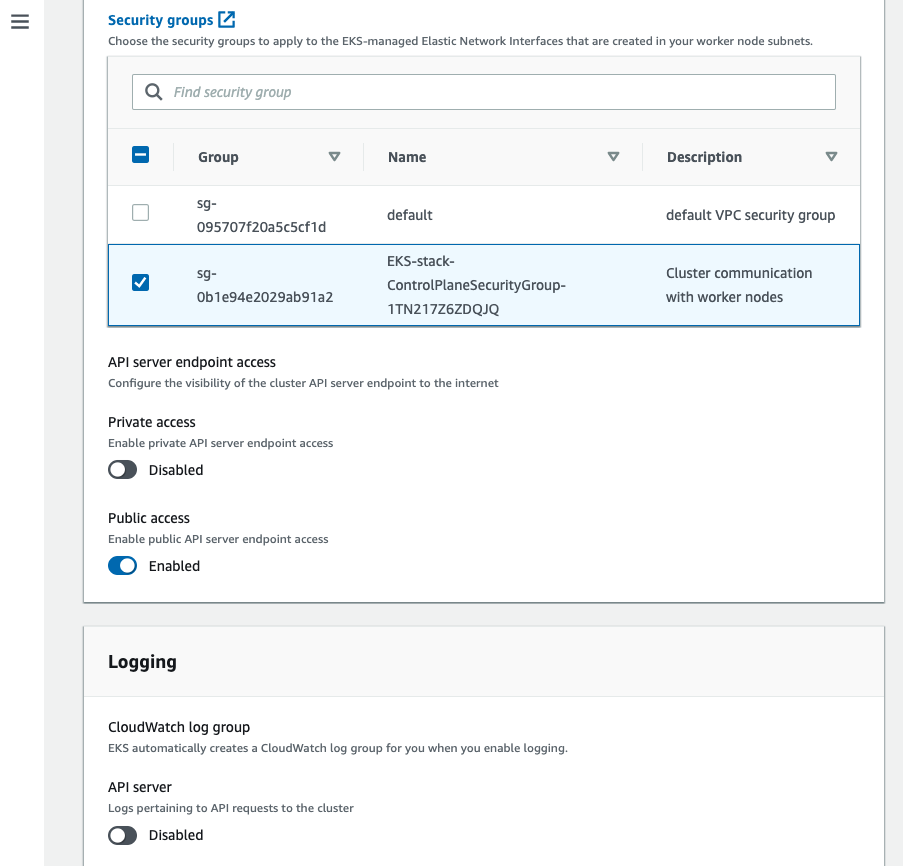
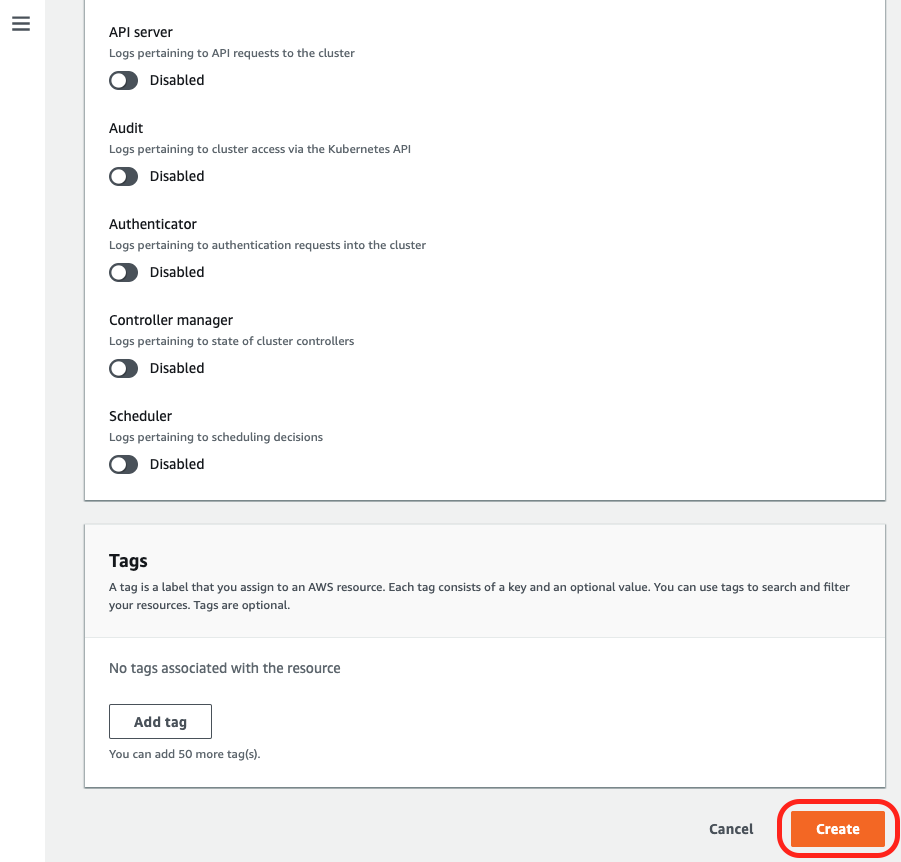
Security group下面的可以用預設值不調,看個人喜好(筆者沒調,好了按Create
接著AWS就會幫我們建立EKS的cluster了,要等一段時間(這個蠻久的,可以小睡一下
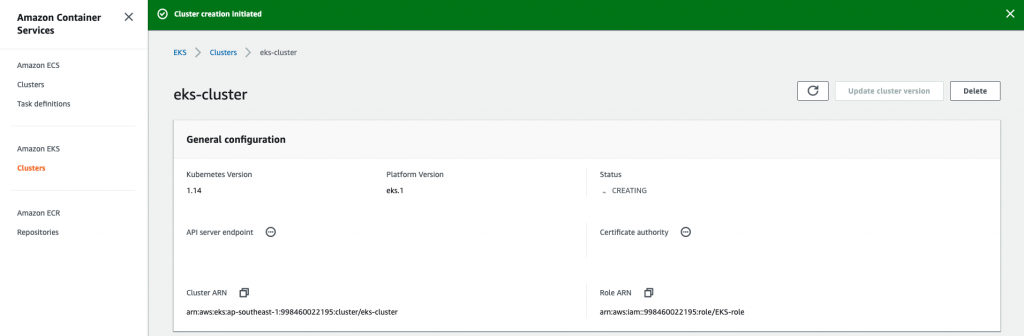
好了會長這樣,筆者大概等了10分左右
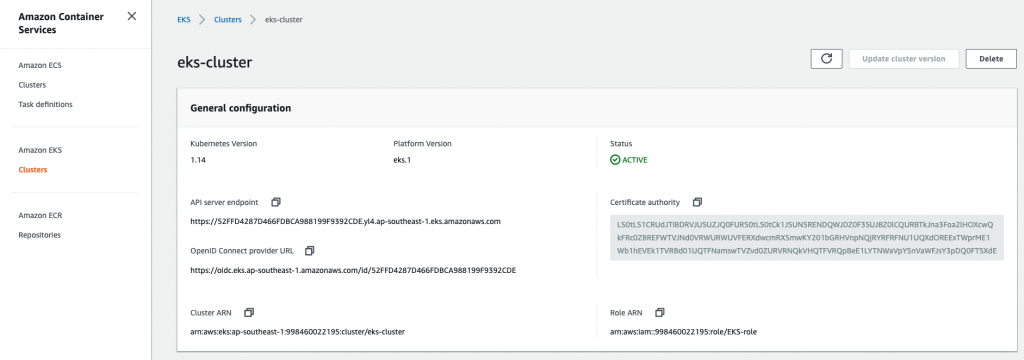
OK,到這邊關於創建k8s的控制介面的部分就結束囉!
今天我們已經將k8s架設在AWS實務篇之上卷走過啦!就是AWS的基礎設置、創建k8s的控制介面的內容。到這邊關於EKS的設置已經過了一半了,在下卷的內容,我們會提到關於kubectl的安裝與設置、登入EC2的工作節點等等的內容,AWS雖然一開始用起來眼花撩亂,但久了還是可以習慣(咦,有押韻,走到這邊,筆者會建議先將前面基礎篇、進階篇、管理篇等內容複習一次,因為我們到時候上雲後,會在驗證一部份的前面內容,因為在日常的維運當中,很多時候其實你是在雲端的環境下指令的,本地端的minikube只是給你測試用而已,加油!我們明天見~
本文同步刊載於https://github.com/x1y2z3456/ironman
感謝您撥冗閱讀此文章,不喜勿噴,有任何問題建議歡迎下方留言:)
說個笑話,希望我能寫滿30天啊(笑


 iThome鐵人賽