今天要帶各位繼續昨天沒完成的功能,也就是程式呼叫和 actix webservice 的 api 串再一起,那麼經過我稍微摸索一下發現其實不難那就讓我們開始吧,
首先把昨天的 call_python 這支程式調整一下,
fn call_python(value:&str) -> String {
    let mut translate = Command::new("python3");
    translate.arg("run_nn.py").arg("translate").arg(value);
    translate.current_dir("/Users/liyanxin/Life/myprojects/Chinese2English_Seq2Seq_Attention");
    let output = translate.output().expect("failed to execute process");
    String::from_utf8_lossy(&output.stdout).to_string()
}
跟上一篇最大的差別在回傳值(String),為了要把結果回傳給呼叫他的程式用 from_utf8_lossy 以及 to_string 把 u8 的格式轉換 Cow 後再轉成 String。這邊也是筆者相對不熟的地方 Rust 內建的䅃似乎非常多看來需要多花點時間了解了~
那麼接著我們就來改寫我們的 api 那其實非常容易,
#[get("/hello/{name}")]
fn hello(obj: web::Path<MyObj>) -> Result<HttpResponse> {
    let output = call_python(&obj.name);
    Ok(HttpResponse::Ok().json(MyObj {
        name: output,
    }))
}
也就是呼叫 call_python 然後把結果傳給 client 端這樣就完成囉!
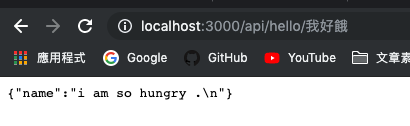
怎麼樣是不是非常酷呢?這樣我們就擁有可以中翻英的小機器人了(雖然容易翻錯哈
以下是完整的程式碼,
use actix_web::{web, App, HttpServer, Result, HttpResponse, Responder, get};
use listenfd::ListenFd;
use serde::{Deserialize, Serialize};
use std::process::Command;

#[derive(Serialize, Deserialize)]
struct MyObj {
    name: String,
}

fn call_python(value:&str) -> String {
    let mut translate = Command::new("python3");
    translate.arg("run_nn.py").arg("translate").arg(value);
    translate.current_dir("/Users/liyanxin/Life/myprojects/Chinese2English_Seq2Seq_Attention");
    let output = translate.output().expect("failed to execute process");
    String::from_utf8_lossy(&output.stdout).to_string()
}

fn index(info: web::Path<(u32, String)>) -> impl Responder {
    format!("Hello {}! id:{}", info.1, info.0)
}

#[get("/hello/{name}")]
fn hello(obj: web::Path<MyObj>) -> Result<HttpResponse> {
    let output = call_python(&obj.name);
    Ok(HttpResponse::Ok().json(MyObj {
        name: output,
    }))
}

fn main() {
    let mut listenfd = ListenFd::from_env();
    let mut server = HttpServer::new(
        || App::new()
            .service(web::resource("/{id}/{name}/index.html").to(index))
            .service(
                web::scope("/api").service(hello)
            )
        );

    server = if let Some(l) = listenfd.take_tcp_listener(0).unwrap() {
        server.listen(l).unwrap()
    } else {
        server.bind("127.0.0.1:3000").unwrap()
    };

    server.run().unwrap();
}
今天主要也就是完成前一篇原本要處理的功能,那麼 Rust 還有一個叫做 FFI(Foreign Function Interface) 的東西也可以用這個來串接程式,若是要再優化我們的 web service 的話可以試試看用這種方式呼叫翻譯程式!
那麼下一篇我們就來稍微試試看用 FFI 來取代我們的 CLI 寫法吧!


 iThome鐵人賽