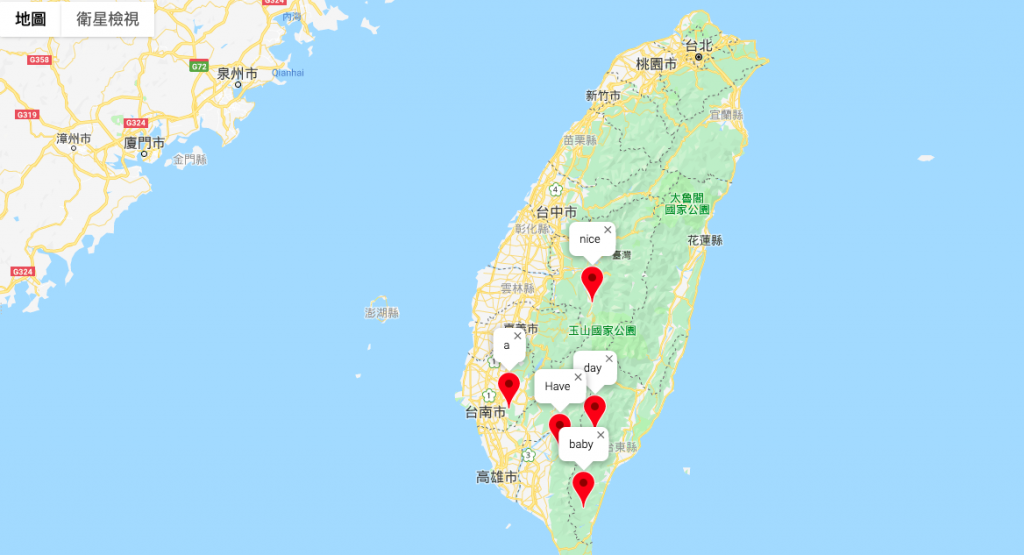
今天想介紹一個很有趣的東西,讓地圖幫我們留一段訊息~
我們一樣先看整段程式碼再來解析:
<!DOCTYPE html>
<html>
  <head>
    <meta name="viewport" content="initial-scale=1.0, user-scalable=no">
    <meta charset="utf-8">
    <title>Using Closures in Event Listeners</title>
    <style>
      /* Always set the map height explicitly to define the size of the div
       * element that contains the map. */
      #map {
        height: 100%;
      }
      /* Optional: Makes the sample page fill the window. */
      html, body {
        height: 100%;
        margin: 0;
        padding: 0;
      }
    </style>
  </head>
  <body>
    <div id="map"></div>
    <script>
      function initMap() {
        var map = new google.maps.Map(document.getElementById('map'), {
          zoom: 4,
          center: {lat: -25.363882, lng: 131.044922 }
        });

        var bounds = {
          north: -25.363882,
          south: -31.203405,
          east: 131.044922,
          west: 125.244141
        };

        // Display the area between the location southWest and northEast.
        map.fitBounds(bounds);

        // Add 5 markers to map at random locations.
        // For each of these markers, give them a title with their index, and when
        // they are clicked they should open an infowindow with text from a secret
        // message.
        var secretMessages = ['Have', 'a', 'nice', 'day', 'baby'];
        var lngSpan = bounds.east - bounds.west;
        var latSpan = bounds.north - bounds.south;
        for (var i = 0; i < secretMessages.length; ++i) {
          var marker = new google.maps.Marker({
            position: {
              lat: bounds.south + latSpan * Math.random(),
              lng: bounds.west + lngSpan * Math.random()
            },
            map: map
          });
          attachSecretMessage(marker, secretMessages[i]);
        }
      }

      // Attaches an info window to a marker with the provided message. When the
      // marker is clicked, the info window will open with the secret message.
      function attachSecretMessage(marker, secretMessage) {
        var infowindow = new google.maps.InfoWindow({
          content: secretMessage
        });

        marker.addListener('click', function() {
          infowindow.open(marker.get('map'), marker);
        });
      }
    </script>
    <script async defer
    src="https://maps.googleapis.com/maps/api/js?key=YOUR_API_KEY&callback=initMap">
    </script>
  </body>
</html>
我們一樣先建立最初始的地圖,把中心定在台灣,
接下來我們必須要定下一個範圍,讓後續隨機產生的 marker 不會跑的太遙遠~
var bounds = {
  north: -25.363882,
  south: -31.203405,
  east: 131.044922,
  west: 125.244141
};
var secretMessages = ['Have', 'a', 'nice', 'day', 'baby'];
var lngSpan = bounds.east - bounds.west;
var latSpan = bounds.north - bounds.south;
接下來把我們想打的訊息藏在五個 marker 中。
for (var i = 0; i < secretMessages.length; ++i) {
  var marker = new google.maps.Marker({
    position: {
      lat: bounds.south + latSpan * Math.random(),
      lng: bounds.west + lngSpan * Math.random()
    },
    map: map
  });
attachSecretMessage(marker, secretMessages[i]);

function attachSecretMessage(marker, secretMessage) {
  var infowindow = new google.maps.InfoWindow({
  content: secretMessage
  });
}
我們利用迴圈來幫我們生產出不大於 sceretMessage 長度數量的 marker
並定義這些 marker 的位置。
在下方定義一個 attachSeceretMessage 這個函式
函式裡面可以放兩種參數 marker 以及 secretMessage
並建立一個資訊視窗(infowindow)來放入 secretMessage 中的內容
marker.addListener('click', function() {
  infowindow.open(marker.get('map'), marker);
});
}
萬事俱備,只欠東風~
當然我們必須設計一個觸發的要素,才能將我們 message 展示出來,
一樣使用 .addListener 並配合 click 的動作
就能將給予每個 marker 的訊息一一秀出來啦!
不妨動手實際做做看吧!
你今天,把玩 Google Map 了嗎?:)
