在Angular當中,管道(pipe)的功用是在不更動原始資料的情況下,轉換資料顯示的樣子。一來可以不更動資料的原始狀態,二來可以將資料轉換成比較容易閱讀的形式。
但在Nestjs裡面,因為沒有頁面必須要處理,但是管道的功能非常類似:能轉換輸入的資料,使其符合需要的格式,同時也能驗證是否傳入需要的資料。
建立管道的指令和Angular的指令一模樣
nest generate pipe <pipeName>
現在建立一個名為document的管道
nest generate pipe document
這樣就建立一個空白的管道了
import { ArgumentMetadata, Injectable, PipeTransform } from '@nestjs/common';


@Injectable()
export class DocumentPipe implements PipeTransform {
  transform(value: any, metadata: ArgumentMetadata) {
    return value;
  }
}
在管道轉換資料的時候,有兩個參數
管道可以用來驗證是否有傳送必須的資料。管道可以在客戶端傳送過來的資料進入控制器之前,先驗證資料是否有齊全。如果不齊全,就直接拋出錯誤,不會進入到控制器。一來是為了避免浪費時間,二來避免不齊全的資料進來讓控制器運作遇到死路,發生不可預期的錯誤。
如果要驗證資料,得先安裝另外的套件:class-validator
npm i --save class-validator class-transformer
這個套件可以取得metatype,驗證資料的型別。因為要驗證資料的型別,所以這個功能僅適用於Typescript,不適用於Javascript
安裝好之後,在管道裡面引入這兩個套件
import { validate } from 'class-validator';
import { plainToClass } from 'class-transformer';
另外還要引入Nestjs的錯誤處理的模組
import { ArgumentMetadata, Injectable, PipeTransform, BadRequestException } from '@nestjs/common’; // 引入BadRequestException
接下來修改管道的內容,使用這個套件來驗證資料
export class DocumentPipe implements PipeTransform {
  async transform(value, metadata: ArgumentMetadata) {
    const { metatype } = metadata;
    if (!metatype || !this.toValidate(metatype)) {
        return value;
    }
    const object = plainToClass(metatype, value);
    const errors = await validate(object);
    if (errors.length > 0) {
        throw new BadRequestException('資料格式錯誤');
    }
    return value;
  }


  private toValidate(metatype): boolean {
    const types = [String, Boolean, Number, Array, Object];
    return !types.find((type) => metatype === type);
  }
}
關於驗證的方法:
transform:是非同步的處理方法資料格式錯誤
安裝完成之後,手動新增一個檔案,定義要驗證的資料,在這裡定義這個資料為create-document.dto.ts
要來驗證新增檔案的時候,是否有輸入name和author
import { IsString } from 'class-validator';


export class CreateCatDto {
    @IsString()
    readonly name: string;


    @IsString()
    readonly author: string;
}
document.controller.ts
使用管道之前,先引入處理管道的模組UsePipes
import { Controller, Get, Post, Patch, Delete, Param, Body, Response, HttpStatus,UsePipes } from '@nestjs/common’; // 引入UsePipes
在新增資料資料之前,先驗證資料有沒有符合格式
@Post()
@UsePipes(DocumentPipe)
addDocument(@Response() res, @Body() document: AddDocumentDto) {
    this.documentService.getDocumentData().subscribe(data => {
        // 做些什麼
        res.status(HttpStatus.CREATED).json(document);
    })

}
@UsePipes裝飾器,並且指定使用剛剛建立的DocumentPipe使用postman測試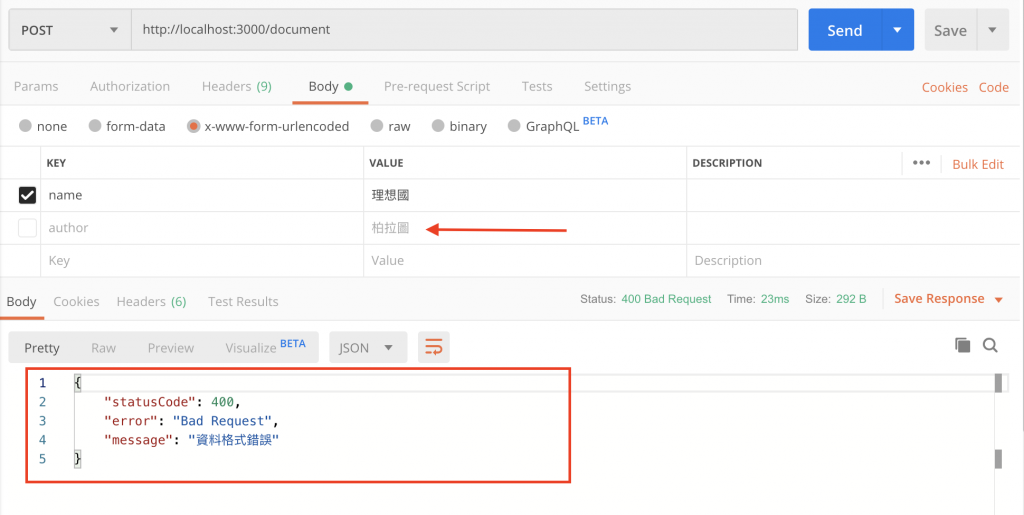
輸入資料的時候,故意不輸入作者的名稱,回傳就拋出錯誤
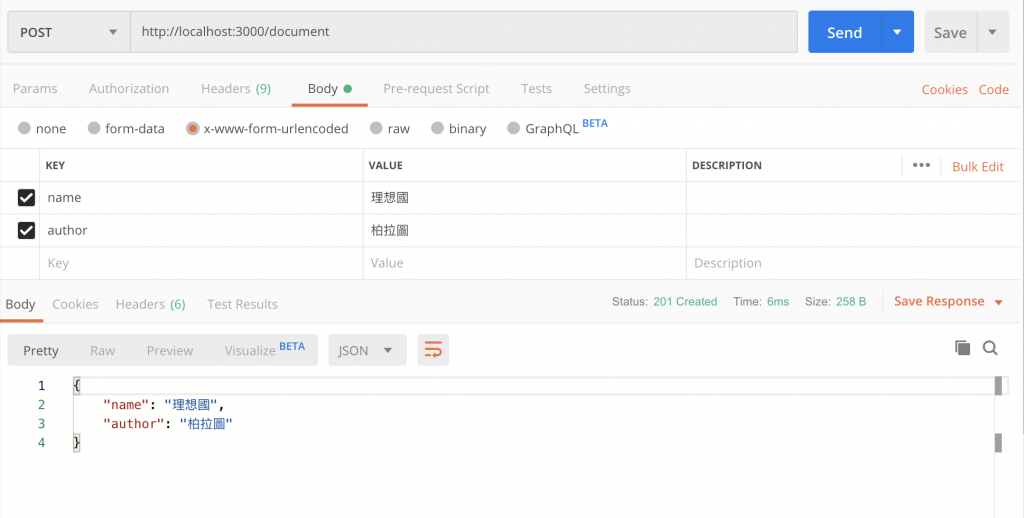
如果輸入正確資料,就不會拋出錯誤
今天的範例內容可以githib上面看到:範例內容
今天學到的事情有:
明天將會來談談如何使用管道轉換資料