今天做的包含了三件事:
Let's go!
5f、5g。// tests/Browser/PostTest.php
public function testPostPage()
{
$this->browse(function (Browser $browser) {
$posts = factory(Post::class, 2)->create();
$browser->visit('/post')
->assertSee('Post:')
->assertSee($posts[1]->user->name)
->assertSee($posts[1]->post_text);
});
}
在畫面中尋找 使用者名稱。
其實這樣的 UI 測試並不完整,我們只確認了這段文字在 Html 中,而不知道會在哪個 Element 中,就先將就著吧。
<!-- recources/views/post.blade.php -->

@foreach ($posts as $post)
    <p>
        <div class="card">
            <div class="card-header">{{ $post->user->name }}</div>

            <div class="card-body">
                {{ $post->post_text }}
            </div>
        </div>
    </p>
@endforeach
// tests/Browser/IndexTest.php

public function testPostLinkInHomePage()
    {
        $this->browse(function (Browser $browser){
            $user = factory(\App\User::class)->create();

            $browser->loginAs($user)
                    ->visit('/home')
                    ->clickLink('Post')
                    ->assertPathIs('/post');
        });
    }
新增一個 url('/post') 連結。
<!-- resources/views/layouts/app.blade.php --?

<!-- Right Side Of Navbar -->
<ul class="navbar-nav ml-auto">
    <li class="nav-item">
        <a class="nav-link" href="{{ url('/post') }}">Post</a>
    </li>
    <!-- Authentication Links -->
    ...
採取的邏輯是新增貼文後,會重新跳轉到顯示的頁面,因此就會把剛新增的顯示出來,因此測試是否有跳轉到 /post。
// tests/Browser/PostFormTest.php

public function testPostByFormIfAuth()
{
    factory(User::class)->create();

    $second_user = factory(User::class)->create([
        'email' => 'taylor@laravel.com',
    ]);
    $this->assertSame(2, $second_user->id);

    $this->browse(function ($browser) use ($second_user) {
        $browser->loginAs($second_user)
                ->visit('/post/form')
                ->type('post_text', "a testing post")
                ->press('送出貼文')
                ->assertPathIs('/post')
                ->assertSee('Post:');
    });

    $this->assertDatabaseHas('posts', [
        'post_text' => "a testing post",
        'user_id' => $second_user->id
    ]);
}
加入 redirect() 來做跳轉。
// app/Http/Controller/PostController.php

class PostController extends Controller
{
    public function insertPost(Request $request)
    {
        $post = new Post;
        $post->post_text = $request->input('post_text');
        $post->user_id = Auth::id();
        $post->save();
        return redirect('/post');
    }
( $ git checkout 5f )
使用者能夠對其他人的貼文留言。
// tests/Browser/PostTest.php

public function testPostPage()
{
    $this->browse(function (Browser $browser) {
        $posts = factory(Post::class, 2)->create();

        $browser->visit('/post')
                ->assertSee('Post:')
                ->assertSee($posts[1]->user->name)
                ->assertSee($posts[1]->post_text)
                ->assertSee('Leave a Comment:');
    });
}
每則貼文下,顯示一個表單。
<!-- resources/views/post.blade.php -->

@foreach ($posts as $post)
    <p>
        <div class="card">
            <div class="card-header">{{ $post->user->name }}</div>

            <div class="card-body">
                {{ $post->post_text }}
            </div>
            <form method="post" action="/post/comment">
                @csrf
                Leave a Comment:
                <input type="text" size="30" name="post_text">
                <input type="hidden" name="post_id" value={{ $post->user->id }}>
                <input type="submit" value="Send">
            </form>
        </div>
    </p>
@endforeach
// tests/Feature/PostTest.php

public function testCommentRoute()
{
    $post = factory(Post::class)->create();
    $user = factory(User::class)->create();

    $text = "new comment";

    $this->post('/post/comment', [
        'post_id' => $post->id,
        'user_id' => $user->id,
        'comment_text' => $text
    ]);

    $this->assertDatabaseHas('comments', [
        'post_id' => $post->id,
        'user_id' => $user->id,
        'comment_text' => $text
    ]);
}
// routes/web.php

Route::post('/post/comment', 'PostController@insertComment');
// app/Http/Controllers/PostController.php

class PostController extends Controller
{
    public function insertComment(Request $request)
    {
        $comment = new Comment;
        $comment->post_id = $request->input('post_id');
        $comment->user_id = Auth::id();
        $comment->comment_text = $request->input('comment_text');
        $comment->save();
        return redirect('/post');
    }
}
其他還有新增一個 Comment Model、Factory、Comment 與 Post、User 的關聯、comments 資料表的 Migration。
應該還需要一個,測試評論表單的 UI 測試,但不瞭解 type() 要怎麼選取到特定的 Element 中,因此只好先跳過。
// tests/Browser/PostTest.php

class PostTest extends DuskTestCase
{
    use DatabaseMigrations;

    public function testPostPage()
    {
        $this->browse(function (Browser $browser) {
            ...
            $browser->...
                    ->assertsee($comment->comment_text);
        });
    }
}
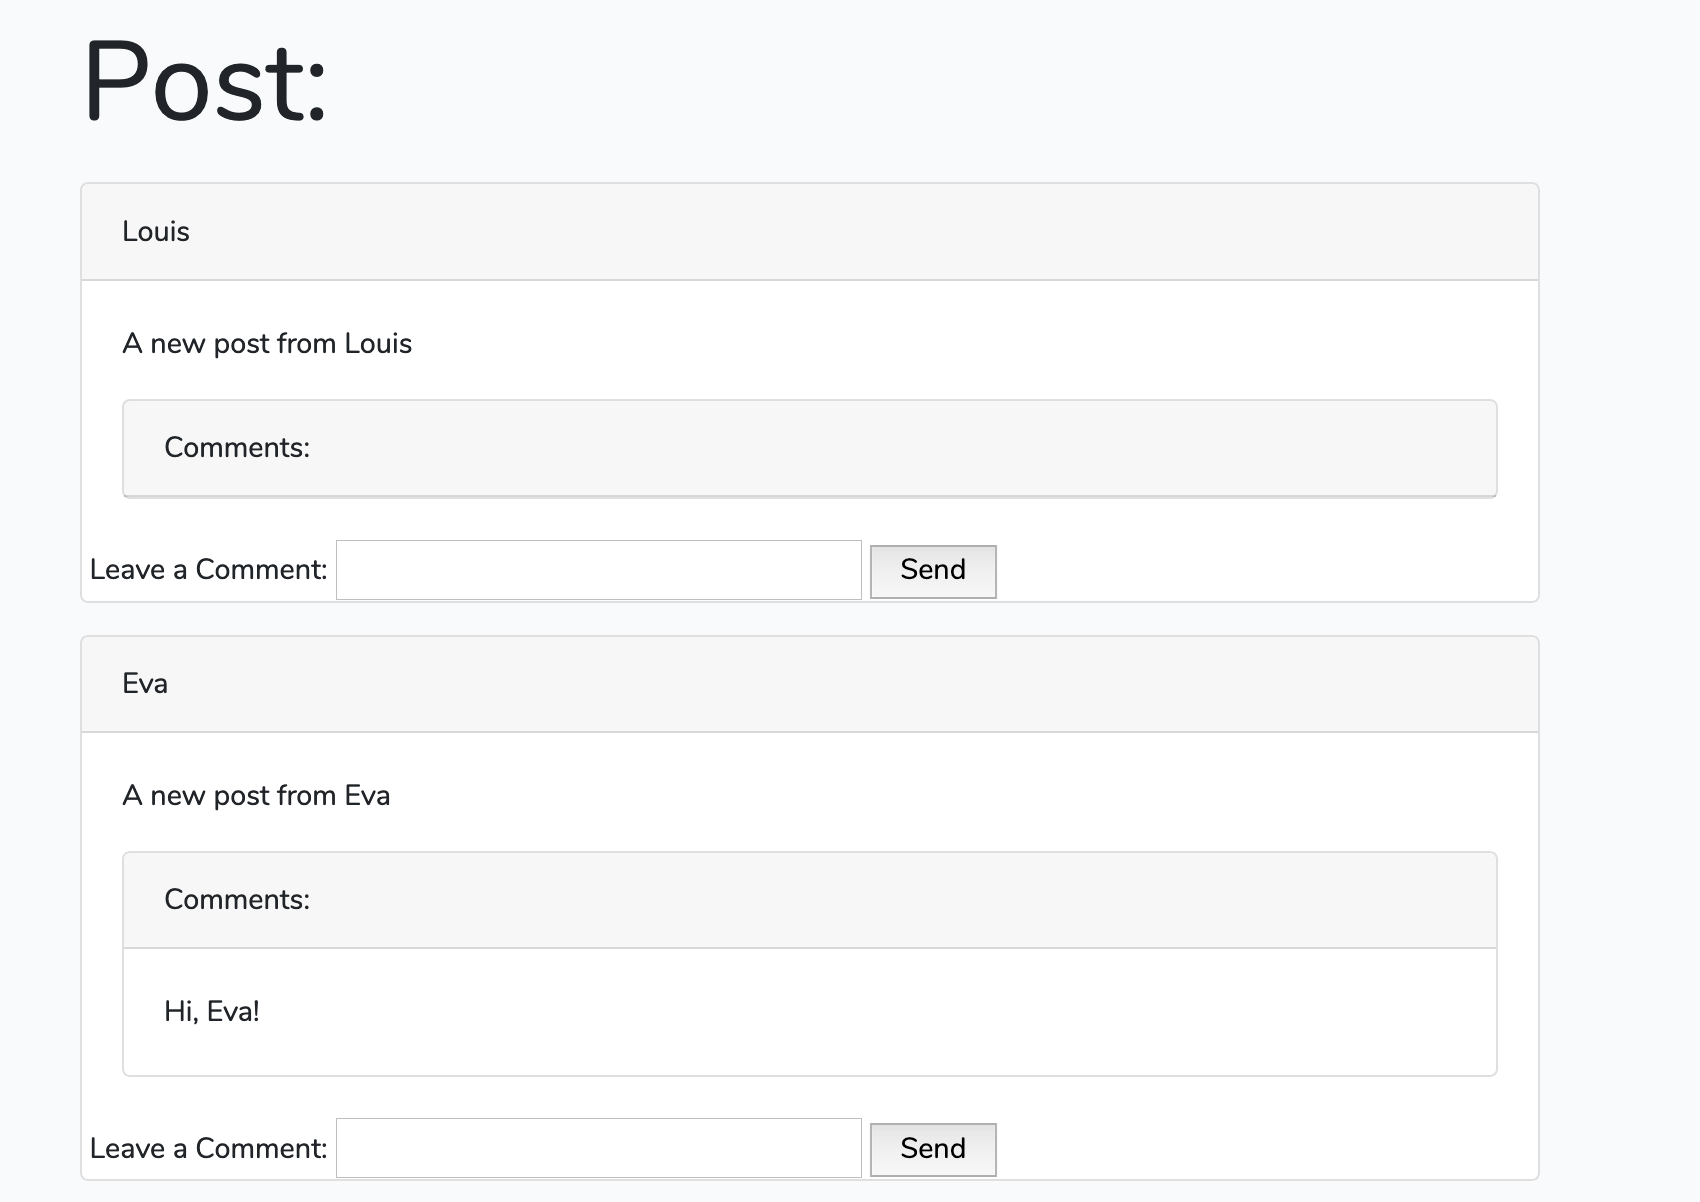
@foreach ($posts as $post)
    ...

    <div class="card">
        <div class="card-header">Comments:</div>

        @foreach($post->comments as $comment)
            <div class="card-body">
                {{ $comment->comment_text }}
            </div>
        @endforeach
    </div>

    ...
@endforeach
( $ git checkout 5g )
我們已經完成了基本的留言板,雖然還沒有很齊全,安全性也值得注意,但基本的功能確實達到了。
在這個實作的過程中,也實際體會到,要實踐 TDD 的確不容易。
尤其對於前端的測試相當不熟悉,對於 Laravel 的語法也還沒有完全了解,如果是在面對進度壓力時,使用 TDD 肯定會更加不願意或感到挫折,也難怪 TDD 並不是非常普及的開發方式。