使用過Jupyter的朋友,一定會醉心於它乾凈簡潔的設計,以及在“擺脫Python命令行運行”上提供的優質服務。某種意義上講,Jupyter的簡潔設計,非常適合於初學編程的朋友。因為從整體看,整個Jupyter所提供的界面像是學生時代老師提供的PPT演講大綱。而唯一不同的是,在Jupyter裏面,那些作為示例文檔的代碼,可以被真實運行起來。對於真正從事過教學和喜歡探索的人來講,這個優雅的小功能,有著難以言說的奇妙和舒適感。
但這遠遠不夠。對於一般的“門外漢”來講,或者對於那些僅僅想要隨手做一個輕便小實驗的研究者來講,Jupyter還是過重了。為什麽呢?因為Jupyter提供的是一套組裝工具,類似於宜家售賣的拼接家具。你可以通過Jupyter提供的這套基建設施組合出一副精致的“家具”,但必須經歷拼接的繁瑣:例如Jupyter軟件的安裝、各種Machine Learning代碼庫的“先下載後安裝”,以及最為反人性的:你必須在本地占用一個端口啟動一個server,還得保持這個server的運行。
從程序角度講,它的這套邏輯毫無問題。可從用戶角度講,這些繁瑣的基礎設施消耗,會大大磨滅探索者前進的欲望。還沒開始真正的數據分析,就已經準備放棄了。
一個相對折中的辦法,是購買一台虛擬機,在它上面開辟出一個端口來長時間運行Jupyter。但這也需要不怎麽省力的一番折騰。
那有沒有什麽更為優質的解決方案呢?!答案是,yes。
那就是Google提供的Colab( https://colab.research.google.com ),以及Kaggle社區提供的Kernel環境。
Colab還免費提供 Nvidia Tesla K80 GPU !!!
基於Google Drive的存儲
首先,Colab的notebook是存放在你自己的Google Drive裏面的。對於熟練使用Google Docs的同學來說,這是自然而然的事情。你可以自己在Google Drive裏面新建一個文件夾作為notebook的存放地,也可以直接使用默認文件夾 Colab Notebooks:
新建Colab notebook既可以在colab.research.google.com界面中,也可以直接在Google Drive裏
新建好了notebook,在Colab的展現出來便是這樣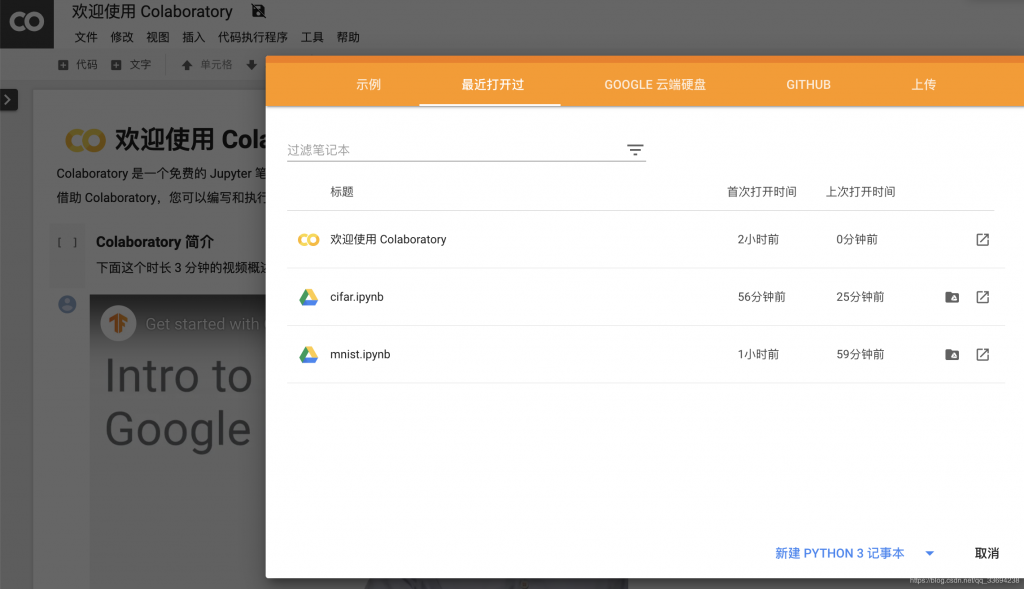
整個notebook的運行方式,和Jupyter基本一致。一些細微的文檔操作上,例如Cell上下移動,Google做了些自己的定制。
如何設置GPU的運行呢?依次點擊 Edit > Notebook settings 或者 Runtime > Change runtime type ,選擇GPU作為Hardware accelerator。
對想要探索Deep Learning的同學來說,Keras已經成了一個必備的工具框架。這就涉及到安裝Keras,只需一行命令:
!pip install -q keras
更一般地,為了import 不在Colab上的庫,可以直接使用!pip install 或者!apt-get install 來做安裝。例如,安裝matplotlib:
!pip install -q matplotlib-venn
或者調整TensorFlow的版本:
# To determine which version you're using:
!pip show tensorflow
# For the current version:
!pip install --upgrade tensorflow
# For a specific version:
!pip install tensorflow==1.2
# For the latest nightly build:
!pip install tf-nightly
又或者,查看你的當前路徑和當前路徑的內容:
# Check your current directory
!pwd
# Check contents under current directory
!ls
可以推斷:想在Colab中調用Linux命令,需要在命令最開始添加符號!。
雖然Colab的文件是存儲在你的Google Drive上,但一個讓人懊惱的問題是你在Colab的notebook中使用命令時,其發生作用的文件目錄卻不在Google Drive上,而是在Google提供的一個虛擬機(VM)中。如果你有其它數據或者文件需要在運行時使用,就沒辦法了。所以,你需要將運行的VM同你自己的Google Drive連接起來。這就涉及到Mount Google Drive。
這裏,我們通過 google-drive-ocamlfuse 去Mount自己的Google Drive。
先運行以下命令去安裝必要的庫,以及做相應的authorization:
!apt-get install -y -qq software-properties-common python-software-properties module-init-tools
!add-apt-repository -y ppa:alessandro-strada/ppa 2>&1 > /dev/null
!apt-get update -qq 2>&1 > /dev/null
!apt-get -y install -qq google-drive-ocamlfuse fuse
from google.colab import auth
auth.authenticate_user()
from oauth2client.client import GoogleCredentials
creds = GoogleCredentials.get_application_default()
import getpass
!google-drive-ocamlfuse -headless -id= -secret= < /dev/null 2>&1 | grep URL
vcode = getpass.getpass()
!echo  | google-drive-ocamlfuse -headless -id= -secret=
在運行過程中,會看到相應的認證框:=
點擊超鏈接,覆制超鏈接關聯的Google賬號的Auth密鑰,粘貼到輸入框裏面,按enter,即可通過。
下一步,Mount起自己的Google Drive:在VM中新建一個目錄,再用命令將它連接到Google Drive的根目錄。
!mkdir -p TerenceDrive
!google-drive-ocamlfuse TerenceDrive
這裏的”TerenceDrive”可修改為你想要的名稱。它意味著,這個 TerenceDrive 將直接指向你的Google Drive的根目錄。
Mount完畢自己的Google Drive後,很多事情就變得極其方便了。
先用一段Keras上的代碼示例mnist_cnn.py( http://t.cn/REe2bqF )來演示如何直接運行.py文件:
'''This is [mnist_cnn.py]'''

'''Trains a simple convnet on the MNIST dataset.
Gets to 99.25% test accuracy after 12 epochs
(there is still a lot of margin for parameter tuning).
16 seconds per epoch on a GRID K520 GPU.
'''
from __future__ import print_function
import keras
from keras.datasets import mnist
from keras.models import Sequential
from keras.layers import Dense, Dropout, Flatten
from keras.layers import Conv2D, MaxPooling2D
from keras import backend as K
batch_size = 128
num_classes = 10
epochs = 12
# input image dimensions
img_rows, img_cols = 28, 28
# the data, split between train and test sets
(x_train, y_train), (x_test, y_test) = mnist.load_data()
if K.image_data_format() == 'channels_first':
    x_train = x_train.reshape(x_train.shape[0], 1, img_rows, img_cols)
    x_test = x_test.reshape(x_test.shape[0], 1, img_rows, img_cols)
    input_shape = (1, img_rows, img_cols)
else:
    x_train = x_train.reshape(x_train.shape[0], img_rows, img_cols, 1)
    x_test = x_test.reshape(x_test.shape[0], img_rows, img_cols, 1)
    input_shape = (img_rows, img_cols, 1)
x_train = x_train.astype('float32')
x_test = x_test.astype('float32')
x_train /= 255
x_test /= 255
print('x_train shape:', x_train.shape)
print(x_train.shape[0], 'train samples')
print(x_test.shape[0], 'test samples')
# convert class vectors to binary class matrices
y_train = keras.utils.to_categorical(y_train, num_classes)
y_test = keras.utils.to_categorical(y_test, num_classes)
model = Sequential()
model.add(Conv2D(32, kernel_size=(3, 3),
                 activation='relu',
                 input_shape=input_shape))
model.add(Conv2D(64, (3, 3), activation='relu'))
model.add(MaxPooling2D(pool_size=(2, 2)))
model.add(Dropout(0.25))
model.add(Flatten())
model.add(Dense(128, activation='relu'))
model.add(Dropout(0.5))
model.add(Dense(num_classes, activation='softmax'))
model.compile(loss=keras.losses.categorical_crossentropy,
              optimizer=keras.optimizers.Adadelta(),
              metrics=['accuracy'])
model.fit(x_train, y_train,
          batch_size=batch_size,
          epochs=epochs,
          verbose=1,
          validation_data=(x_test, y_test))
score = model.evaluate(x_test, y_test, verbose=0)
print('Test loss:', score[0])
print('Test accuracy:', score[1])
假設這個文件mnist_cnn.py 存放在了我們的Google Drive的Colab Notebooks文件夾下,此時,它的路徑便是 My Drive/Colab Notebooks/mnist_cnn.py 。
知道了TerenceDrive 直接指向Google Drive的根目錄,便可以直接運行命令:
!python3 'TerenceDrive/Colab Notebooks/mnist_cnn.py'
例如,直接從URL上下載數據到自己Google Drive的Colab Notebooks文件夾:
!wget https://raw.githubusercontent.com/vincentarelbundock/Rdatasets/master/csv/datasets/Titanic.csv -P 'TerenceDrive/Colab Notebooks'
馬上用Pandas讀取一個試試:
import pandas as pd
titanic = pd.read_csv('TerenceDrive/Colab Notebooks/Titanic.csv')
titanic.head(5)
再來看看經常會用到的git版本控制,特別是如何使用在GitHub上現成的project。直接clone 一個項目到自己的Colab Notebooks文件夾:
!git clone https://github.com/wxs/keras-mnist-tutorial.git 'TerenceDrive/Colab Notebooks/keras-mnist-tutorial'
從Google Drive中打開notebook,選擇以Colaboratory的方式打開,便可以將這個notebook運行了。
最後提一句,Colab自帶的notebook Welcome to Colaboratory! 是一個很好的學習Colab的起點。
Enjoy your Colab journey.


 iThome鐵人賽